
I’ve touched on the fit already, but it really is worth reiterating just how good it is. Everything – and I mean everything – fits so well, I wondered at times if anything would need to be cleaned up.
In this day an age of ever more complex plastic model kits, it’s good to see one appear that offers something a little simpler, doesn’t tax the modeller with endless options and builds into an attractive replica after little more than a few days work. Great Wall Hobby’s T-33 is just such a kit.

1. 
2.
1. The packaging and box art are superb!
2. Painting instructions and decals. Three options are included on the sheet.
Moulded in a smart pale grey plastic, GWH’s T-33 comprises little over 100 parts, each detailed with finely rendered fixtures and fittings and panel lines and rivets that are the equal of anything seen elsewhere. Highlights include a superb one-piece undercarriage and airbrake bay that recalls memories of Monogram’s classic 1/48 F-106 Delta Dart, this section being a wonderful example of the toolmaker’s art, almost everything that you could rightfully expect in a 1:48 kit being present and correct.

1 
2 
3
1. Construction began with the main wheel bay and undercarriage units. Detail is superb and fit almost perfect.
2 & 3. The interior of the main wheel bays have been painted with Tamiya Yellow Green and then weathered with thin washes of Raw Umber oil paint thinned with white spirit. Enamels were used to pick to the details and finer features.
The cockpit is similarly impressive. Instrument panels and side consoles partner multipart ejection seats to great effect. The instrument panels are moulded in two parts, front and rear, these two plastic pieces trapping a decal that replicates the instrument faces. Good idea, failure in practice. When this was done for the review build, the depth of the instrument bezels on each panel was such that nothing could be seen through each one. Reducing the depth of the bezels may help, but I did nothing to mine, painted the whole lot black, dropped some Kristal Klear into each one and moved on…
1 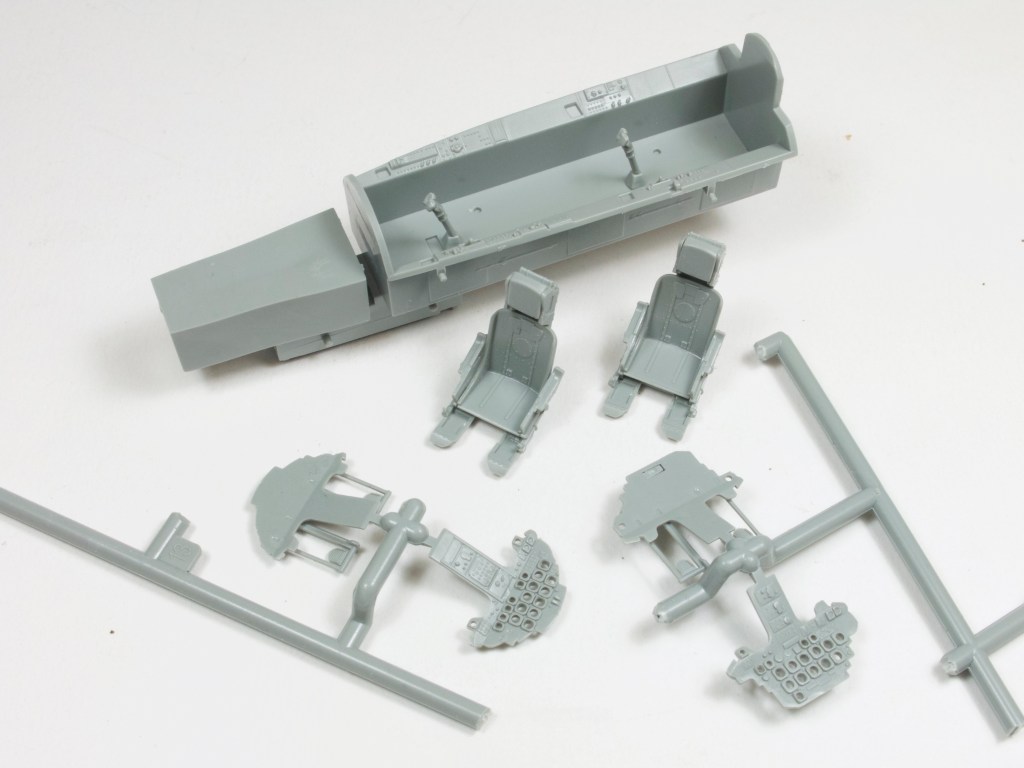
2 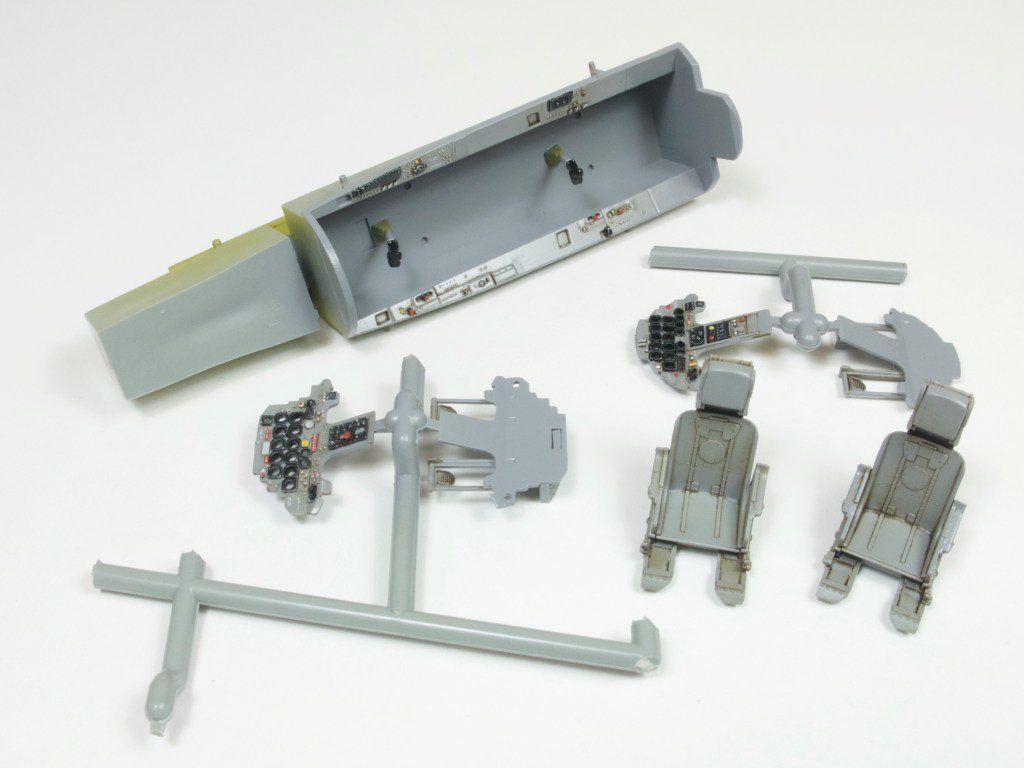
3 
4
1. The cockpit is simply designed, easy to build and fits without the need for glue.
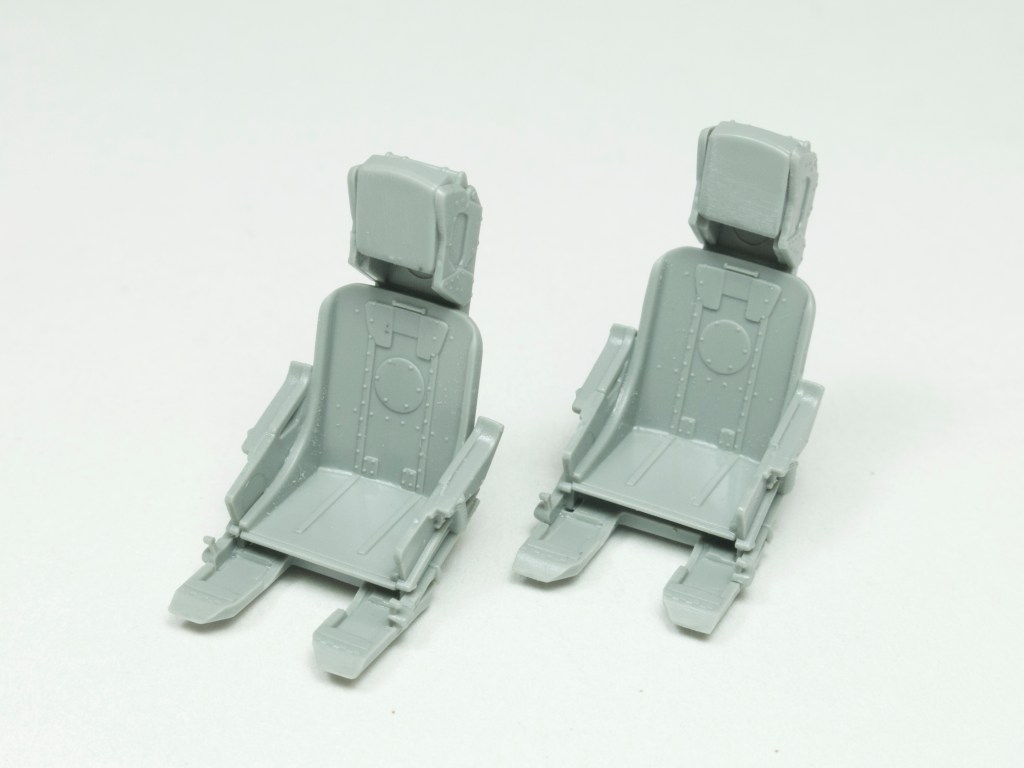
2. The seats are nicely detailed. Some spares’ box seat straps will add the finishing touch once painting is complete.
3. The cockpit and seats have been assembled, ready for painting and weathering.
4. The cockpit is well-detailed and fun to paint. Tamiya Neutral Grey was the colour of choice here, various Vallejo acrylics and Humbrol enamels being used to bring out the finer details. A thin wash of Raw Umber added the final touch.
The surface detail is really very pleasing, the panel lines, rivets and fastners all being recreated with a deft touch. Add to this the clever way that the model has been broken down, major sections falling onto natural panel lines and you know that construction will be quick and easy, as indeed it proved to be. Add fit that’s almost perfect and the road to completion, is smooth and hassle free. Indeed, I had everything ready for painting and weathering within a morning of construction and that included the smaller items such as seats, undercarriage and other fine details. Longwinded and difficult, this kit is not.
In terms of set-up options, GWH has taken the sensible step of limiting what it has included, to an absolute minimum, with only the most obvious items being incorporated into their design. For instance, only the elevators and rudder are separate parts, flaps are there to enjoy, as are dropped airbrakes – all parts that would be seen thus on an aircraft sat on the ground. Should you wish to show the model in flight, the kit includes all of the main undercarriage doors and airbrakes in one piece; it is then up to you you cut this item into individual parts, ready for use. Though initially raising an eyebrow or two, I rather liked this idea and found that it worked well in practice. Should I have wanted a model in flight, the retracted doors would have looked neat and tidy; choosing lowered undercarriage legs, the parts were easy to separate. Neat, tidy and easy – what more could a modeller want, except perhaps a pilot or two, but perhaps that’s being overly churlish.
1 
2 
3 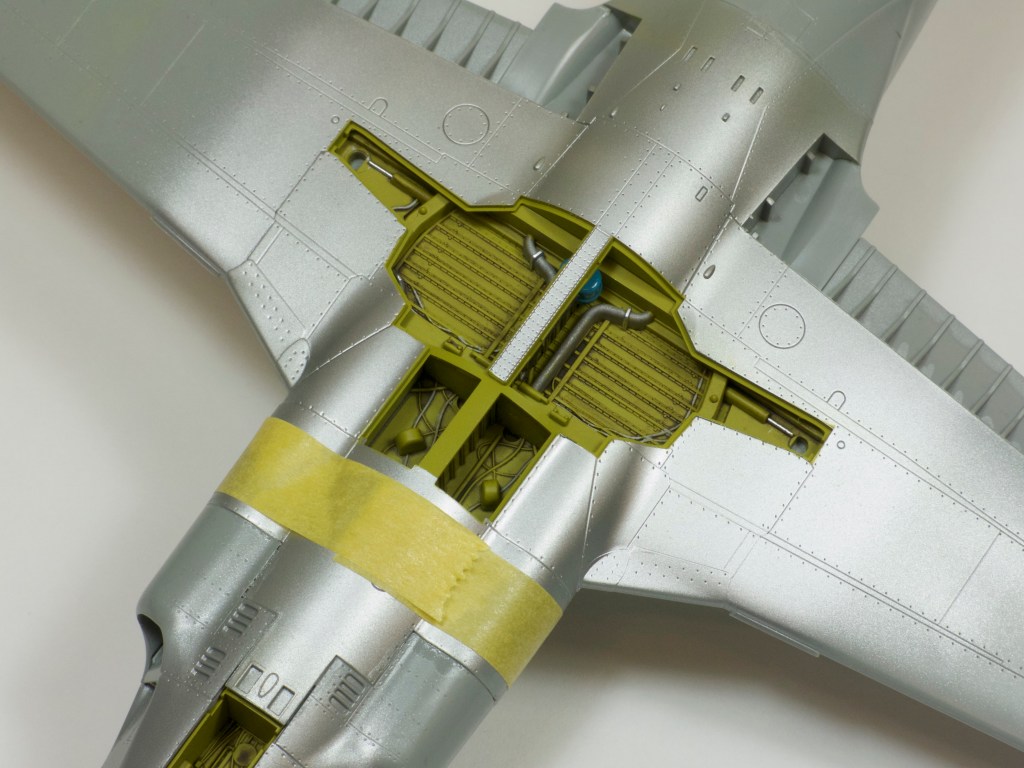
4 
5
1. As with the wheel bays, the cockpit surrounds were sprayed with AS-12 before joining the fuselage halves. The remaining airframe could now be brought together.
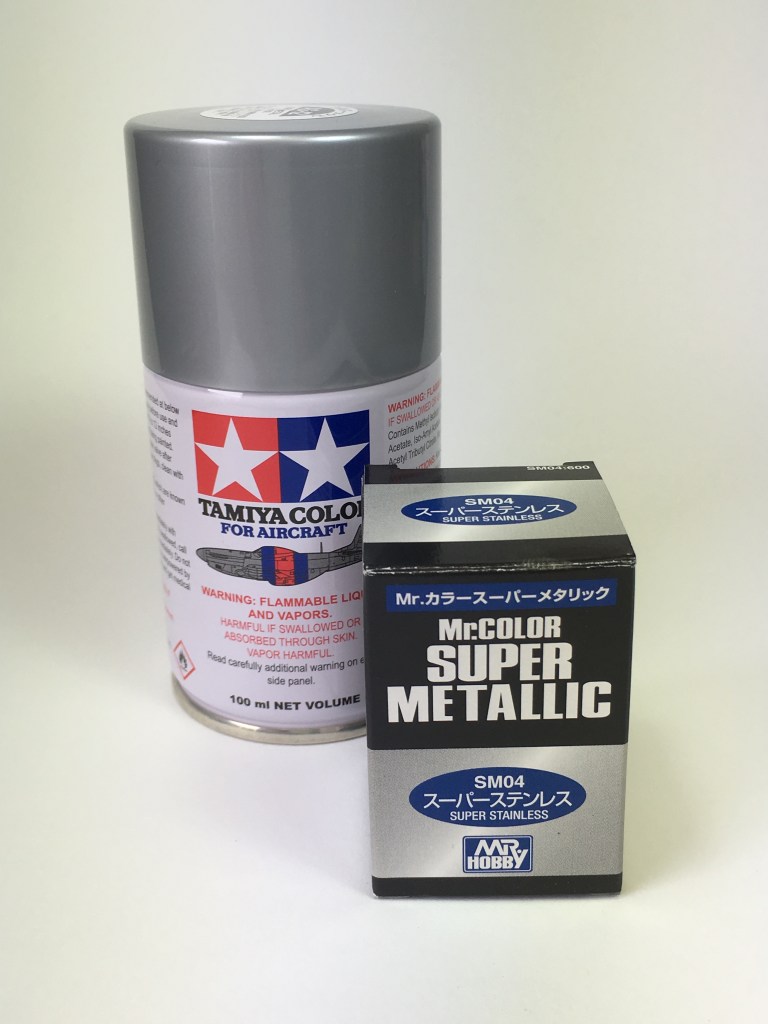
2. The basics needed to paint the natural metal finish on this model: Tamiya AS-12 Bare Metal Silver and Gunze Super Metallic Super Stainless.
3. The AS-12 was decanted into glass jar and then thinned with Mr Color Leveling Thinner. Here’s how…
4. The fit of this model was superb, only some tape being needed to hold it together whilst the glue set. The only joints that needed to be dealt with were along the wing leading edges and the upper and lower fuselage seams, all other joins falling along natural panel lines.
5. Here’s the bay in place showing the already painted surrounding panels. The lower surfaces can now be airbrushed without masking the interior sections.
I’ve touched on the fit already, but it really is worth reiterating just how good it is. Everything – and I mean everything – fits so well, I wondered at times if anything would need to be cleaned up. The large wing to fuselage joint was so good that it could easily have been painted separately and then glued in place. Same with the tip tanks. The only slightly trying areas were the airbrakes and their actuators. Delicate parts these, their slightly indistinct location points and a lack of patience conspired to make this step in construction somewhat more trying than it needed to be…
Final features include the canopy and the inclusion of a set of crew steps. The canopy is wonderfully clear and perfectly formed. Though somewhat thick in cross-section, it looks good in its open position, the separate internal frame helping to add a neat level of detail. The crew steps are less of a success, the designer getting confused with the location of the upper rungs, each being attached to the rear frame rather than that forming the front of the structure. Suffice to say that it doesn’t fit this way and so those rungs needs to be removed and repositioned – a simple, if rather needless task!
1 
2 
3 
4 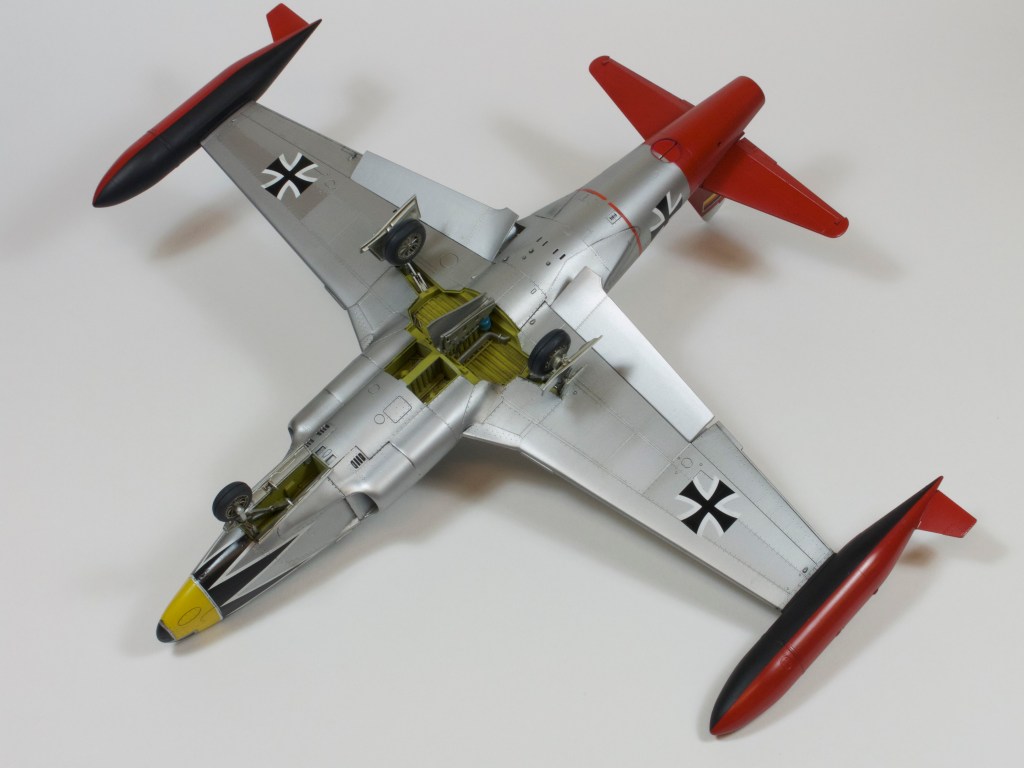
5
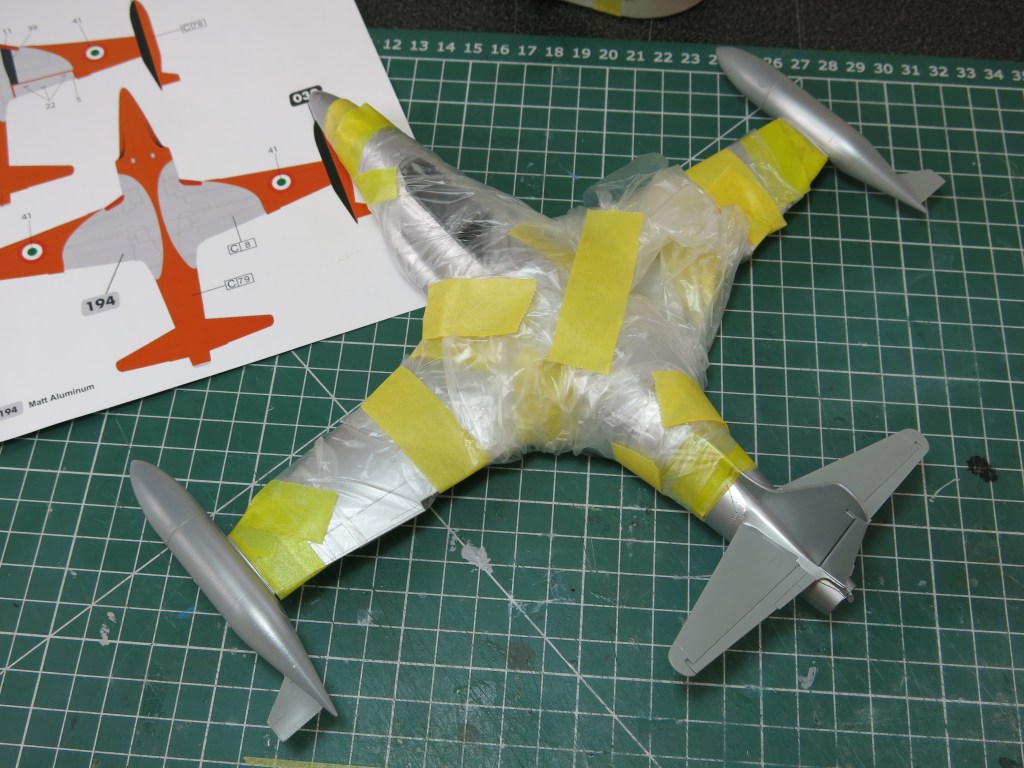
1. Happy with the natural metal finish, the nose, tail and tip tanks were masked off with Tamiya masking tape and cellophane. The noses then sprayed with Tamiya Gloss yellow and the tail and tanks with a 50/50 mix of Tamiya Flat and Gloss Red, all colours being thinned with Mr Color Leveling Thinner.
2. The masking has been removed to reveal an almost completely painted model. Neat scheme, eh?
3. The decals went on well, only the black and white nose marking being tricky to apply. Careful scalpel cuts and some judicious use of setting solution eventually settled everything down.
4. This is always a great part of a build, when the model sits on its undercarriage for the first time! All weathering on this model was created with oil paint washes and also oversprays of Tamiya Smoke heavily thinned with Mr Color Thinner.
5. The undercarriage is in place, along with airbrakes and flaps. Note the demarcation for the black panels on the tip-tanks.
The kit is completed with the inclusion of a superb set of painting and decaling instructions and a fine set of decals covering three different aircraft. The choices are as follows:
- T-33A 53-4892: 78th Fighter Interceptor Wing, Hamilton Air Force Base, California, 1957.
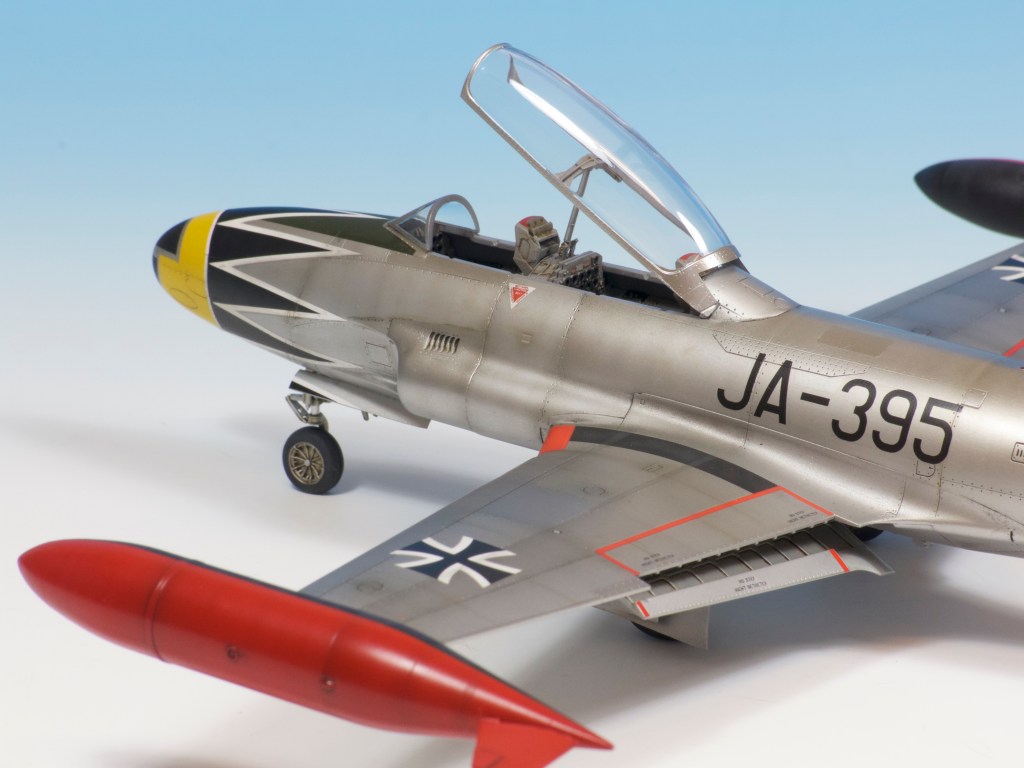
- T-33A 51-17481: 2 Staffel, JG 71 ‘Richthofen’, Ahorn, West Germany, 1961.
- T-33A MM55-3076, CR-20: Reparto Radiomisure Aeronautica Militare Italiano Pasticca di Mari, Rome 1964.
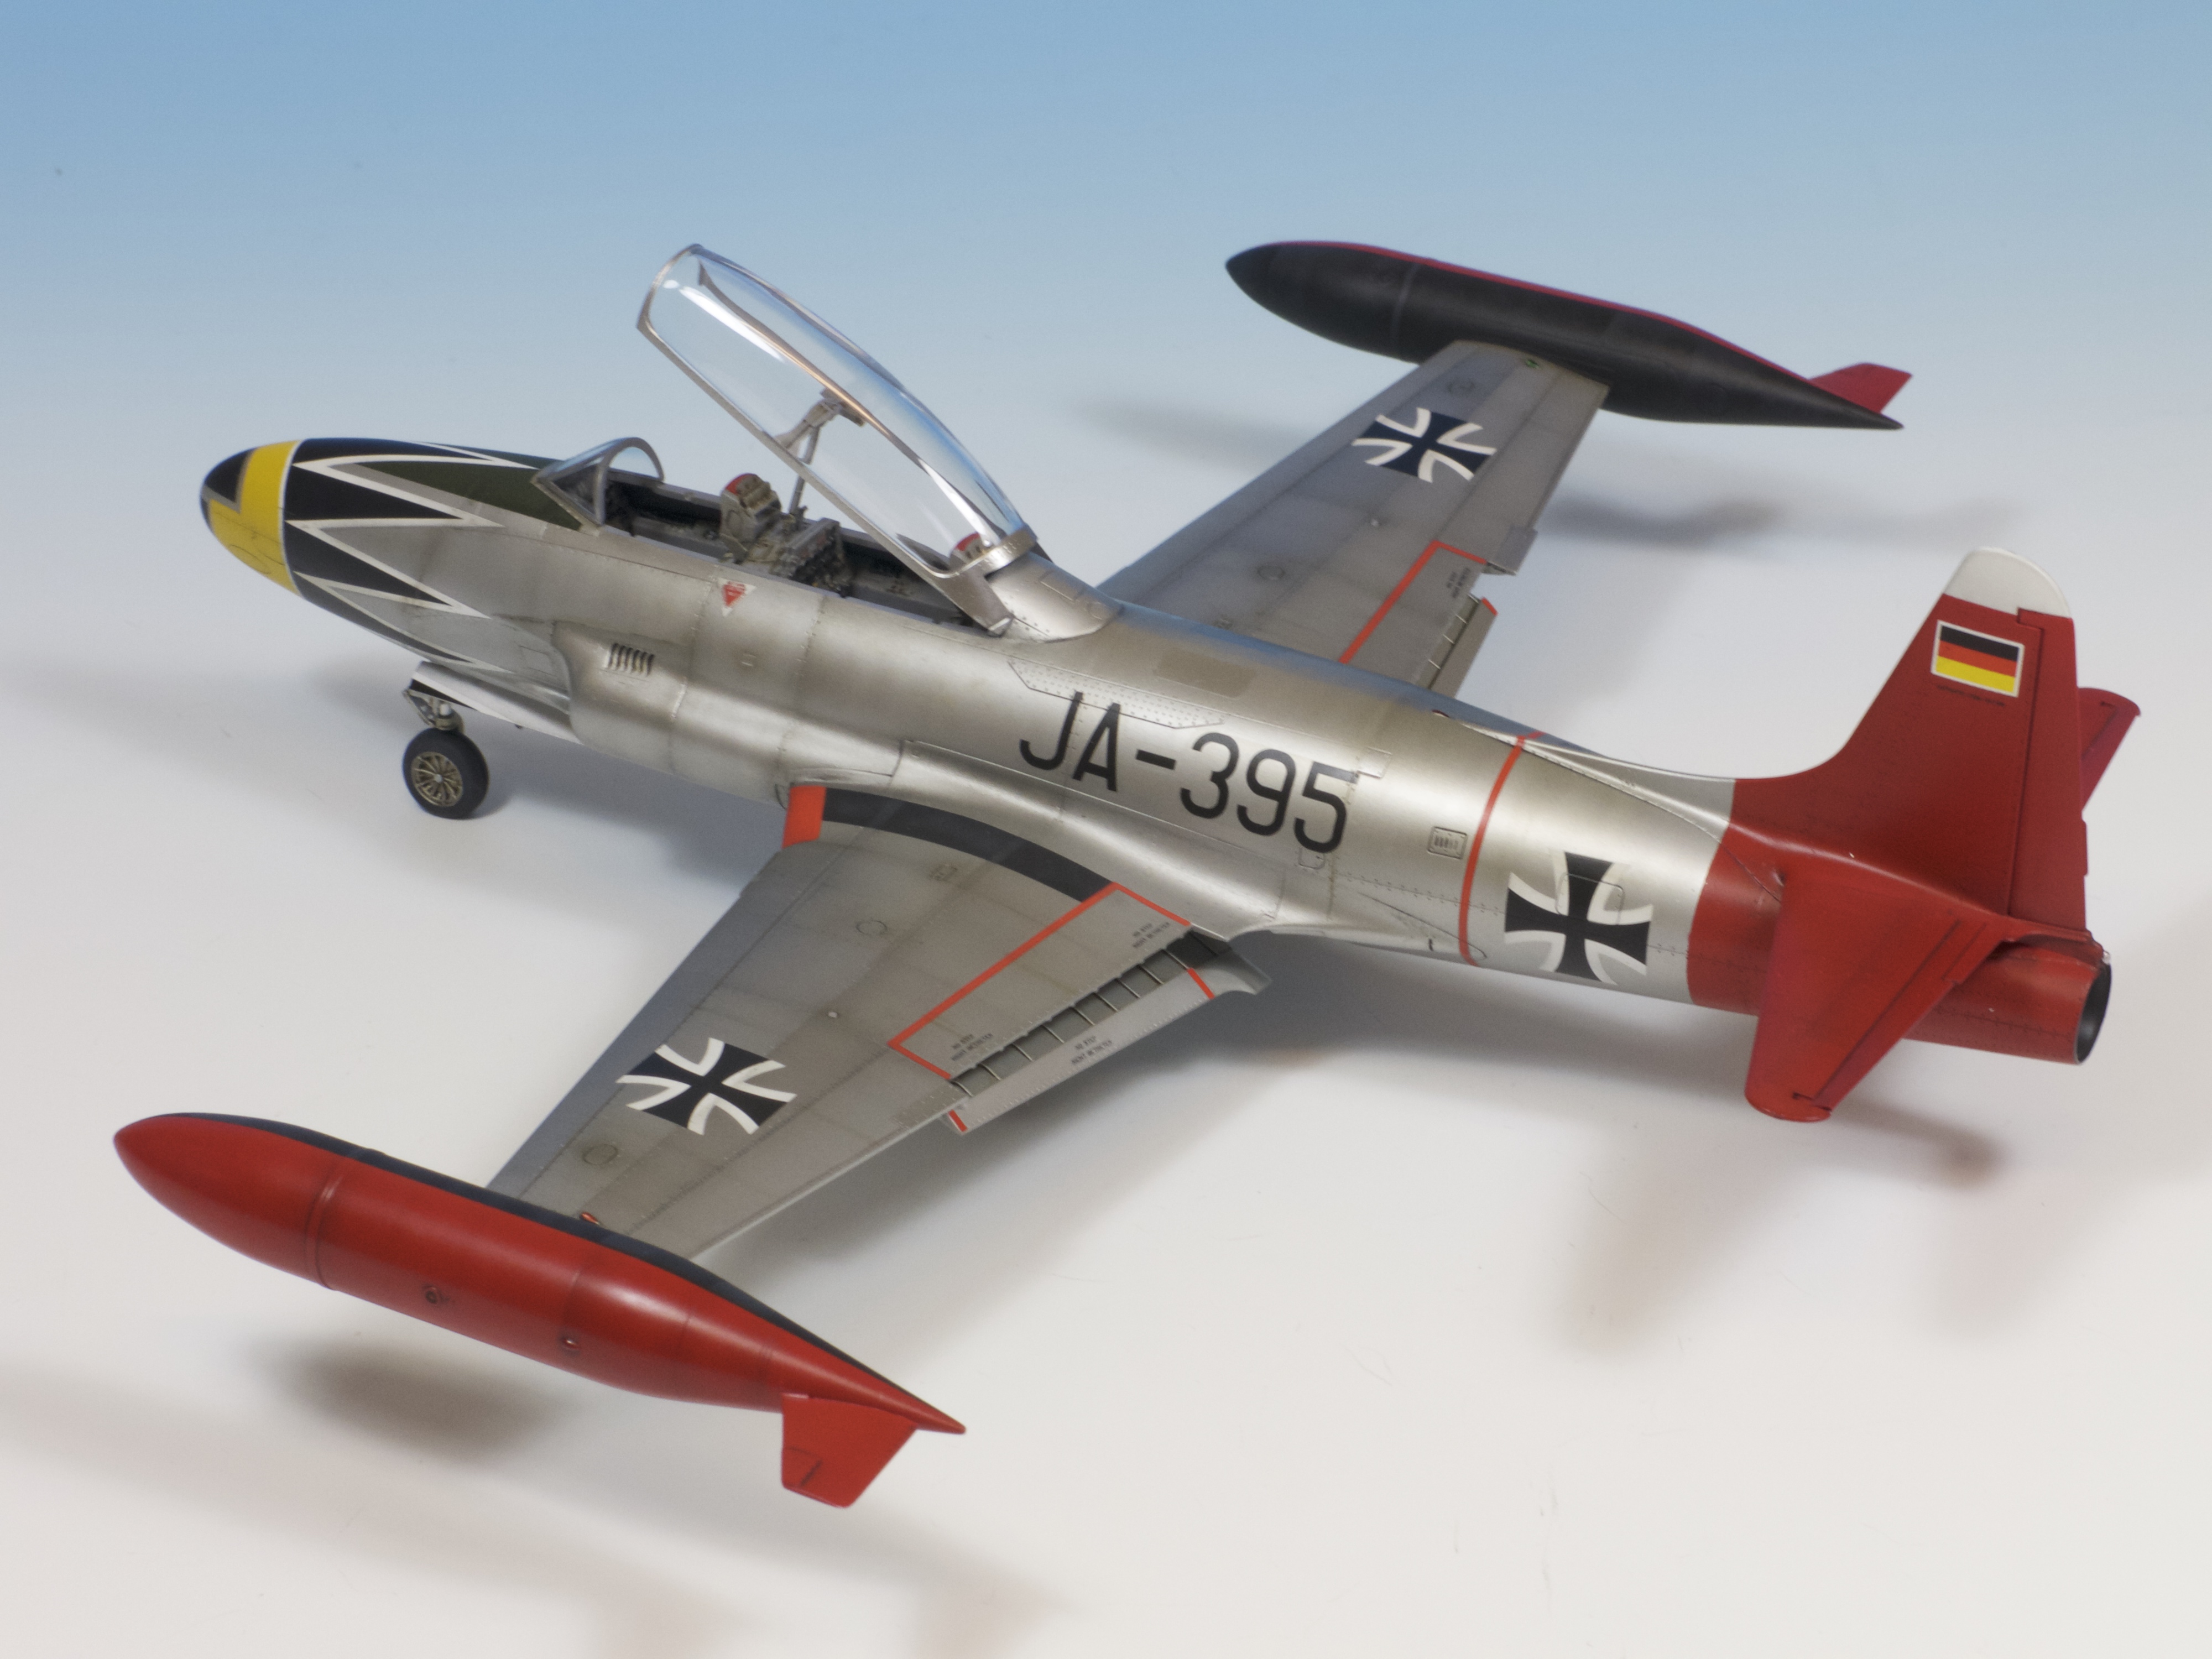
The decals are well-printed and in this kit at least, perfectly in register. The choices are interesting and colourful, the Italian build in its orange and silver plumage being particularly gaudy! Having never built a post war Luftwaffe aircraft, this was the one chosen for this feature, the silver and red colours suiting the shape of this aircraft perfectly.
Showcase: The Completed Model


FINAL VERDICT
This is a really fun kit that builds easily and looks great once complete. I didn’t take a ruler to the model and though aware that the intakes seemed to have caused some consternation, I was happy with the way it looked and would be more than keen to build another. The detail is really nice, fit sublime and thanks to those bright schemes, attractive on the display case shelves. I really liked this kit and so I think, will you.
Thanks to Great Wall Hobby for the review sample.
FURTHER INFORMATION…
If you would like to see more on the painting of this model, you can check out my YouTube channel where you will find three videos showing how I created the metal finish and painted and weathered this model. Here are the links for those that would like to take a look:
https://www.youtube.com/channel/UCy2zx9zdns3FWzQAWs8s-XQ

Your new website is fantastic!
LikeLike
I am glad to see you have a Youtube channel as well….. I have long been of the opinion that perhaps the best way to learn a new skill is to watch and experienced person perform the desired skill set and then copy that process. This tends to produce early successes and eventually you will alter the process to fit your needs and personality, but seeing the magic done the first time is a huge boost for morale….. I was quite taken with the weathered gray finish on your F-4B, and would love to see how that was done –
LikeLike