“I’m not suggesting that a beginner is going to be able to build a 1:24 Hurricane cockpit from scratch as their first attempt, but they just might be able to detailed a cockpit coaming and canopy rail of a model jet, before moving on to something more challenging”
If the theme of this week’s Blog has been about anything, it’s been about older kits and those models that many forget, in the face of newer more detailed offerings. Yesterday I discussed in some detail the weakness that forced me to buy a 40-year-old Harrier that I know will be less than stellar, the idea behind purchasing it — apart from outright nostalgia — being to build the parts from the box and then add some gloss in the form of a neat paint finish and some new decals. Call it a legacy build if you like, but the plan is simply to show what is possible from what’s supplied, using what’s available today, rather than what was on offer forty years ago.
But what if you want to have a crack at a kit like this and you don’t want to simply build it from the box?
A cursory glance at the lists of aftermarket products often reveals that manufacturers — rightly — tend to concentrate on newer kits with which they can weave their resin and etched magic to heighten the illusion of reality. Kits from a bygone eras tend to be ignored, their sporadic release and unsurprisingly inconsistent levels of accuracy and finesse, being less of a home banker than kits that feature much higher levels of the latter two expectations. So if you are looking to build a Revell 1:32 Beaufighter and are in the market for a brand spanking new resin cockpit, you just might be out of luck…
But all is not lost.
If like me you are a sucker for these older kits, you may well be the sort of person that is prepared to create your own detail and sees nothing wrong in using some plasticard, rod and strip to produce something that’s a little more detailed. You may on the other hand be rather less willing and be unsure that it is within your skill set to tackle something that on the face of it, is as challenging as the detailing — or even scratch building — of an area as intricate as a cockpit. Fear not, with a little forethought and some basic materials, nothing is beyond you!
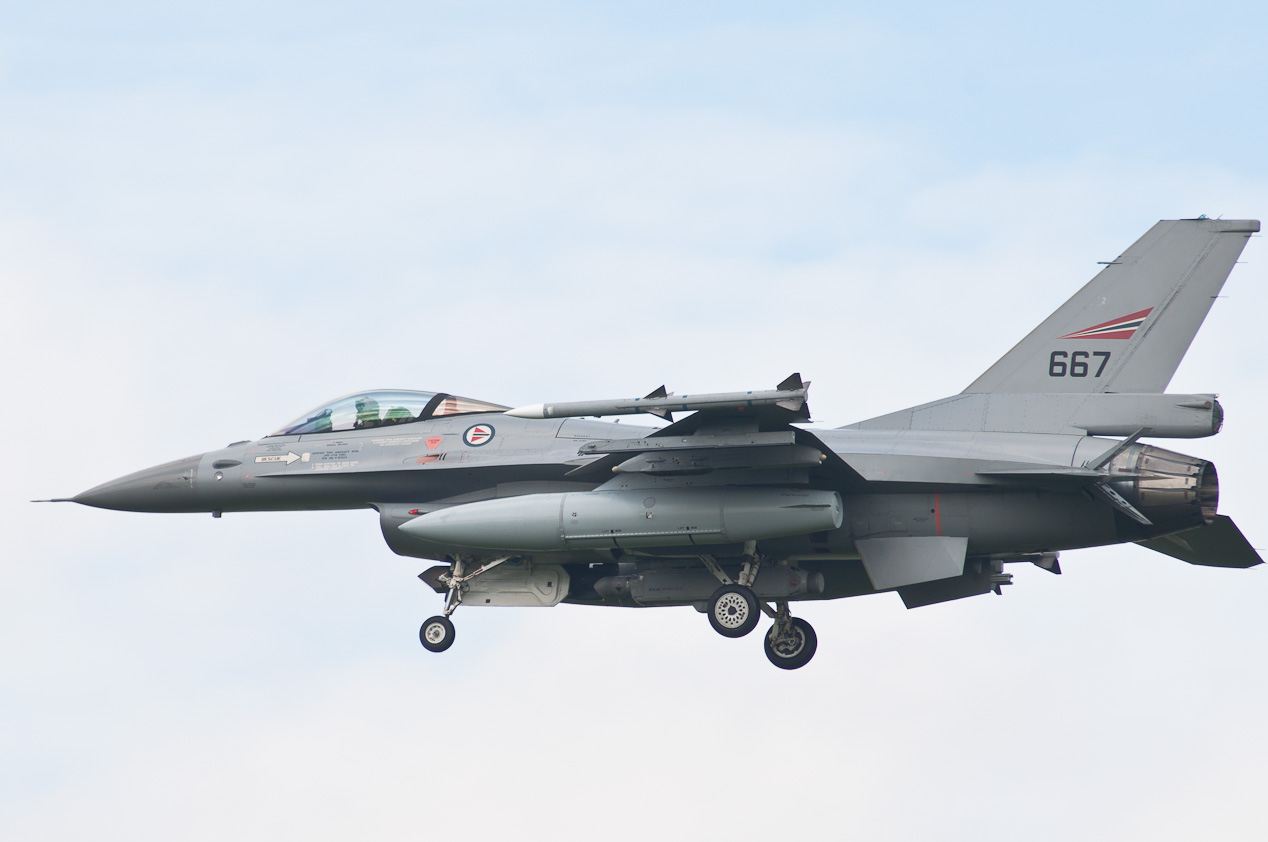
Over the last few weeks I’ve been tinkering with a 1:48 Hasegawa F-16A. This model is over 35 years old and though nicely moulded and reasonably well detailed, it’s nowhere near as complex as the newer Tamiya offering, so I decided early on that I would combine the two kits to create a Norwegian Air Force F-16A MLU, using the basic Hasegawa kit to replicate the airframe and cockpit and then add Tamiya parts such as pylons, tanks and superficial details to improve the remaining features. Now, before anyone says that that is rather an expensive way to build a model of this aircraft in 1:48, let me reassure you by saying that the Hasegawa kit was bought for the princely sum of £5, so the cost of this build is no more than a basic Tamiya kit with a few aftermarket additions!

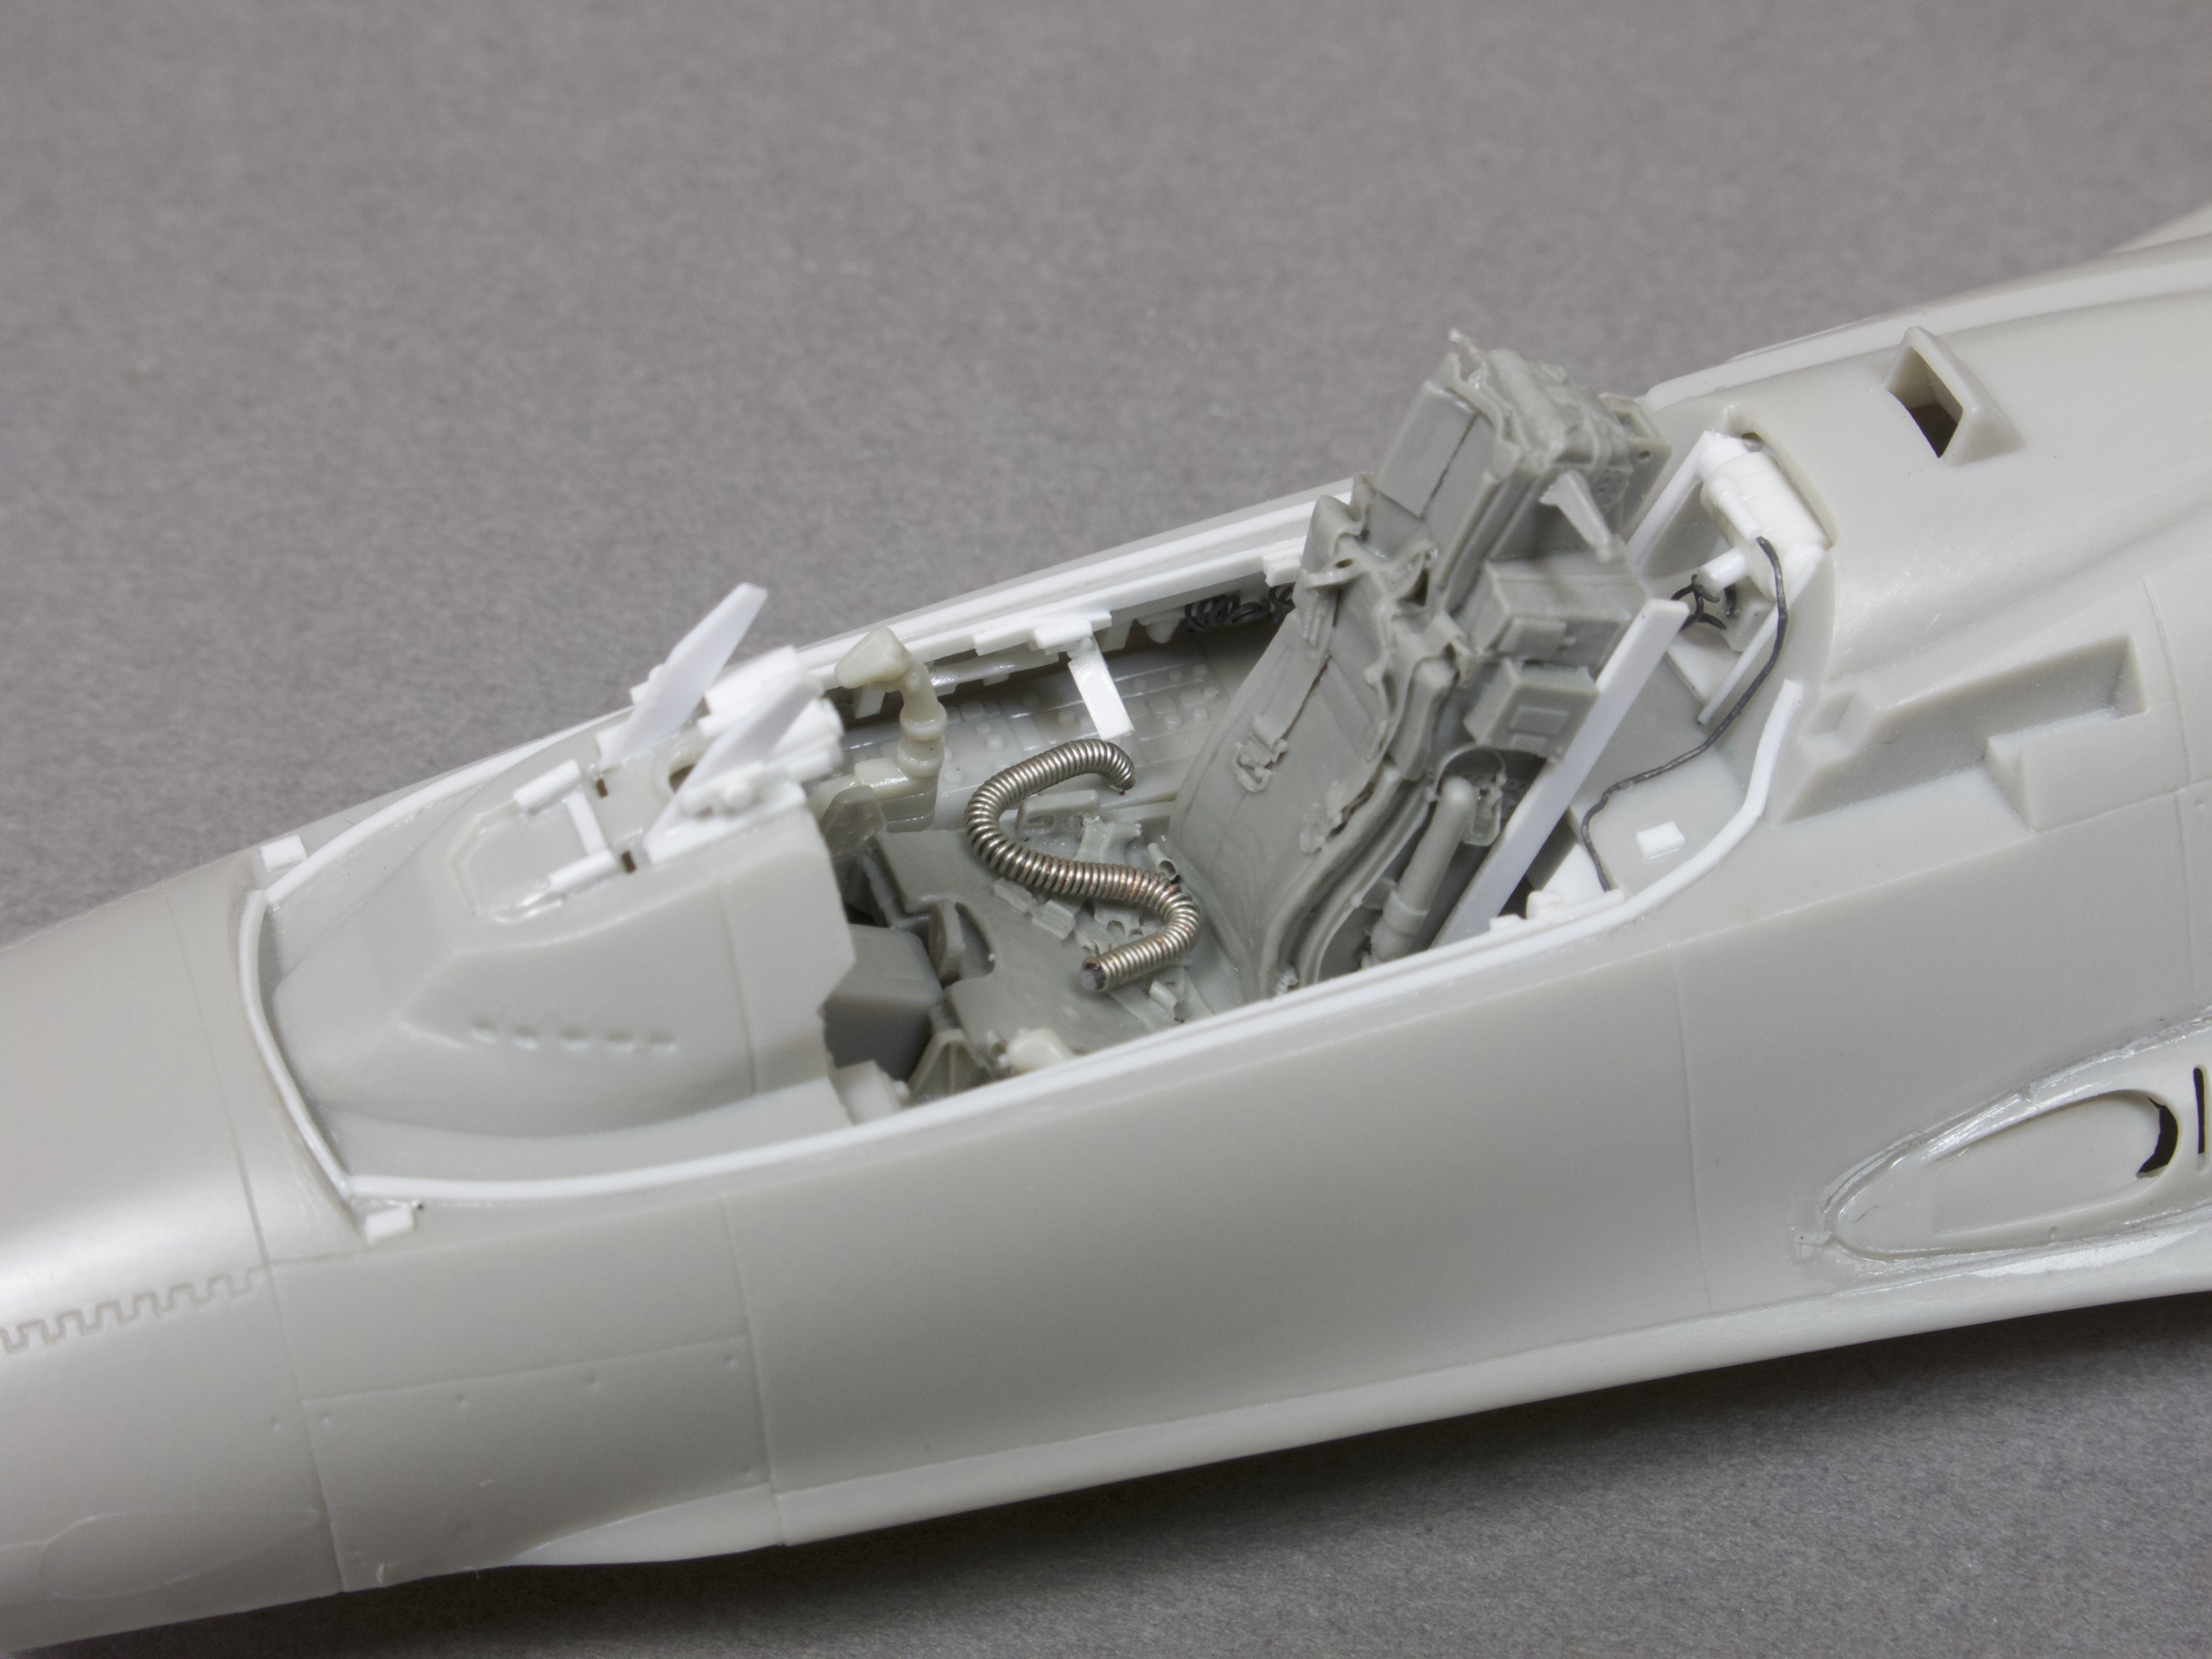
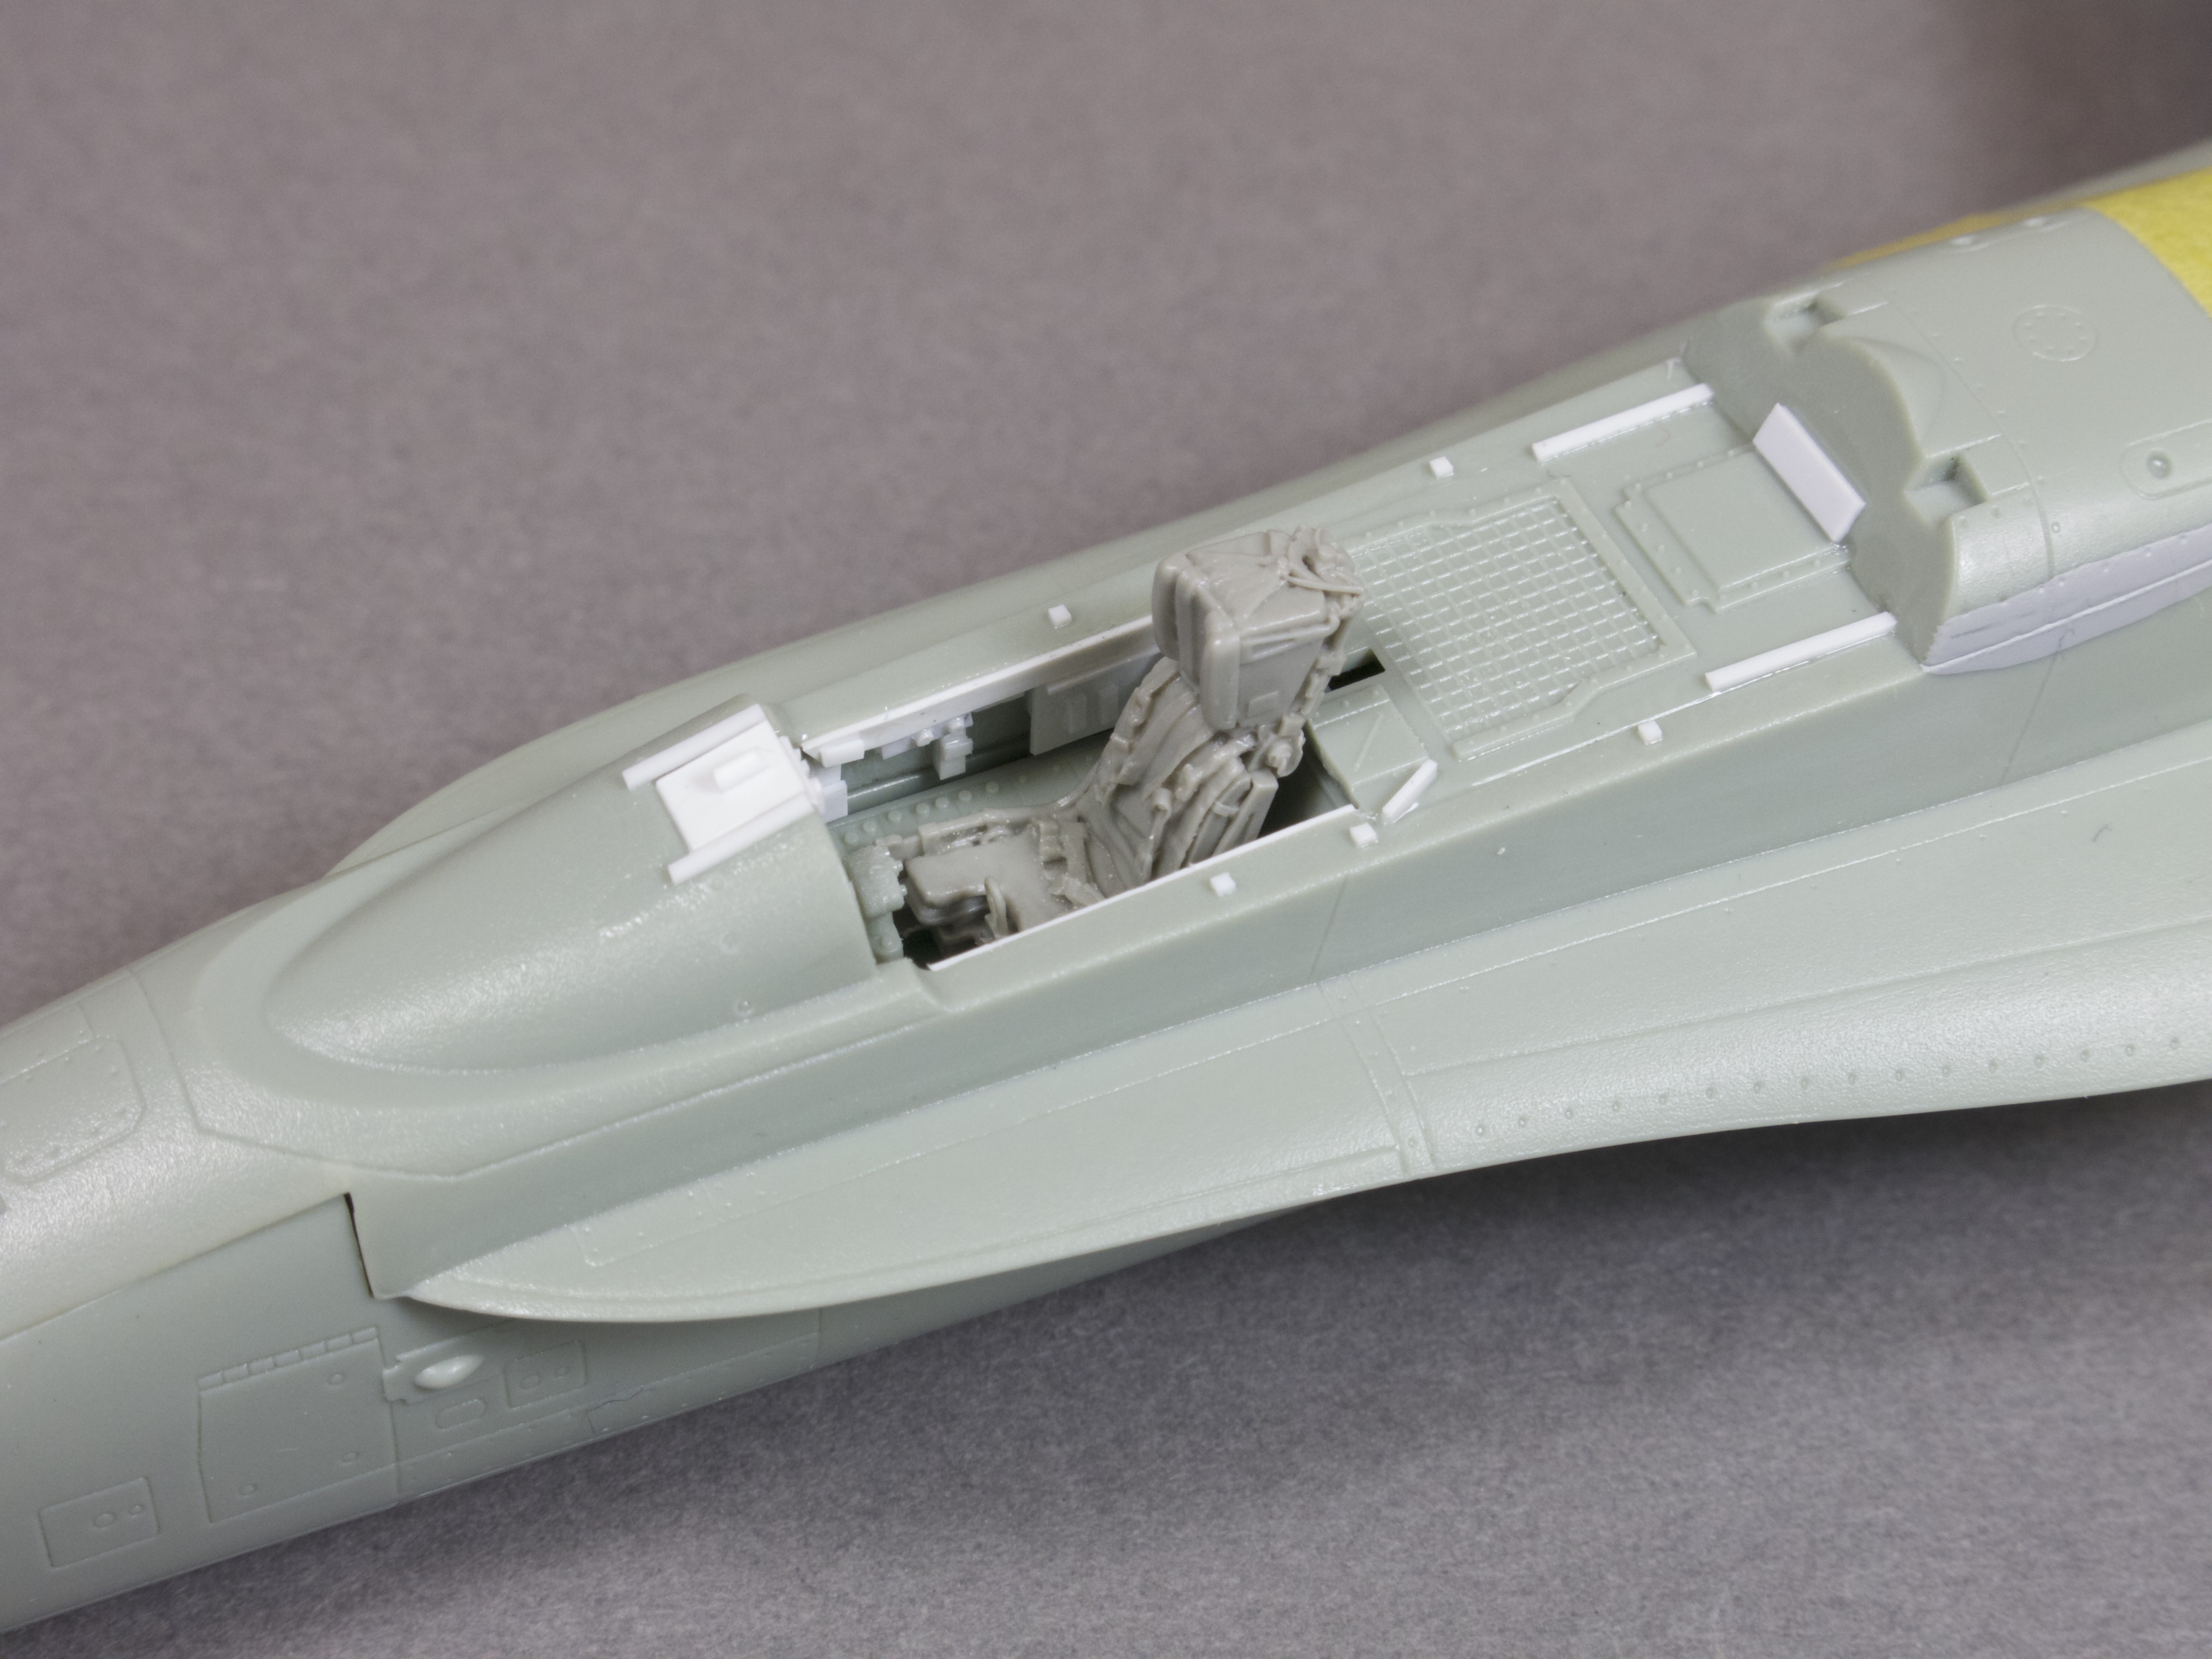
With kits to hand, I decided to up the levels of detail within the cockpit of the F-16 and then whilst I was at it, bulk-out the cockpit of an Academy F-18 that I’ve been also been building this week. Rather than raid the aftermarket for the bulk of this work, I elected to only buy two seats from the Quickboost range (which are both cheap and superbly intricate) and then add all remaining detail using Evergreen strip and rod, as well as plasticard and some lengths of lead wire.
The first step in doing this is to grab some detailed reference books. I cannot tell you how important this is; without pictures of the real thing you will struggle from the off to add the kind of detail that you desire, even if that is to begin with, simple. So with books to hand, I set about deciding on what to add and what not to feature. The first thing to do was add any obvious framework. This was achieved with lengths of plastic strip that were glued in place and then trimmed in-situ, moving from one side to the other. Happy that the vertical members were in place, the horizontal pieces could be added, all the time using nothing more than oversized lengths of strip. Happy with that, I could then move on to other details.
Now, let me say at this point that in a small scale model such as this, you are not aiming for absolute fidelity unless you are a) a genius, b) have endless amounts of time or c) far more skilled than I! Instead, you are trying to create impressions that captures the shape, size and feel of the real details, remembering that the seat (which you have already bought, remember…) will be the real eye-catcher and that everything else is supplementary to it.

So you can start to add other features, brackets, clips, structural members, hoses and the like, all of which can be made with simple shapes, squares, rectangles, tubes and disks. You will be astonished how much you can add using those for simple shapes, or combinations thereof. In the pictures that accompany this update, you will see what appears to be complex detail, but they are not: they are easily broken down shapes, worked one on top of another, to create the illusion of complexity.
Adding details to a model is a fun diversion that helps to create something that is unique to you, after all no one else will have approached their build in the same way. Though I’m as happy to use aftermarket update sets as much as anyone else, my often masochistic desire to build ancient kits forces me in other directions and the need to build my own features. But it’s not difficult and that’s what I hope I’ve shown here, just so long as you approach it in a methodical way and try not to bite off more than you can chew. I’m not suggesting that a beginner is going to be able to build a 1:24 Hurricane cockpit from scratch as their first attempt, but they just might be able to detailed a cockpit coaming and canopy rail of a model jet, before moving on to something more challenging.
So this week I’ve managed to improve the look of two jets that I’m building and hopefully point you in a similar direction should you choose to have a go. I may not be willing to detail that 40-year-old Tamiya Harrier, but at least I know that if I do chose that path, with a few basic tools and materials, I just might be able to.
Have a great weekend and see you next week.

Sadly, it relies on being able to cut small pieces of plastic card into the shapes you want – something i lack!
LikeLike
Inspiring. I have that F-16 somewhere in my stash. These tips are very helpful for a modeller like me that is also a hopeless nostalgic with old classics. May I suggest a more detail video regarding this techniques? When we see a 1/48 Monogram? Now, Where are my Verlinden books?
LikeLike
The phrase that has always stuck in my head when it comes to small scale scratch-building is “representation, not replication”, and I think it it’s an approach that works well.
LikeLike
Really very good!…fantastic details!
LikeLike
Those little details really bring out the model from the OOB standard and it is really easy to make whith some good references which, I am quite sure, everyone can find in no time.
In the end, it all ends to how much time you want to spend with your kit.
LikeLike
Man after my own heart! Spent yesterday building an oil pressure system and pulsometers for a 1/48 DH 2 from plastic card, rod and brass wire – so much fun!
LikeLike
Couldn’t agree more – making your own stuff is more fun. I have an old 1/48 Tamiya Mk. I Spitfire on the bench that I am converting into a Mk. II with some Airfix parts and some scratch upgrades, and it has been a lot of fun. Applying Tony Bell’s shape corrections (an some of my own ideas as well) to improve the outline and fit has turned it into a very nice looking representation. If I can scrounge some nice wheels from a Eduard I will finish with zero aftermarket (ok, cheated and used a couple Mike Grant instrument decals). What has really been an eye opener is how nice the home made stuff came out. Now, if I can wrestle those Airfix decals on 🙂
Konrad
LikeLike
My brother uses scraps of bass guitar strings as oxygen hose and/or heavy power feeder cable. Drill out a piece of styrene rod to fit the ends and it looks great.
LikeLike