
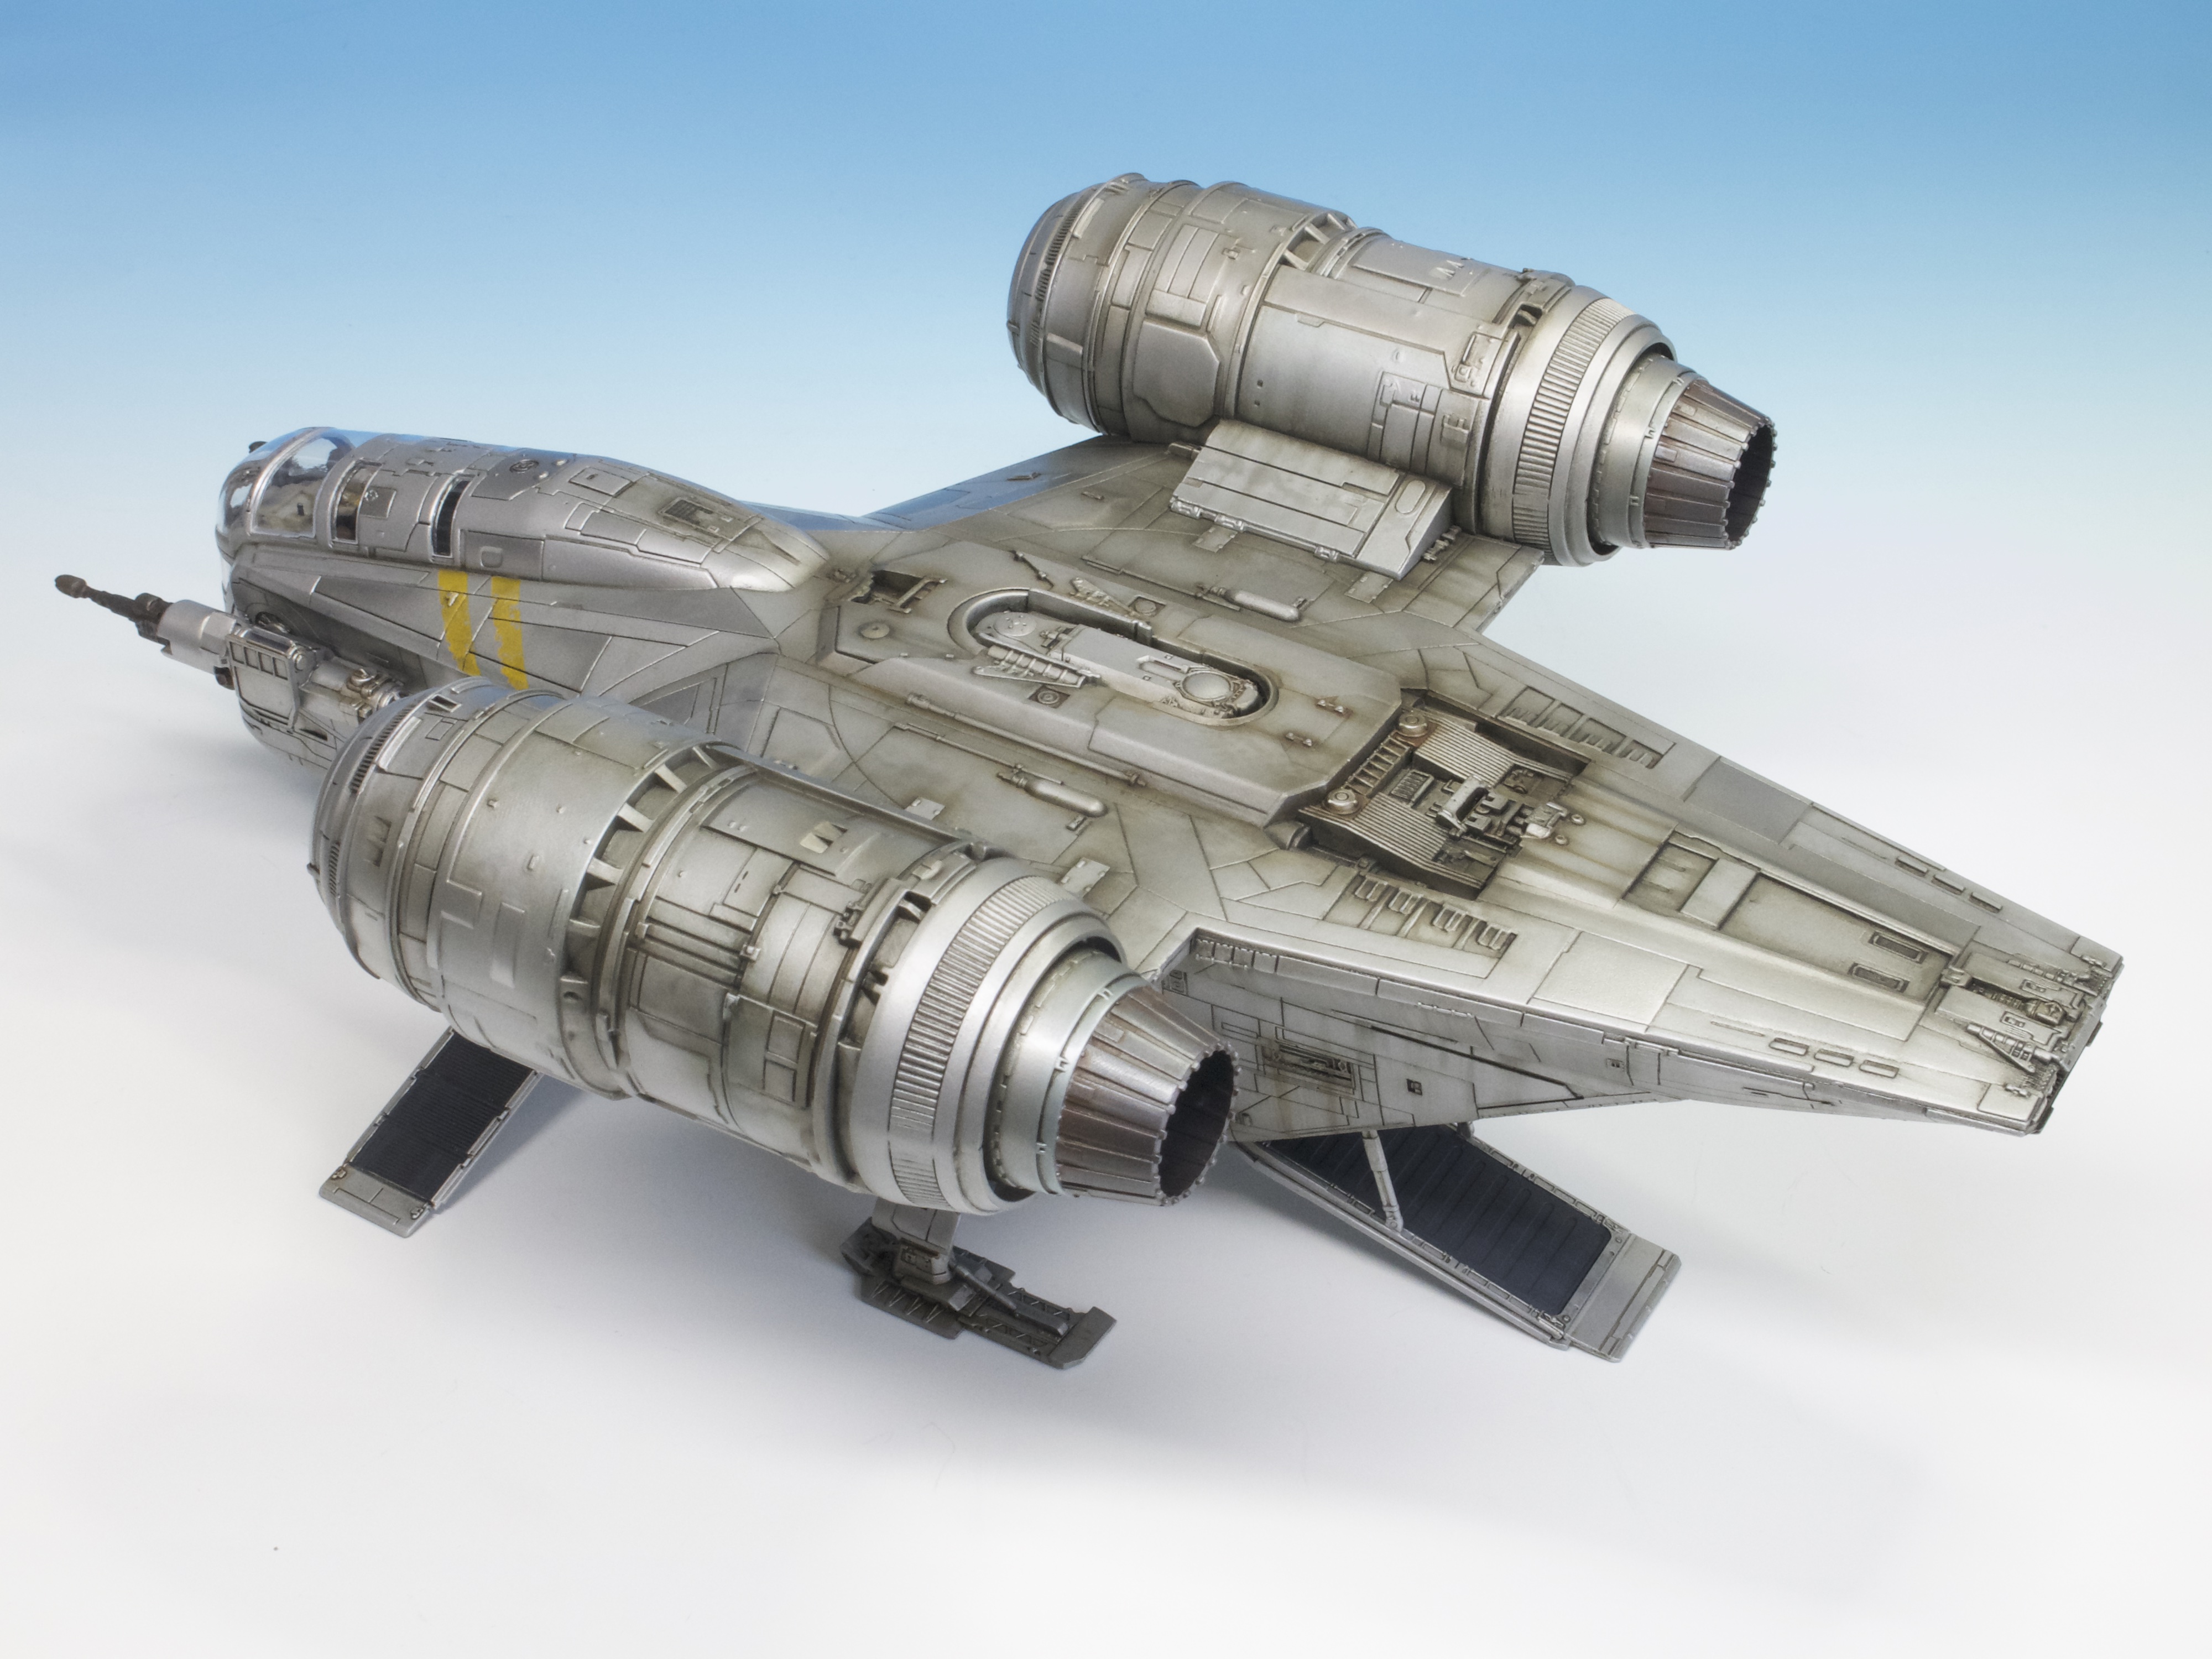
In terms of first impressions, they really are very positive. The model is large to begin with, being almost half the size of the 24” filming miniature used in the programme. It’s also clear that the Revell designers have had access to the original files used by the Mandalorian team, because the model is very well detailed and seemingly accurate in almost every way.
When the Madalorian aired for the first time on Disney+ many Star Wars fans were taken by the story lines, the sets and the recreation of machines that were very much in keeping with previous films and the animated shows that had come before. One of those machines was the Razor Crest, an ex-military gun-boat used by the mysterious Madalorian throughout almost the entire run of episodes. Seemingly inspired by the A-10, this wonderfully metallic ship, weather-beaten and aged, was always going to prove a popular choice for a new kit. And so it has proven to be with this kit from Revell, the latest to arrive on the scene.

I supplied with a test-shot of the kit, that only had a set of parts, no instructions and no decals, everything having to be painted on, including the yellow ID stripes. That said, I had enough to use and enough to enjoy for my build for Tamiya Model Magazine International. So what can you expect from the kit when you finally get your hands on it?
In terms of first impressions, they really are very positive. The model is large to begin with, being almost half the size of the 24” filming miniature used in the programme. It’s also clear that the Revell designers have had access to the original files used by the Mandalorian team, because the model is very well detailed and seemingly accurate in almost every way. Checking the model parts against those images I could find Online, nothing stood out as appearing to be lacking in terms of detail, and every shape appeared to capture the look of the original to a tee. Detail, often scrutinised by builders of this type of model, can be easily seen in the images of the completed model, as can the work the designers have put in to the kit to ensure that it is accurate; just check out the starboard intake ring and how it is subtly different from that on the port side, the cut-out in one, not being present in the other. Very impressive.

As you might expect the kit offers a fairly complete cargo bay, stowage compartment and cockpit. Though the doors can be posed open along with the loading ramp, precious little can be seen within the interior of the kit, so the detail, comprehensive enough as it is, will be more than acceptable to most. That said, I can see modellers adding more, even opting to include LED lighting, all of which will add to the look of the complete model.
I mentioned the quality of the moulding, earlier, so it might be worth pointing out that the upper fuselage panel in our kit was not entirely smooth across its myriad panels. It’s hard to know if this was simply the result of any early test-shots, or if the production kits will be like the one we built, but it is worth pointing out that if that is the case, some sanding will be needed if the metal finish is not to be compromised. Time will tell if that is indeed the case. Watch this space, as they say…
Construction is very straightforward, even when as we did, you build the kit sans instructions. Fit is very precise, and though a degree of cleaning up was needed along with a little fettling here and there, that was hardly arduous and certainly no more than you might expect from many kits featuring complex shapes such as this. For this project, Tamiya cements were used for assembly, and where there were a couple of minor gaps – such as around the upper nose – Mr. Surfacer came in handy. The only other feature(s) worth mentioning were a number of ejector pin marks that needed to be sorted. These were found on several of the parts, but given how shallow they were, needed little more than some scraping and attention with some wet & dry paper.
Since we built the kit, we’ve been sent images of the decals and the instructions, both of which are comprehensive, the decals, in particular the stripes, being exactly what you need to recreate the worn look on the Razor Crest from the show. When we get a full-sec kit we hope to show you what they look like, but in the meantime, we hope that you enjoy seeing the kit built as supplied to us!
If you would like to read more about this very impressive model, please check out my full build feature in the December 2021 edition of TMMI, which you can buy either from your local stockist, or by following this link.


LET ME TELL YOU WHEN I POST NEW MATERIAL!

If you have enjoyed reading this, please subscribe to this website with your email address. By doing that, you will be notified whenever I upload new material each week. You can simply subscribe using the box that you will find on the homepage of this website.
Thanks a lot – I look forward to hearing from you!

It’s cool looking kit as far as Disney “Star Wars” craft go, but I still don’t like the yellow markings, I wonder if there is any reference material for when it was functioning gunship? Building that might be more of a lore for me!
LikeLike
A lovely finish on what is a rather splendid kit with a lot of potential.
LikeLike
Pingback: Revell 1/72 Razor Crest built by Spencer Pollard's Kit Box - Piscean Works - The Whole Works