
As part of my initial assessment, I mentioned that the cockpit was rather well-appointed and now that it is under paint, I have to say that that intial vewpoint has been strengthened.
Though my work commitments have been rather overwhelming of late (as indeed has the need to redecorate the house, but that’s another story!) I’ve managed to get some work done on the Airfix Beaufort. This week the cockpit has been completed and then painted. As part of my intial assessment I mentioned that the cockpit was rather well-appointed and now that it is under paint, I have to say that that initial vewpoint has been strengthened, the resulting ‘pit, looking very pleasing.

As with most aircraft from this period, the cockpit within the Beaufort was painted in the RAF’s interior green colour, a mixed greeny-grey shade that looked rather more sombre than the yellower Interior Green used in American machines. In order to simplify my approach to this interior decoration, my model was sprayed with several layers of Tamiya’s XF-71 Cockpit Green, a wonderfully muted colour that looks superb in place. Though perhaps a little bright in hue when first applied, the colour took on a more sombre tone once overpainted with washes and then drybrushed with oils to bring out the detail.

Drybrushing, that most contentious of steps these days (matched only by the use of clear coats prior to decalling…) really helps pop internal details and though far from obvious within the fuselage of my model, this step certainly helped rather than hindered, progress. Details as with previous models built recently, were picked out with Humbrol enamels.
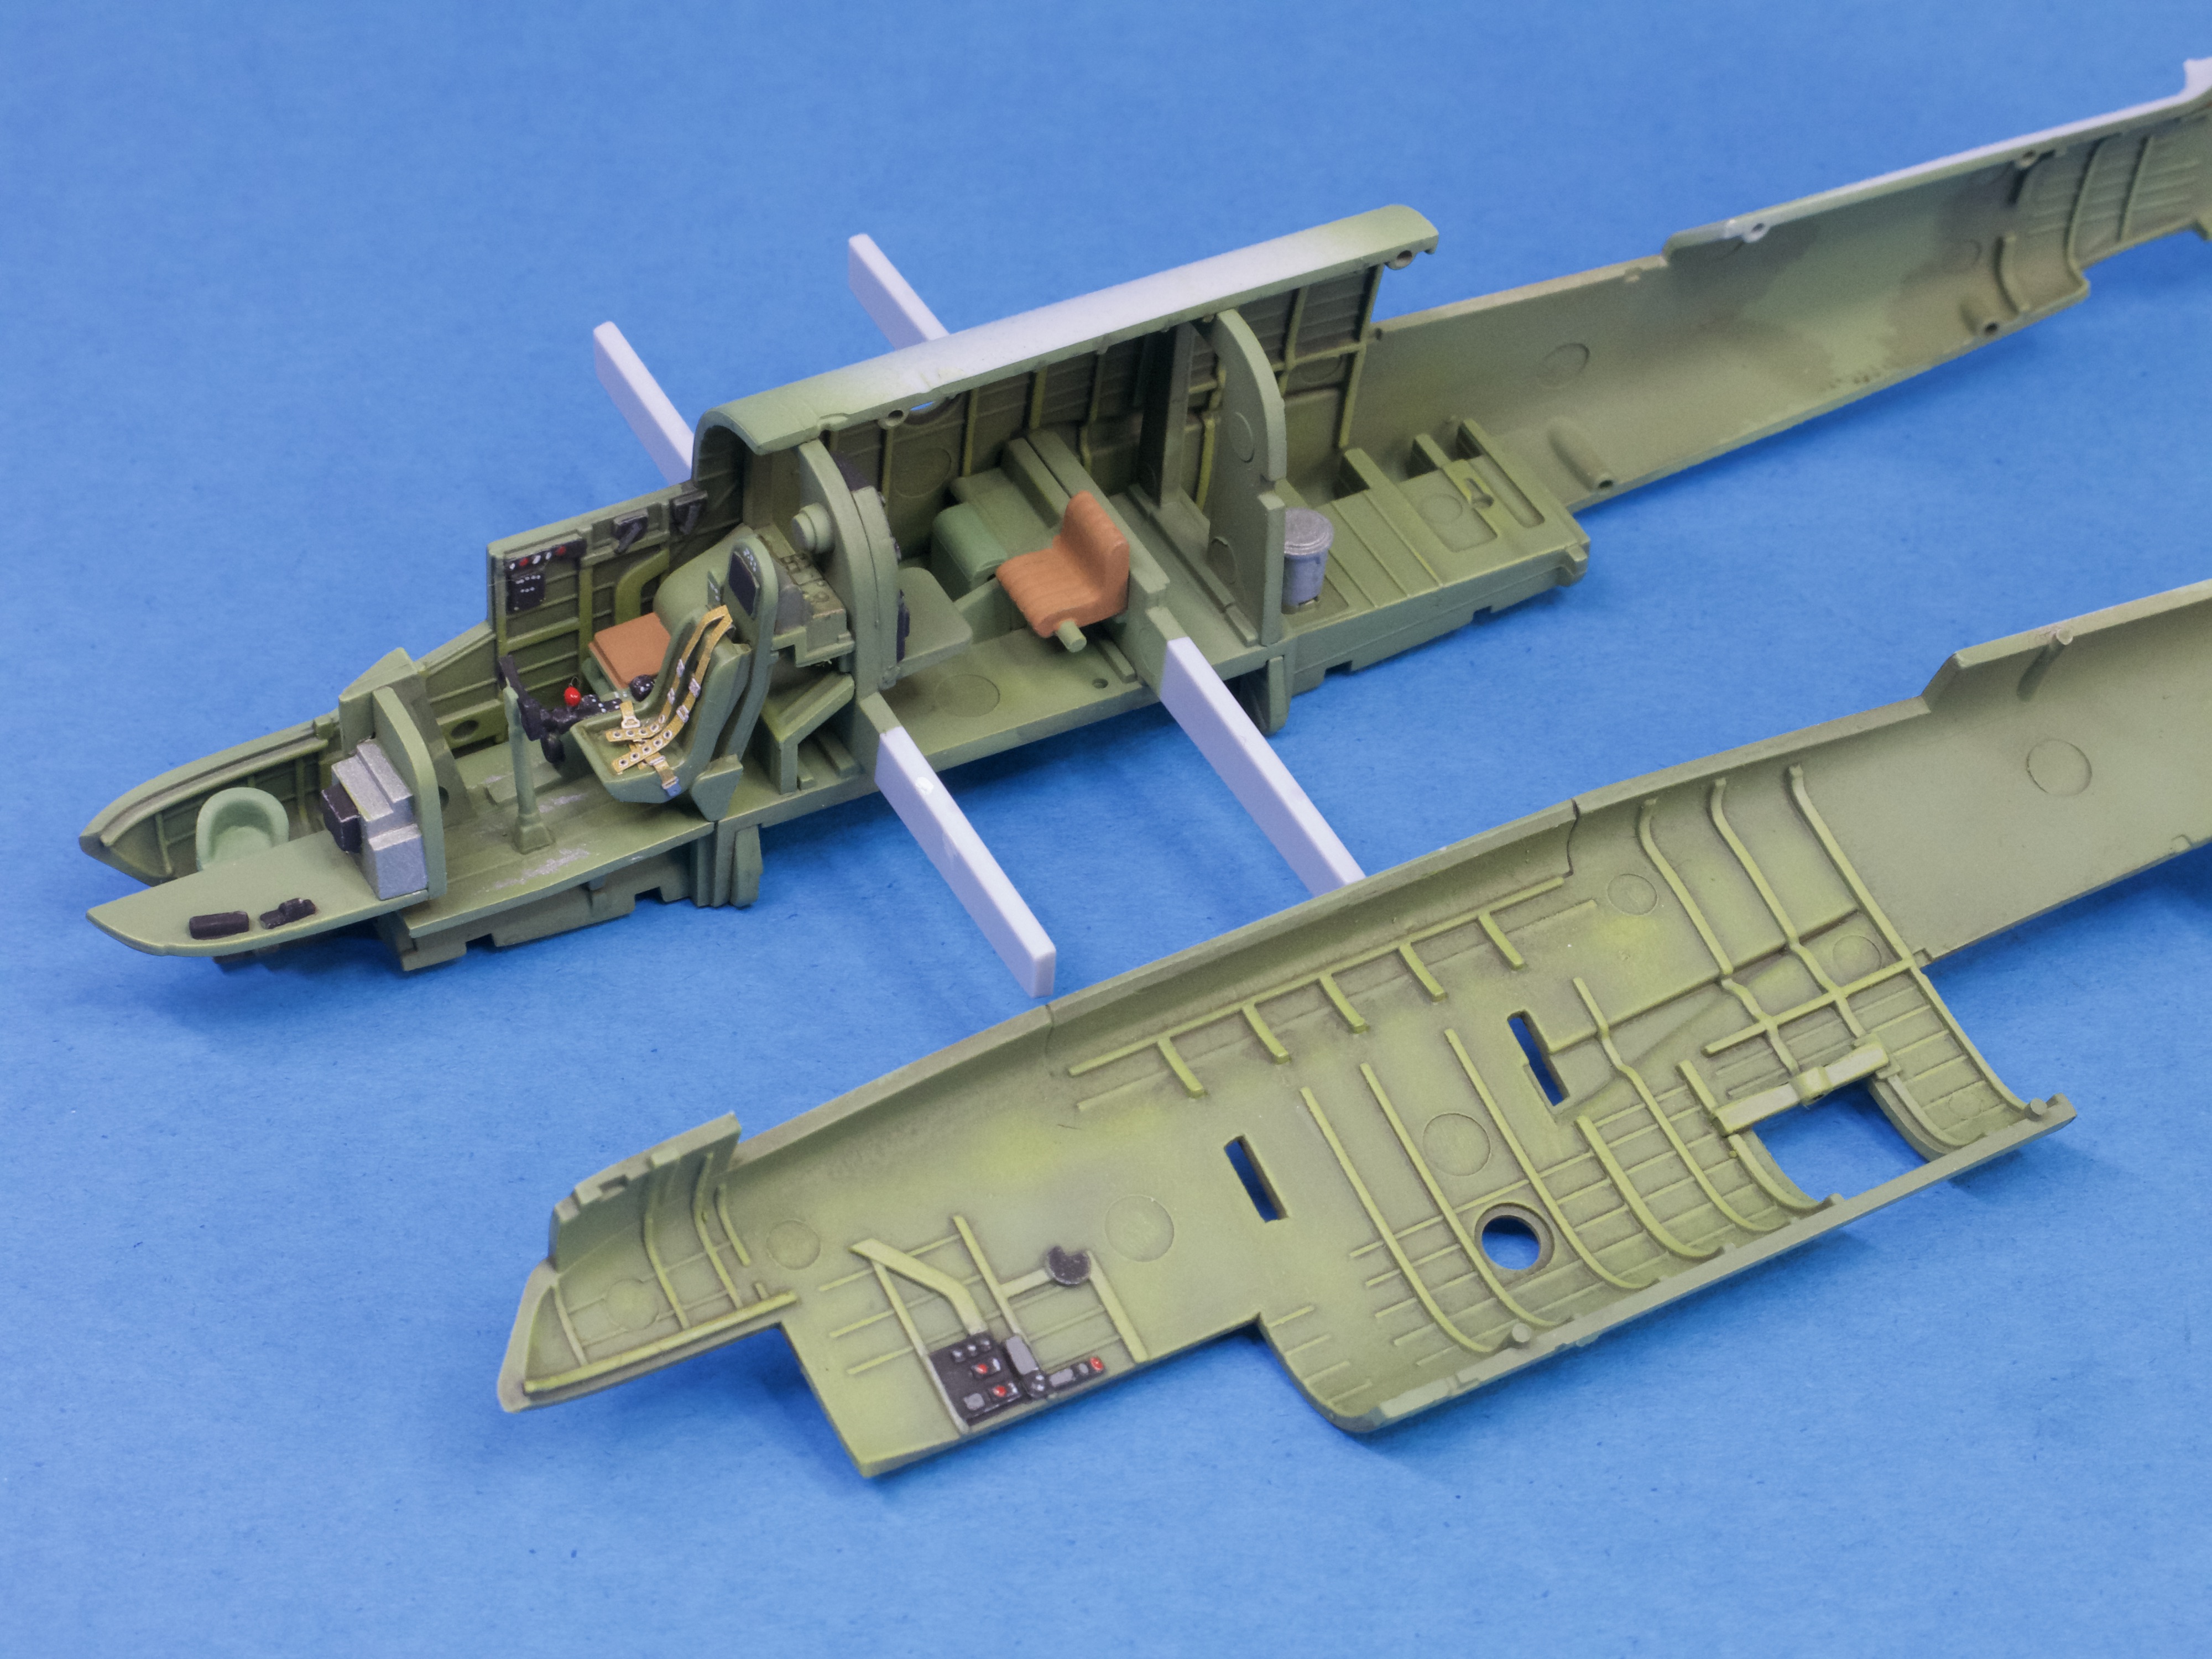

Before closing the fuselage up and then completing the airframe, some seat straps were added to the pilot’s seat using Eduard coloured accessories from the spares’ box. I only used these for the aformentioned seat, the virtually invisible navigator’s station being unworthy of such luxurious add-ons. Yes, I know there is an argument for them being there, but I am very much of the opinion “out of sight, out of mind” so ignored the omission and moved on…
LET ME TELL YOU WHEN I POST NEW MATERIAL!

If you have enjoyed reading this, please subscribe to this website with your email address. By doing that, you will be notified whenever I upload new material each week. You can simply subscribe using the box that you will find on the homepage of this website.
Thanks a lot – I look forward to hearing from you!

Dry-brushing? Gloss coating for decals?? Humbrol paint??? Heresy! HERESY I TELL YOU!!!
Seriously though it is coming along nicely and as you say the cockpit detail is pretty good, especially in 1/72.
LikeLike