
“If you’ve built Tamiya’s F-14, or indeed their much-vaunted P-38 Lightning, you will be somewhat prepared for what you will find in their Phantom box.”

You might be forgiven for thinking that the world is hardly crying out for another F-4 kit, and I have some sympathy with that viewpoint. Tamiya though, evidently feel that now is the time to set their stall out with what looks to the first in a family of Phantom variants and as you might imagine, they have done so in some style.
Highly detailed, moulded with a degree of finesse that almost impossible to take in, Tamiya’s latest box of tricks may well be the last word on this aircraft in this scale – well, at least for now. But let’s not get ahead of ourselves. What can you expect from this F-4B Phantom kit, now that it has landed on your on your local model shop shelves?

If you’ve built Tamiya’s F-14, or indeed their much-vaunted P-38 Lightning, you will be somewhat prepared for what you will find in their Phantom box. Moulded in their now familiar pale grey plastic, the contents offer a superb collection of parts that combine to create a wonderful model of this classic Cold-War jet. Although an expensive package – the UK price is around the £90 mark, which puts it a little above the Zoukei-Mura family of kits (around £70) and considerably above that offered by Academy (around £45) – it is little more than a beginner’s kit in terms of complexity and assembly, if not painting and decalling. Sure, there are lots of parts in evidence, but the way that the aircraft is broken down and the tolerance between the individual components, makes assembly child’s play. But then, it’s a Tamiya kit: when is that ever not the case?
First Impressions
Breakdown is conventional in the main, with very little that feels overly groundbreaking. Indeed, having built many of the recently released Phantom kits, much seems very familiar, with items such as a separate spine panel, one-part lower wings, separate wing tips and a complex, drop-in area around the jet-pipes, all being seen before. But dig deeper and you will find ideas that look familiar, but are a twist on that seen elsewhere. Then there is the fit and tolerance between the individual comments to factor in. Both of these build on that seen in all of the 1/48 aircraft kits dropped by Tamiya over the last few years and I am sure that you know exactly what that means.
Clever ideas, abound. One of those concerns the way that the outer wings, are dealt with. In recent kits, the Phantom’s wing folds been replicated thanks to small ‘hinges’ that slot into the inner and outer wings, thus allowing folded, or spread wings. Here, Tamiya offer large plates that include complete hinges, those plates being extended around 15 mm either side of the joints to fall on natural panel lines. Not only is that important detail preserved, the joints are super-strong, irrespective of outer wing position.
Idea number two, concerns the replication of the fuselage. Tamiya obviously have USAF Charlie and Delta variants in mind because of the way that they have split the fuselage – or rather, the way that they have split one half of the fuselage. Navy and air force jets differ in the position of their refuelling probes/receptacles, the navy using the probe under the cockpit, the air force the receptacle on the spine. This is dealt with here thanks to the use of a variant-specific panel over the spine and then a separate nose that is broken from behind the cockpit to the radome, that takes care of the probe bay that sits to the starboard the side of the rear cockpit.
Idea three deals with the fin and its need to replicate other variant-specific features. Again, this part will allow different sub-types to be replicated, thanks to a separate fin cap, but also the extraordinarily simply way that Tamiya has got to grips with the ram air inlet at the base of the fin. Appearing in different patterns across the service life of the Phantom, Tamiya has included two different intakes, one on each of the fin halves. In order to be correct for the variant modelled, you simply cut off the one that is not needed and then glue the halves together. Genius!
The final idea concerns the cockpit canopies and windscreen. Taking the latter first, we’ve seen how Tamiya like to include part of the upper nose as part of the windscreen in their kits – as in their F-14 Tomcat – so it is perhaps not a surprise to see it being once again used here. What is not so familiar, is the way that they have dealt with the three-part clamshell canopies. You have options in the kit to have the canopies closed or open, the former thanks to a full-length part, the latter, possible through the use of three, glazed components. In almost every other Phantom kit I can think of, the canopies are joined to the central part of the canopy and the rear hump on the fuselage spine with nothing more than delicate hinges that interlock into slots in each fixed piece. Here, the job is made easier because not only do Tamiya supply large hinged plates that are glued between each of the fixed sections and the canopies, those fixed items are separate, thus allowing the completed sub-assembly to be glued in place in one go. It’s a novel way to create strength, but also elegant enough that you don’t notice the slightly bulkier hinges.
Details, Details…
We begin with the cockpit. Here, the layout of the Bravo-model is well replicated, the rather Heath Robinson look of the real aircraft being present and correct. Highlights include the instrument panels and side consoles, paint and decals combining to create highly detailed features that will look great to anyone keen to take a peep inside the completed cockpit. The rear cockpit is perhaps the highlight, the layout of this navalised variant being almost perfect with its recognisable lack of side consoles and in this case, two different instrument panels that define – presumably – early and late, ‘Bravo’ jets.
“These are really lovely little additions, looking superb once painted and decalled…”
Similar comments apply to the Martin Baker Mk.7 ejection seats, these being some of the most detailed I’ve seen in this scale. No straps I am afraid, at least not in terms of solid features, these being supplied as in previous Tamiya aircraft kits, as decals that work to a fashion. For this build, I gave them a go, but really didn’t like the results (a first to have something in a Tamiya kit that I didn’t like!) so I reverted back to my initial plan and used the excellent pilot and RIO (Radar Intercept Officer) figures. These are really lovely little additions, looking superb once painted and decalled, especially once you’ve applied the tiny markings to their helmets that define each of the three possible squadrons featured on the decal sheet.
Colours And Markings
Being an F-4B, the colour schemes are all the same, gloss Light Gull Grey over Gloss Insignia White, only the markings being different. The choices are as follows:
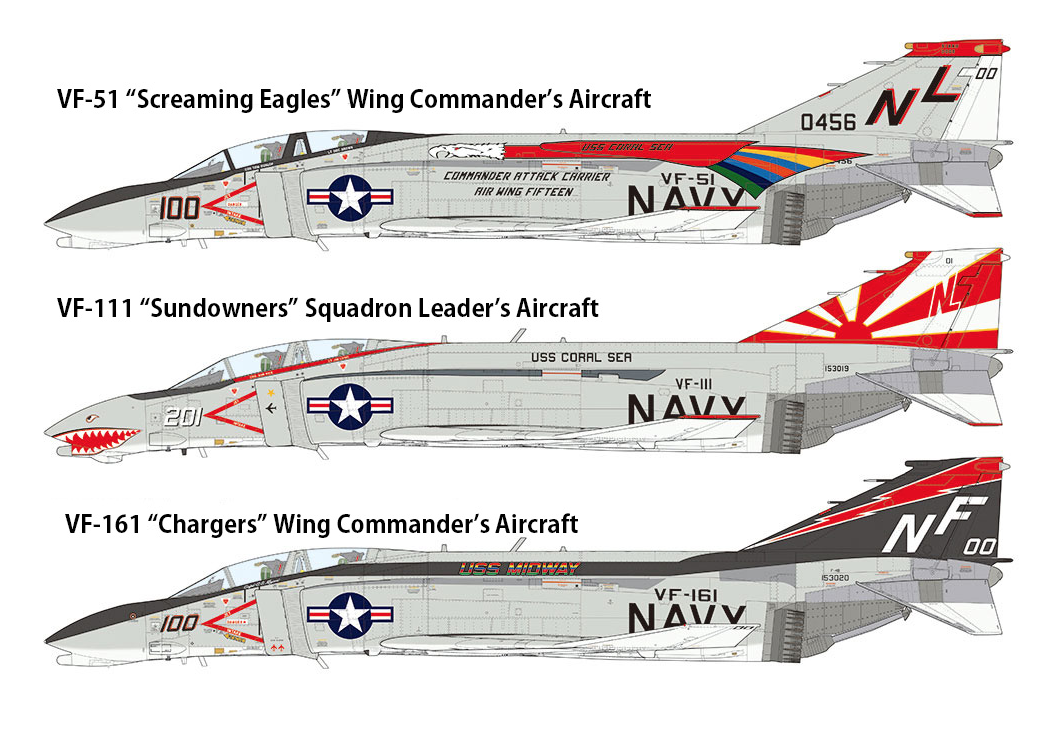
- F-4B Phantom II, VF-51 “Screaming Eagles”, Wing Commander’s aircraft, USS Coral Sea, May 6th 1972. The CAG aircraft for VF-51, the markings include the distinctive unit marking on the rear fuselage nicknamed “The Supersonic Can Opener”. This aircraft features a full set of stencils, as well as the individual unit markings and national insignia.
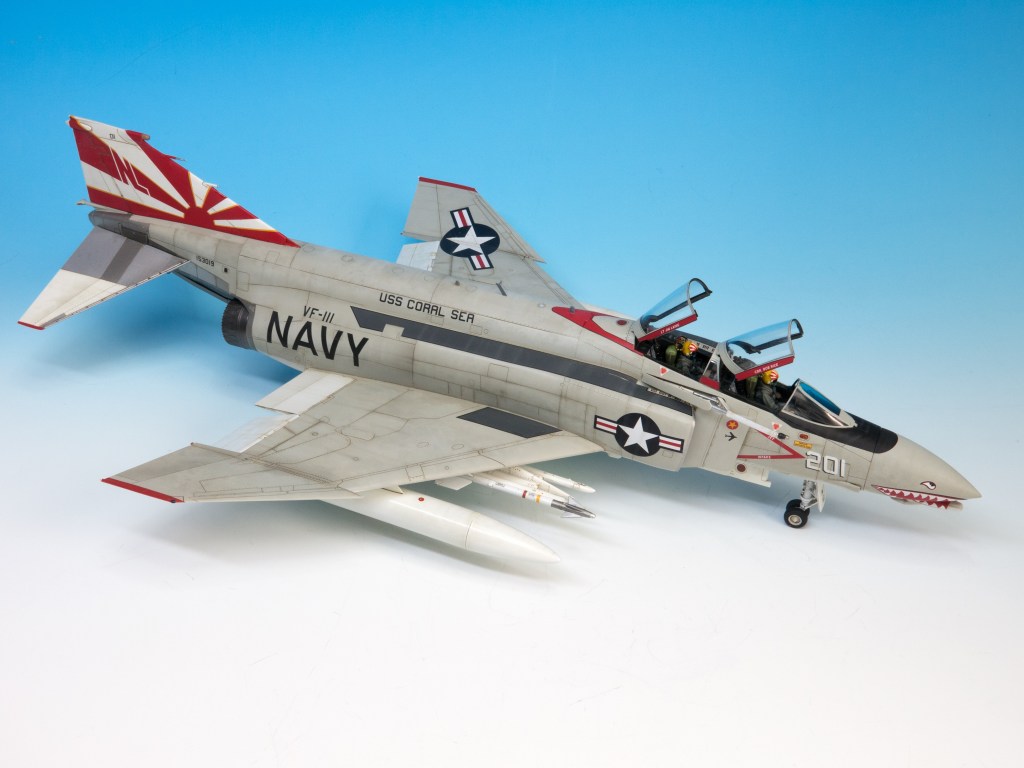
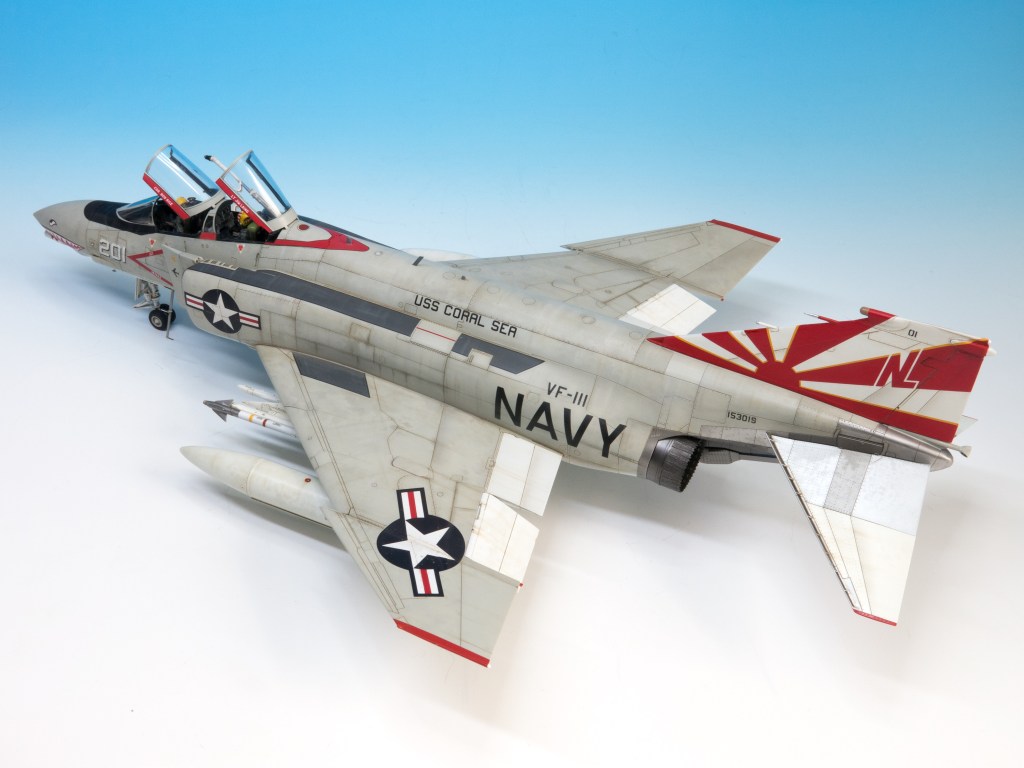
- F-4B Phantom II, VF-111 “Sundowners”, Squadron Leader’s aircraft, NAS Miramar, August 1972. This option replicates Lt. Gary Weigland and Lt. Bill Freckleton’s aircraft 153019/NL, call-sign “Old Nick 201” after it was repainted after deployment to Vietnam. As such, it features only minimal stencils, a fact that is highlighted within the instructions.
- F-4B Phantom II, VF-161 “Chargers”, Wing Commander’s aircraft, USS Midway, May 1972. Another CAG aircraft, this one features not only a full complement of stencils, also two kill markings representing two MiG-17s that were shot down on the 23rd of May 1972.

The decal sheet is amazingly comprehensive, all of the major unit markings, national insignia and those stencils, being present and correct. It was pleasing to see that the sheet included anti-glare trim and that many of the small stencils were combined to create larger designs that were less time-consuming to apply than individual markings.
If I was to be critical, it would concern the black striping that adorns the VF-161 jet. These feature the multicoloured ‘USS Midway’ titles, so you are almost forced to use the complete decal. Personally, I would have preferred to see those titles as markings in their own right so that I could mask and paint the anti-glare panel, cockpit trim, stripes and tail fin all in one go to produce a consistent finish. I would still like to replicate that very famous ‘MiG Killer’ from this kit, so maybe next time I will see if that approach is possible, even with the decals as supplied…
Final Verdict
This is a superb new kit from Tamiya that will delight fans of this iconic aircraft. In choosing to replicate the Bravo variant, they have opened up the possibility for plenty of Vietnam-era squadrons and schemes, will no doubt further heighten its appeal.
As mentioned in my introduction, there is little within the kit that is earth shattering, but enough that you can feel that this Tamiya once again flexing their not inconsiderable muscles to create a kit that is completely user friendly, whilst at the same time having not compromised over anything of note. But more than that, it is a wonderfully fulfilling project that results in a stunning replica of this aircraft and when those two factors combine in any kit, you know that you are on to a winner. Is it the best Phantom kit currently on the market? I’ll leave you to be the judge of that, but having built all of its major competitors, I can only conclude that it is. Now that it has arrived, it will be interesting to see how many other people share that belief. I can’t wait!
Absolutely superb and highly recommended!
FURTHER READING…
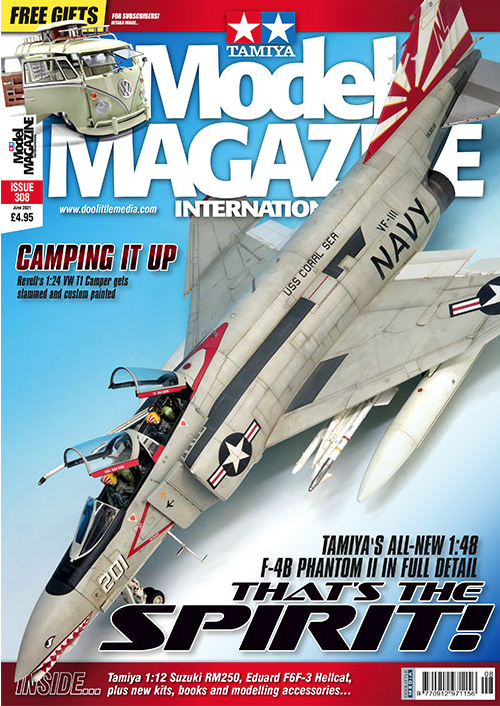
If you would like to see more of this model, including the full review text and an in-depth, step by step guide to its construction and painting, please see the June 2021 edition of Tamiya Model Magazine International, back issues of which can be bought using the following link:
http://adhpublishing.com/shop/store/products/issue-308-june-2021/

TAMIYA INC.

Spencer: I’m looking forward to the F4N. The overhauled website is a real step up. It seems more “electric”, if you will. There is more energy in the format. Looking forward to what you do with it. Cheers!
LikeLike
Hi Spenser,
I read the full build in TMMI. Beautiful kit. I have it ordered and awaiting delivery. Not sure when I’ll get to build it though. And this morning I took delivery of the FineMolds F4-EJ which I think I recall you mentioning on The Interesting Model Company one evening that you were building that kit as well. So when will you put together a Phantom book for us…
LikeLike