This was a really fun build that resulted in a model that I really like. But more than that, it was a great project to not only build my model, but also see what Jonathan had come up with using Italeri’s kit as a base.

Having completed our T-34 Challenge a month or so ago, Jonathon Mock and I were looking for a new ‘Ten Day Challenge‘ to get the juices flowing when the suggestion that the Pink Panther would be a good choice came up. Although we had been planning to only build kits from the same range each time, the chance to take kits from two ranges and see how they compared, was a little too much to resist. Challenge accepted, we took charge of our models (decided by the toss of a coin!) and set to work, Jon with his Italeri kit, me with that offered by Tamiya.

Released in 1976, Tamiya’s Pink Panther is still a superb kit. Listed by The Hobby Company as the 8th best-selling member of Tamiya’s ‘Military Miniatures’ range, it has been on sale almost continuously since release, so it is both widely available and cheap to buy. More than that though, it is incredibly easy to build, accurate in shape and detail and offers a huge degree of options when it comes to personalisation and additions.
Being part of our ‘Challenge’ series, this build came with a number of restrictions. First, was that we had a set ten-day time period in which to build it; we would host a live broadcast at the start of the period and then, ten days hence, we would reveal what we had come up with, good or bad! The second in this case, was that we had to build the model using what was in the box, only the remnants of the additional accessory sets used for the T-34 build being allowed here. Additional details could be added, but they had to be made from scratch as no aftermarket accessories could be incorporated. Rules in place, kit in had, I set to work.
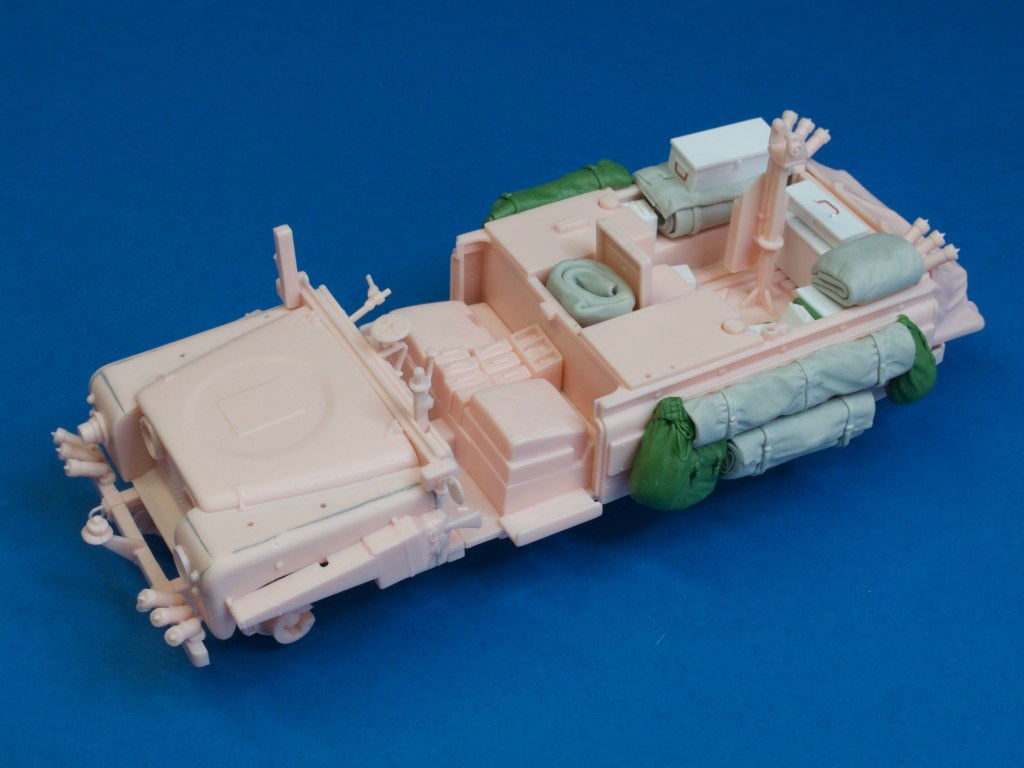
The kit is very easy to assemble, its modular breakdown allowing the chassis, bonnet and then truck bed, to be assembled, detailed and brought together, individually. This certainly helps with access, but it also breaks the model down into three mini-kits that you can focus on to completion, with little fear of damaging surrounding structures.
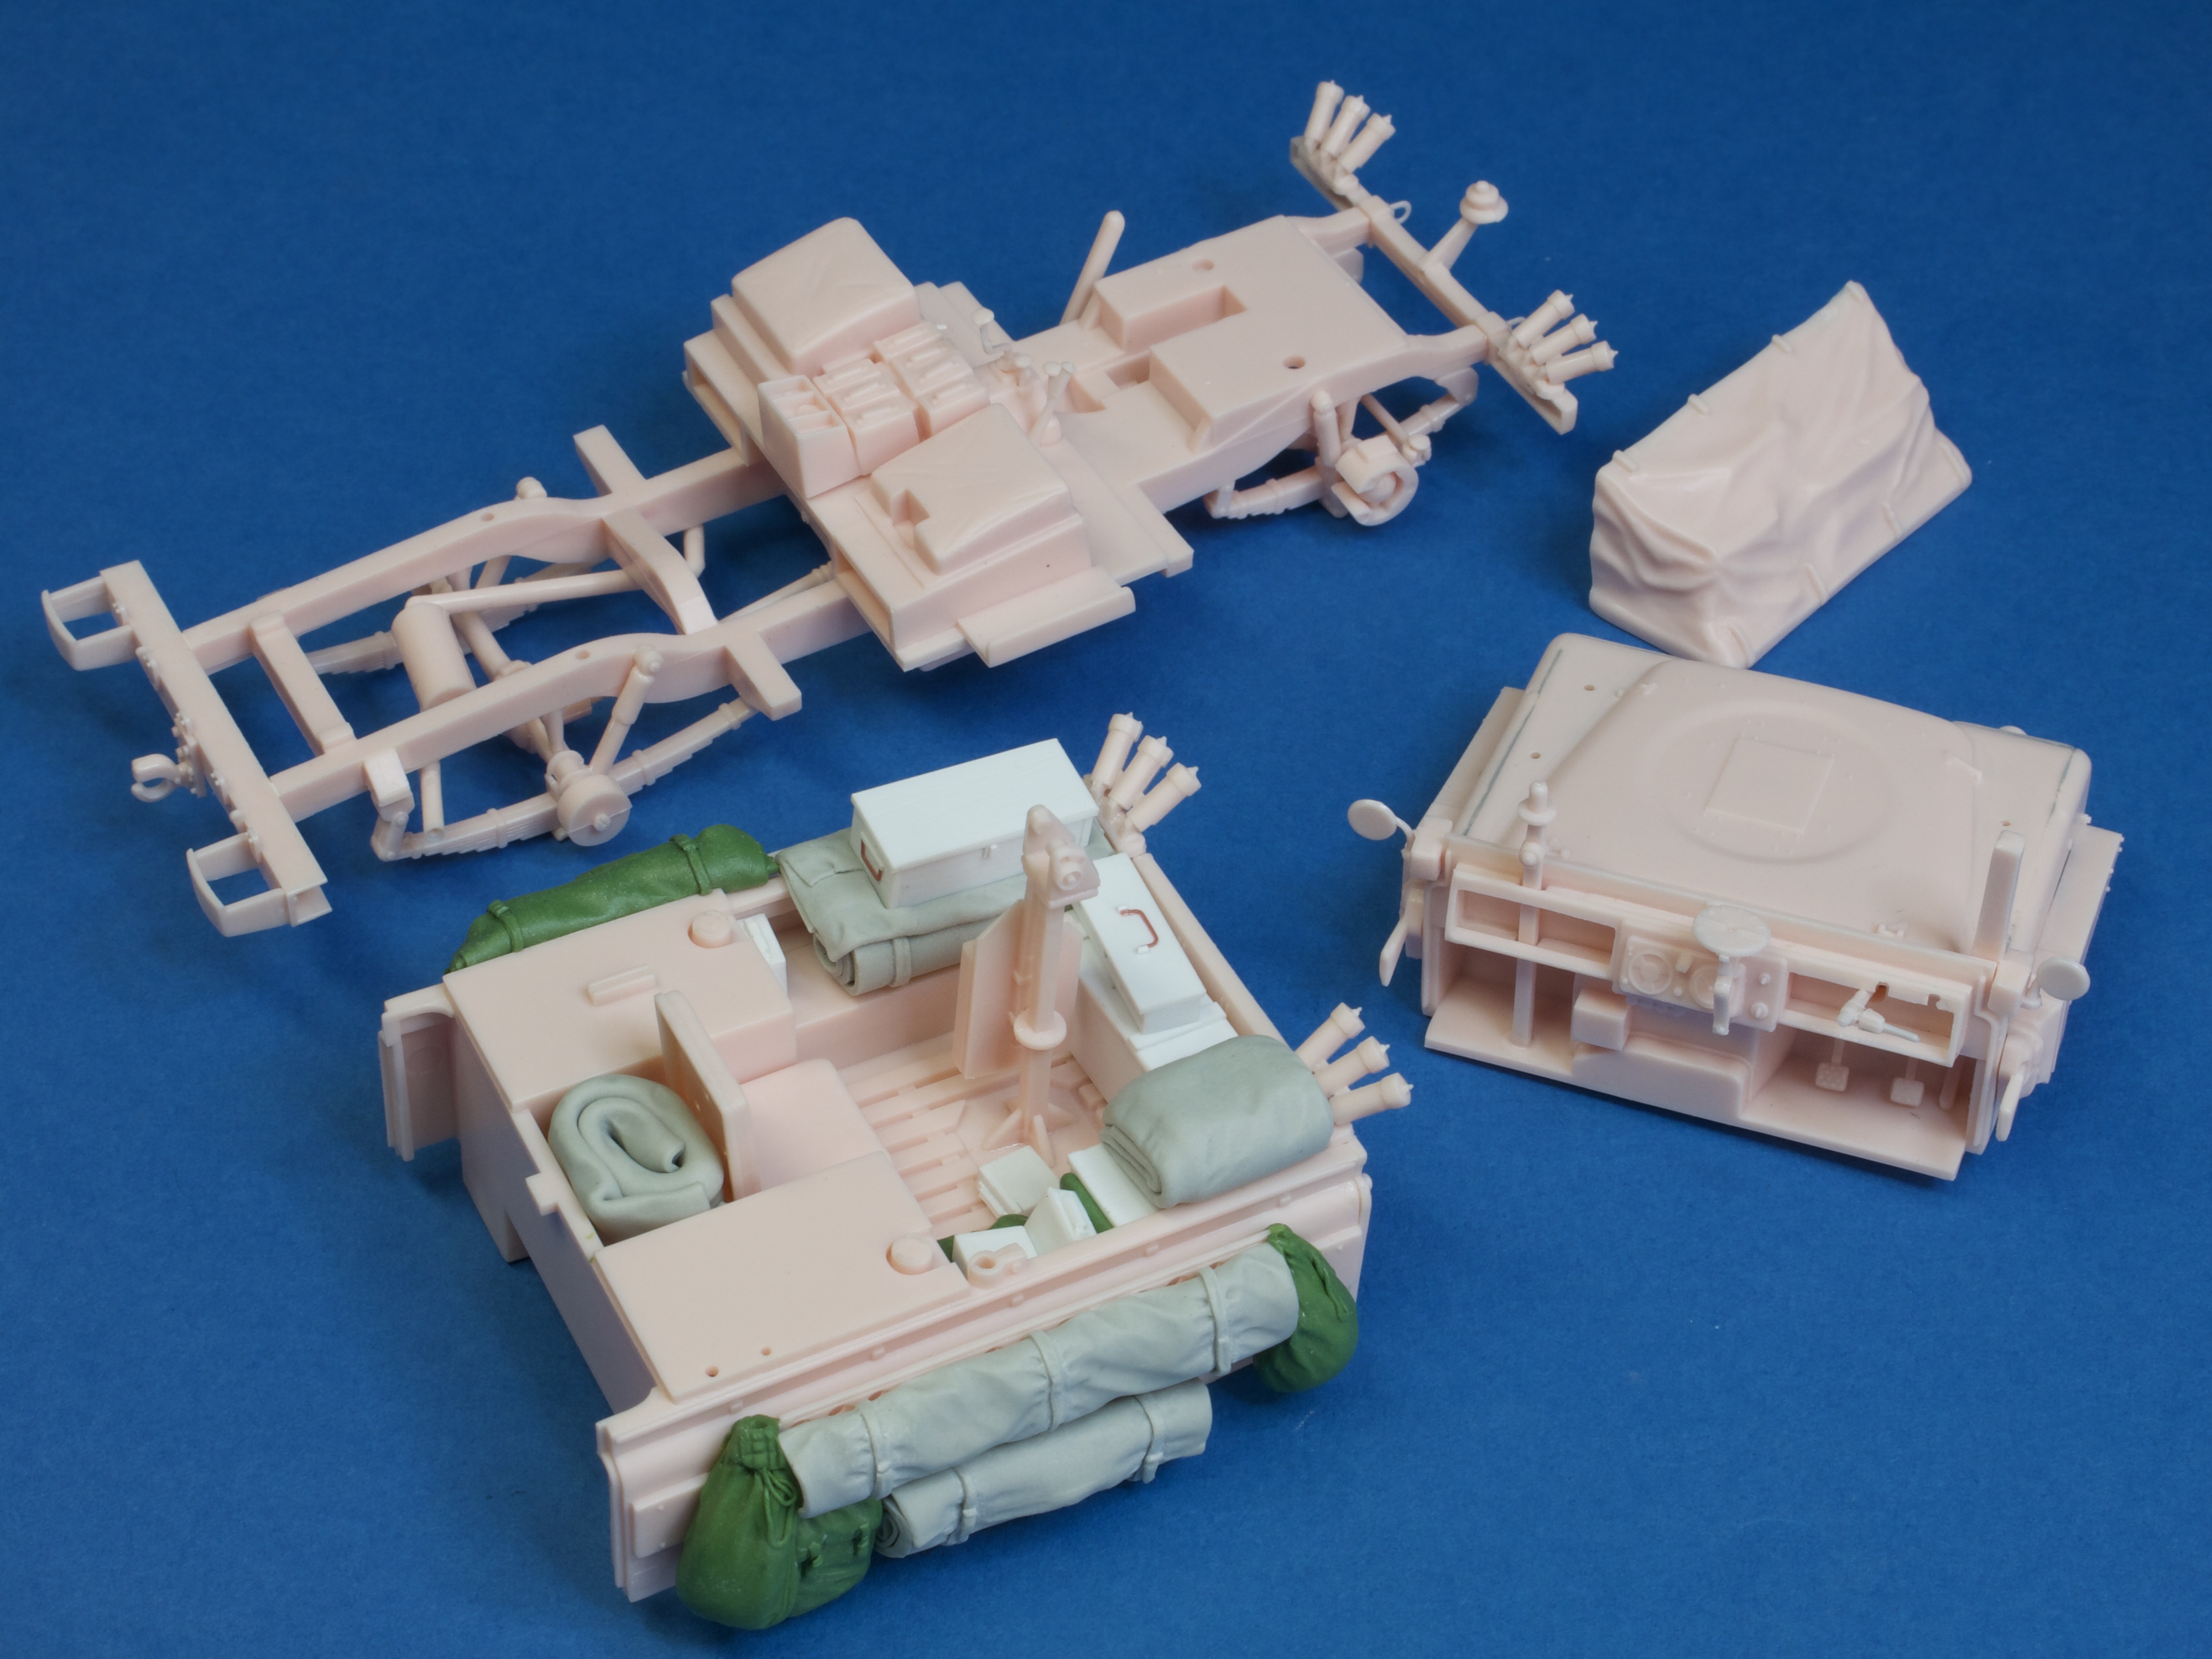
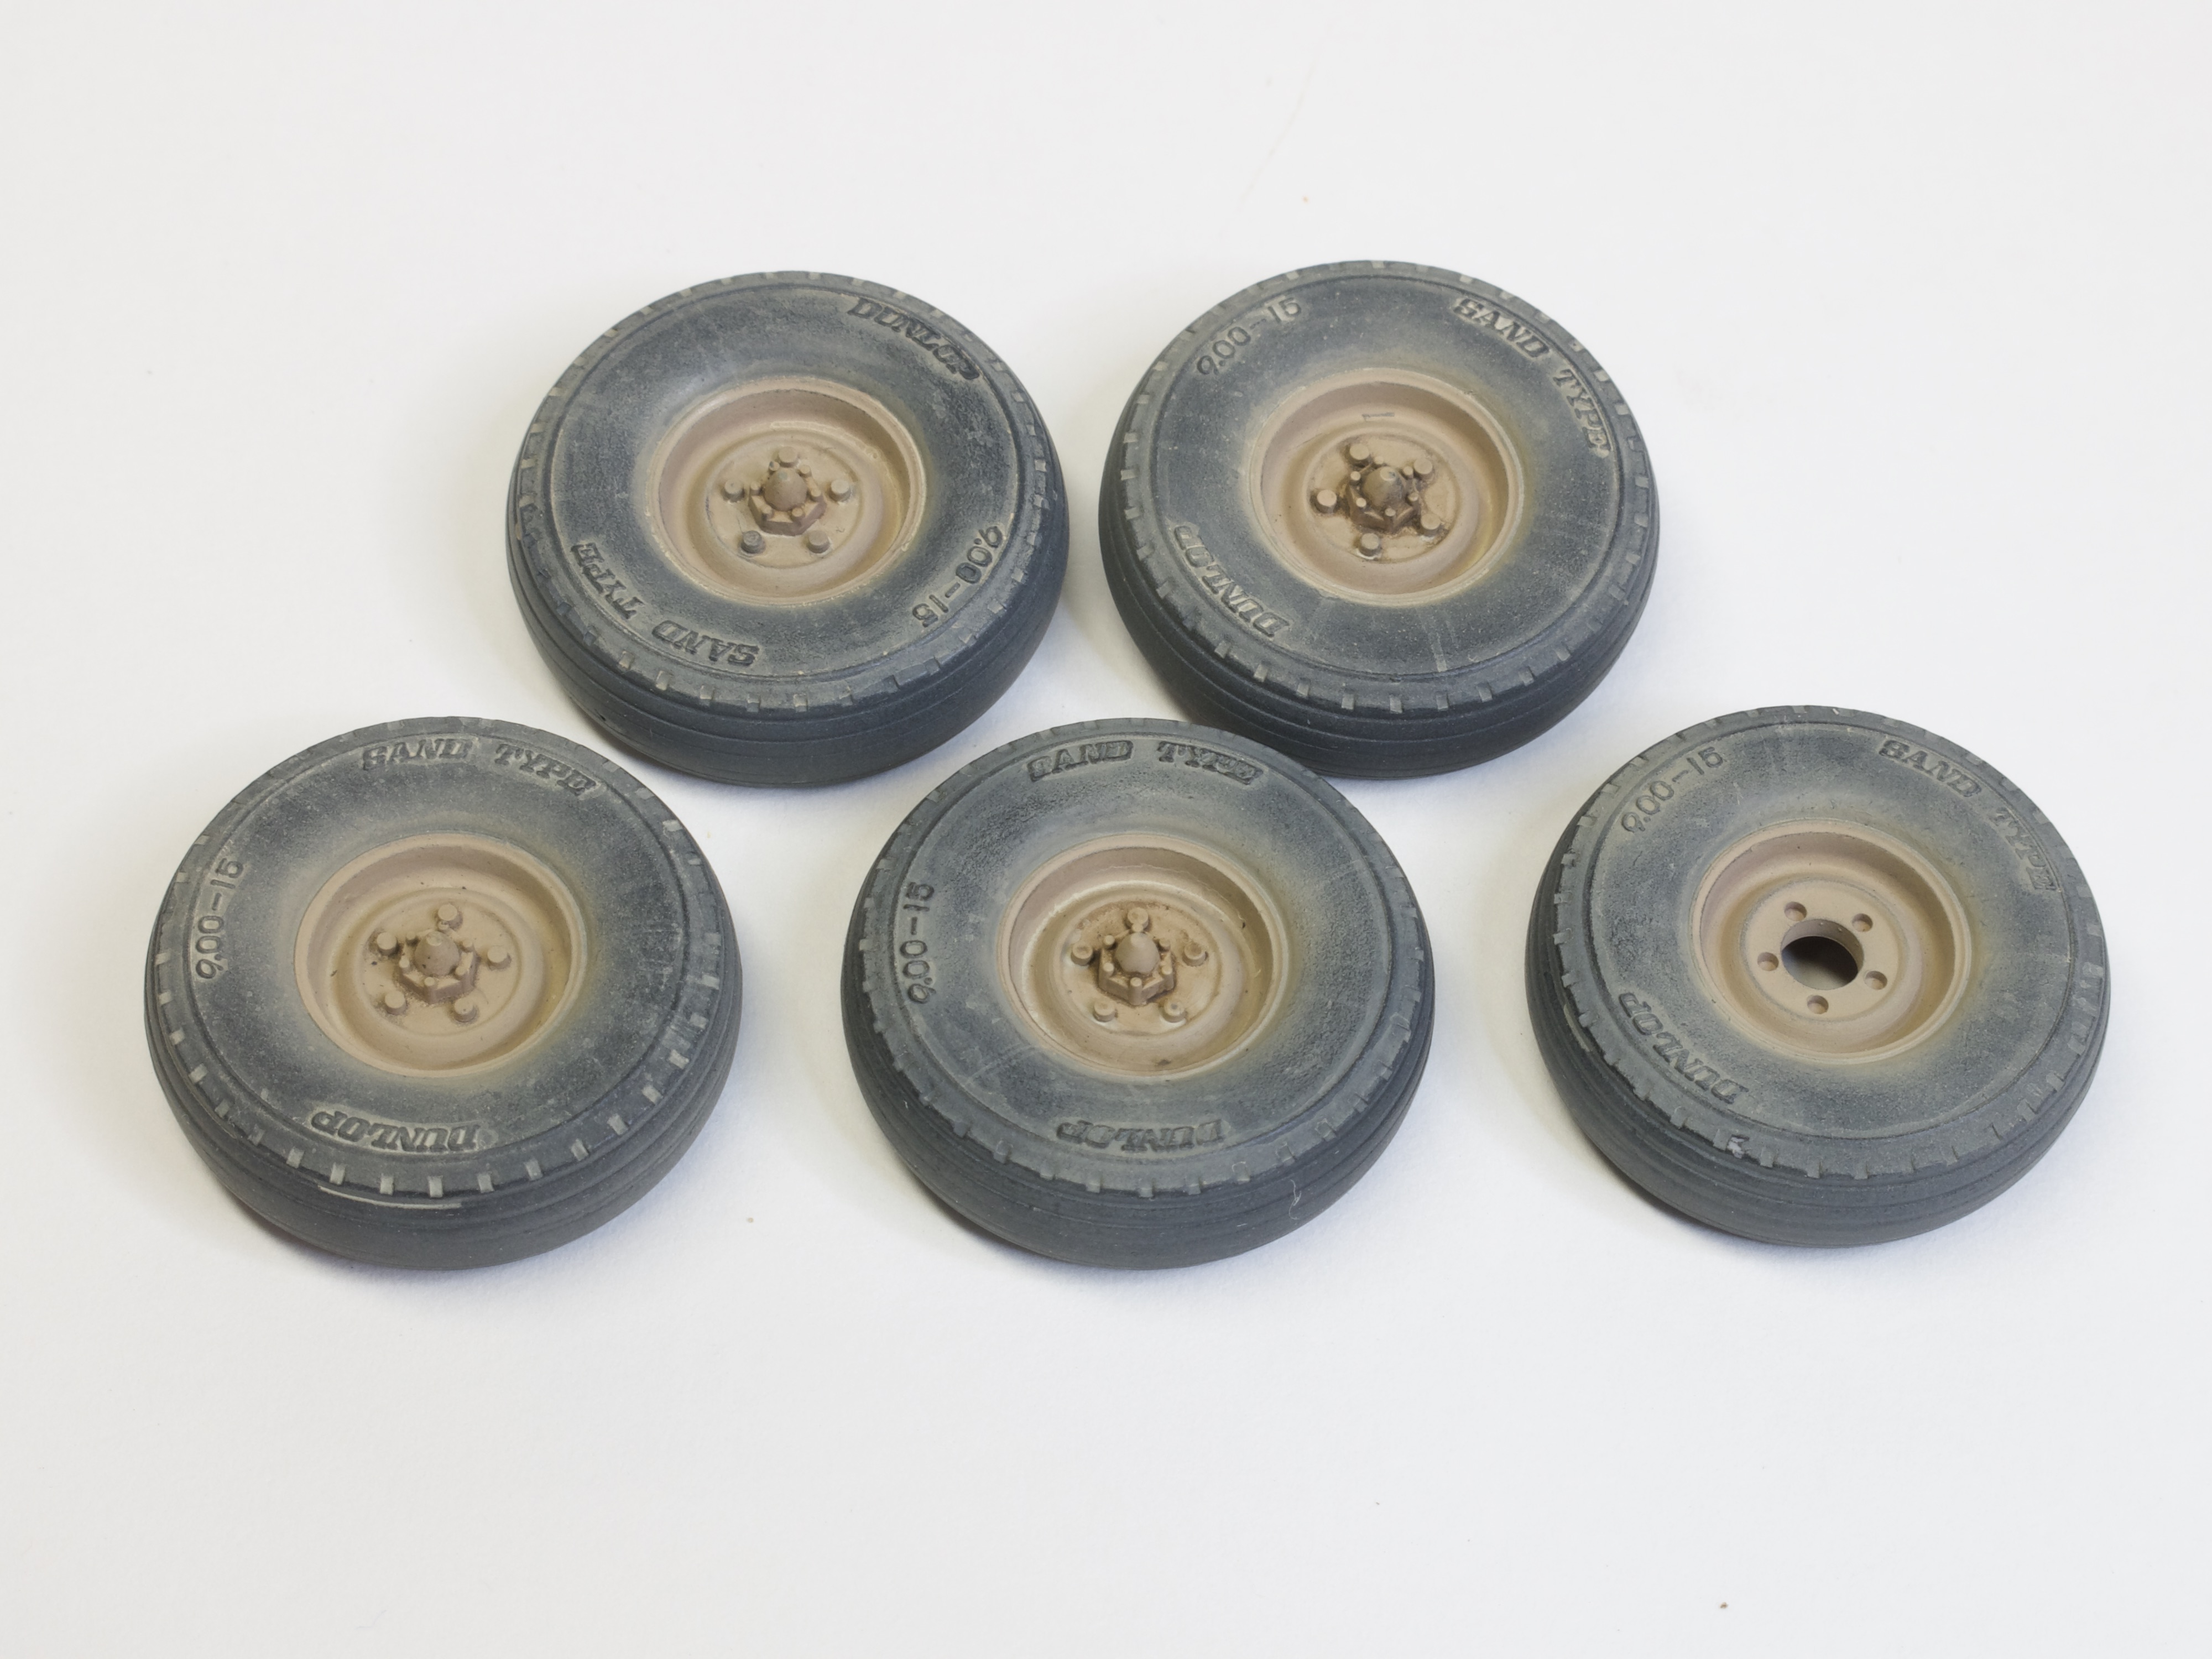
I began with the chassis, its ladder-like frame being moulded in one piece and then detailed with leaf springs, axles, prop shafts and exhaust. Little of this can be seen, so I focussed only on what would be visible under the completed model and ignored the rest, electing when the time came to only paint details that would be similarly on show. Given the limited time scale, I had little wiggle room to be clever, so cutting corners in this way seemed a more than sensible approach! Wheels cleaned up and assembled, attention turned to the upper bodywork and details.
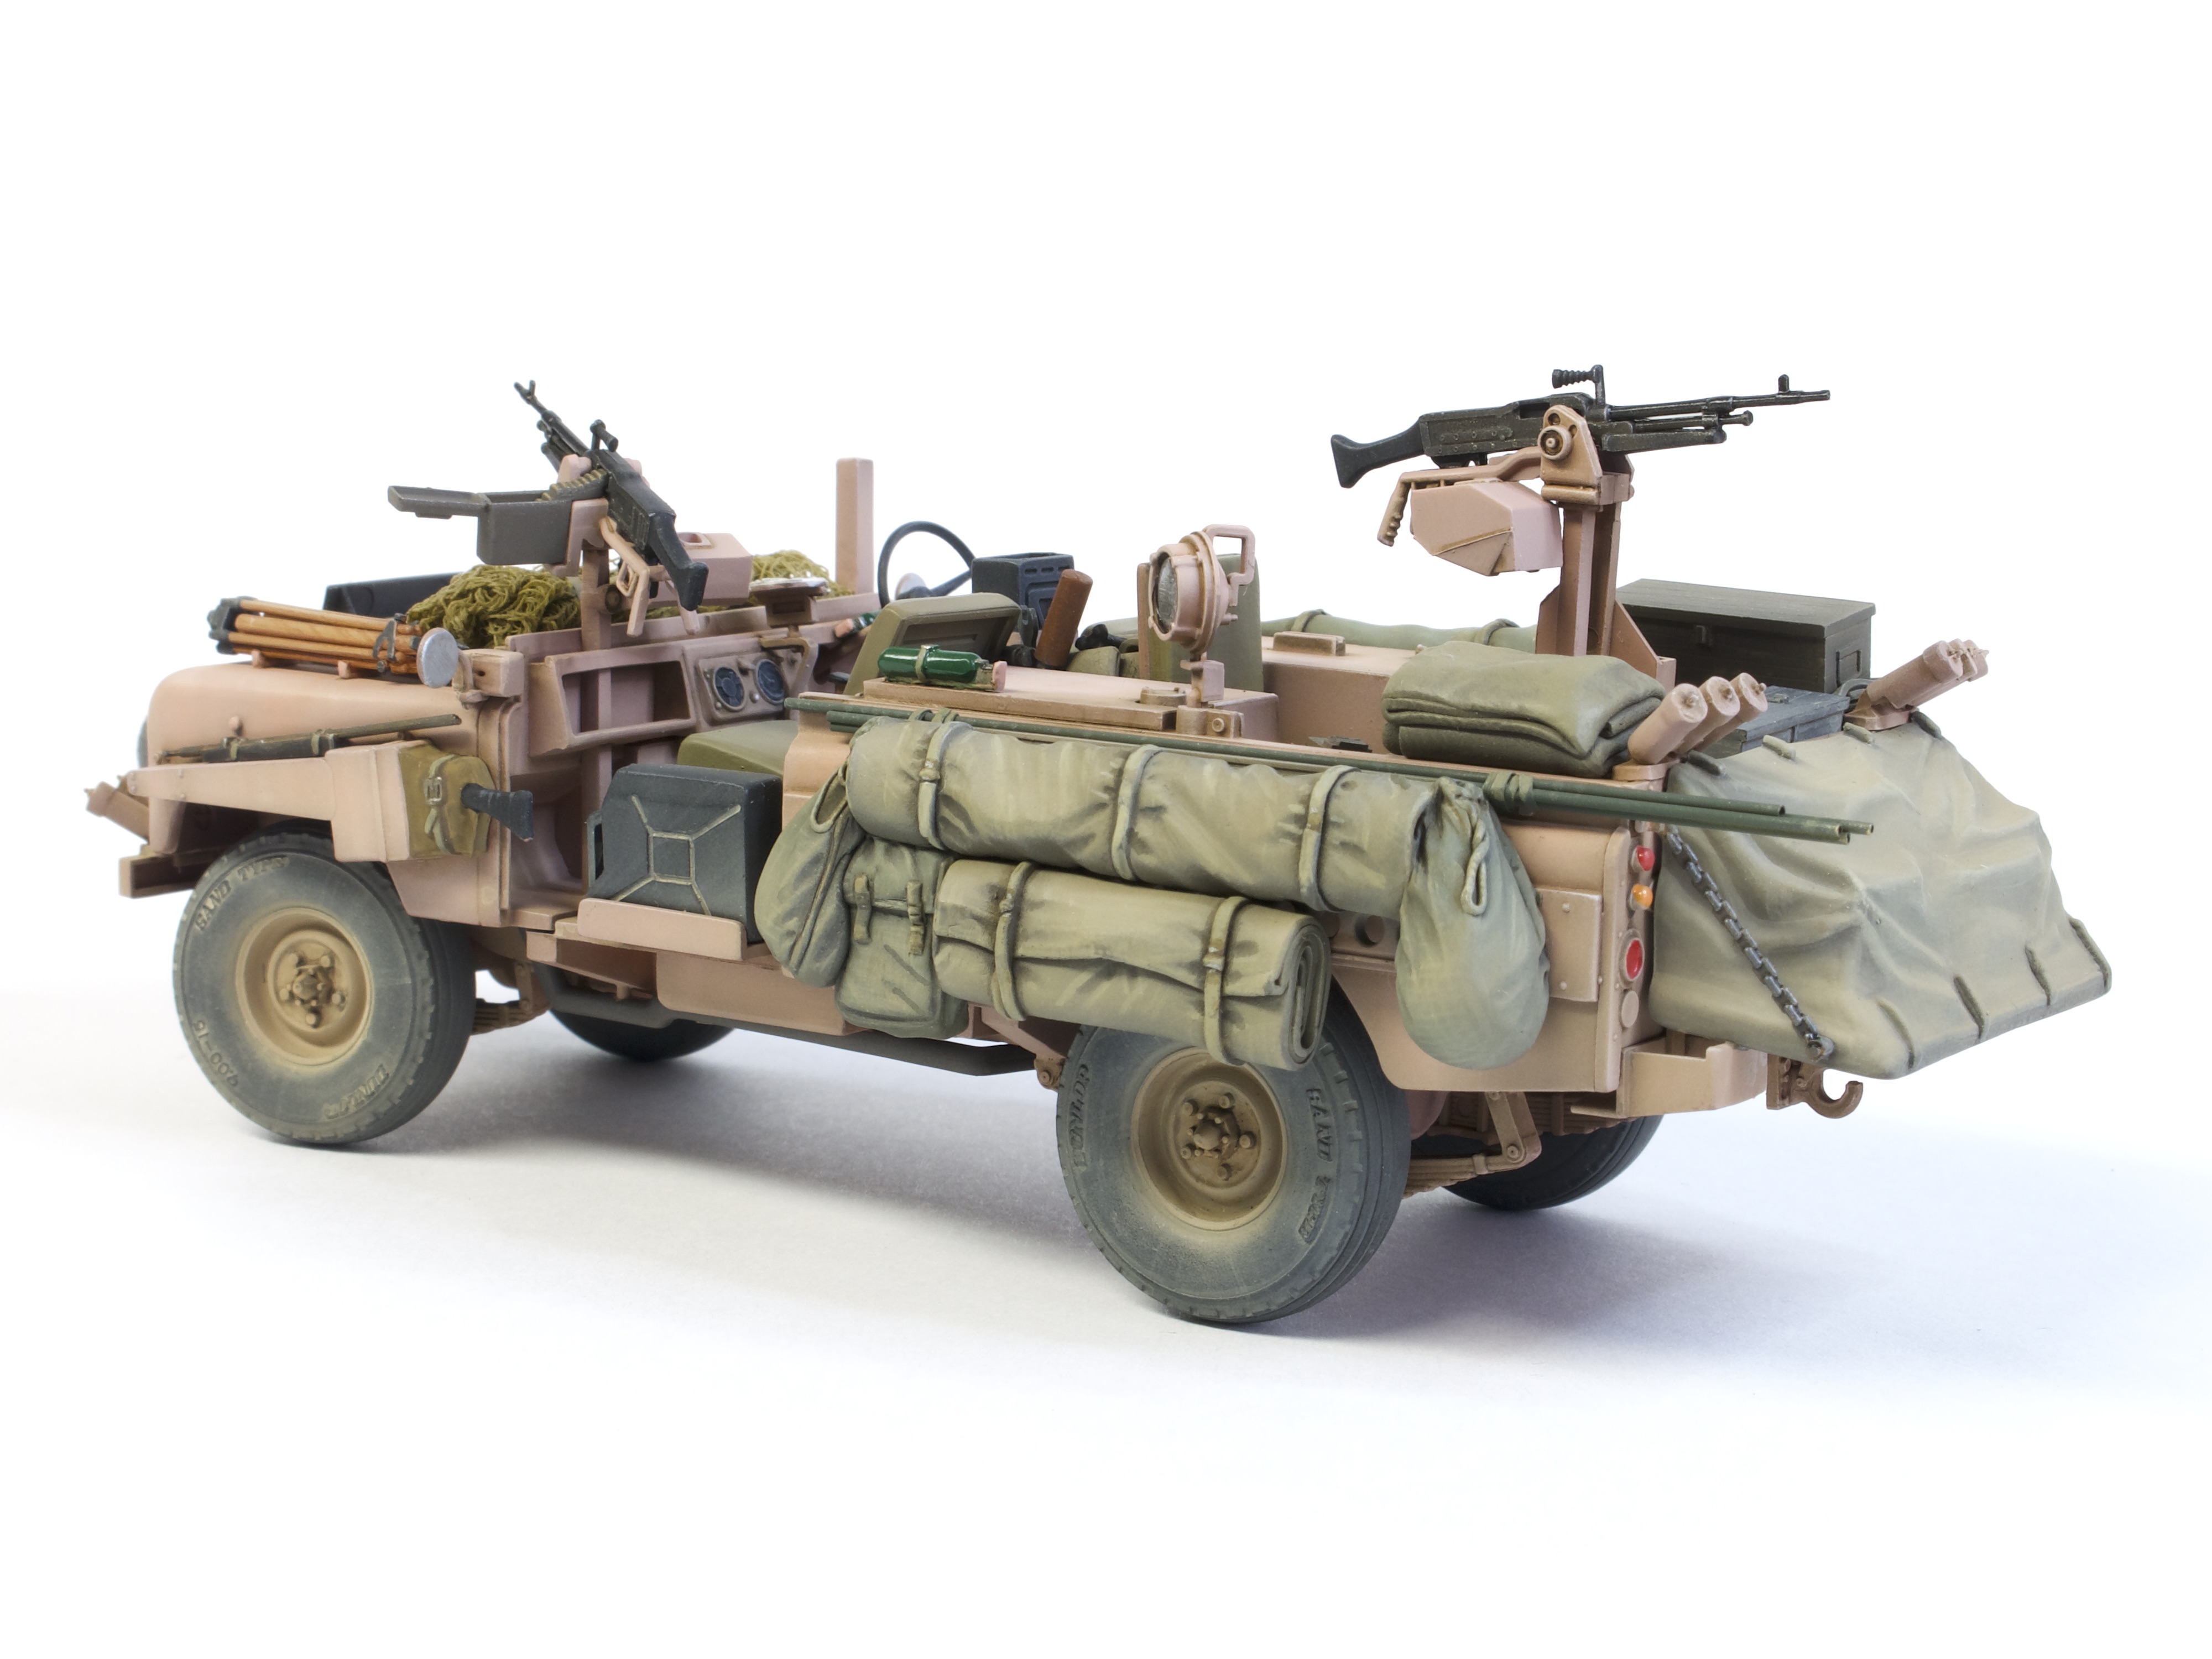
The bonnet and truck bed are fun to build, the limited number of parts around each area allowing both to be completed quickly. Given the flat-pack nature of their breakdown, you will need to be careful with alignment prior to reaching for the glue pot. Though the fit of this kit is very good, it’s not quite in the league of today’s Tamiya kits, so you will need to spend a little time both aligning parts and in places, smoothing joints, before flowing glue (in this case Tamiya Extra Thin Cement) along each one. This was particularly so with the panels over the front wheels which not only needed care to locate, but also a dab of Mr. Surfacer followed by light sanding, to create an acceptable joint. Remaining construction can be completed with ease, before moving on to the stowage.
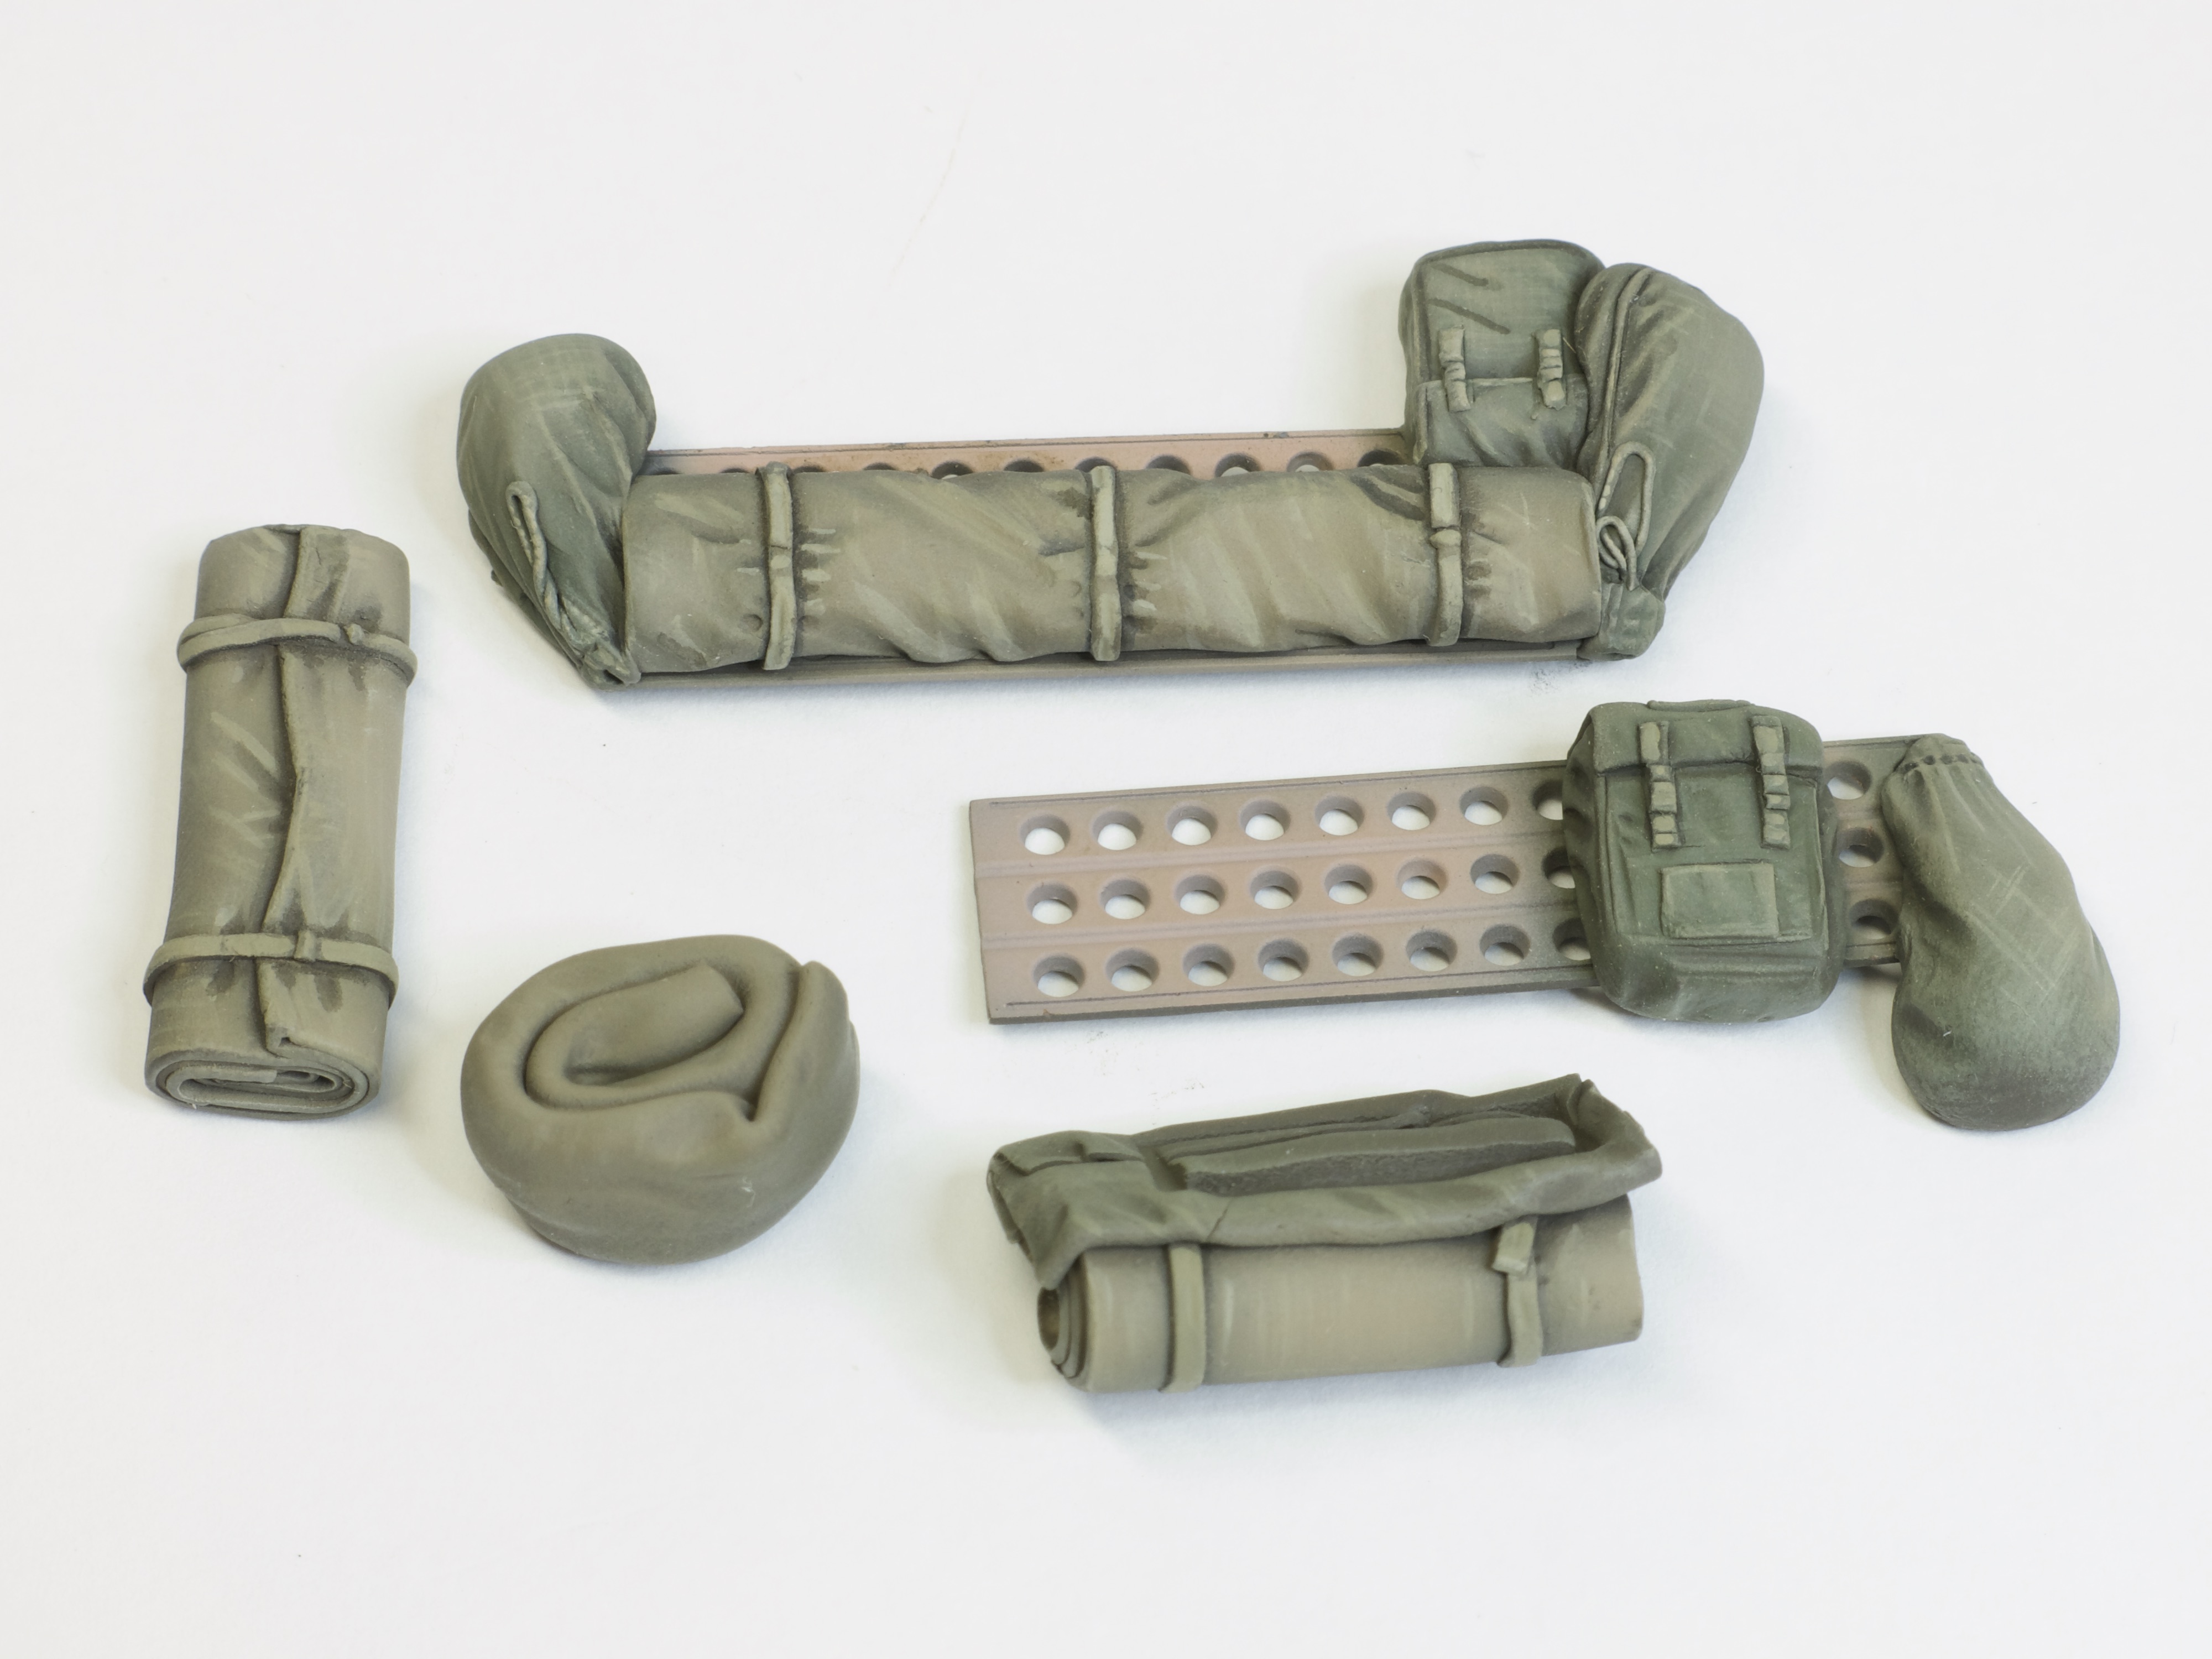
The box top suggests that the kit contains ‘plentiful’ accessories, but I cannot help think that that short description is doing a lot of heavy lifting! Though there are some in the kit, they really only cover the basics so if you are like me and like to see your models a little more heavily stowed, you are in for some work! Given that I was unable to draw on the numerous accessories at my disposal, I had to make my own. I created bedrolls and tarpaulins from Magic Sculp and then smaller water bags and rucksacks from Green Stuff, each item being dropped in place before setting to ensure a natural sit and tight fit. The hard stowage could then be dealt with. Here, I simply built some plasticard boxes, both wooden and metal, a few tool boxes and then replicated, using Evergreen rectangular strip, the ammo boxes Tamiya have between the two front seats. This was very easy and straightforward, needing little more than plasticard, rod and strips and then a steel rule, scalpel and some liquid glue.
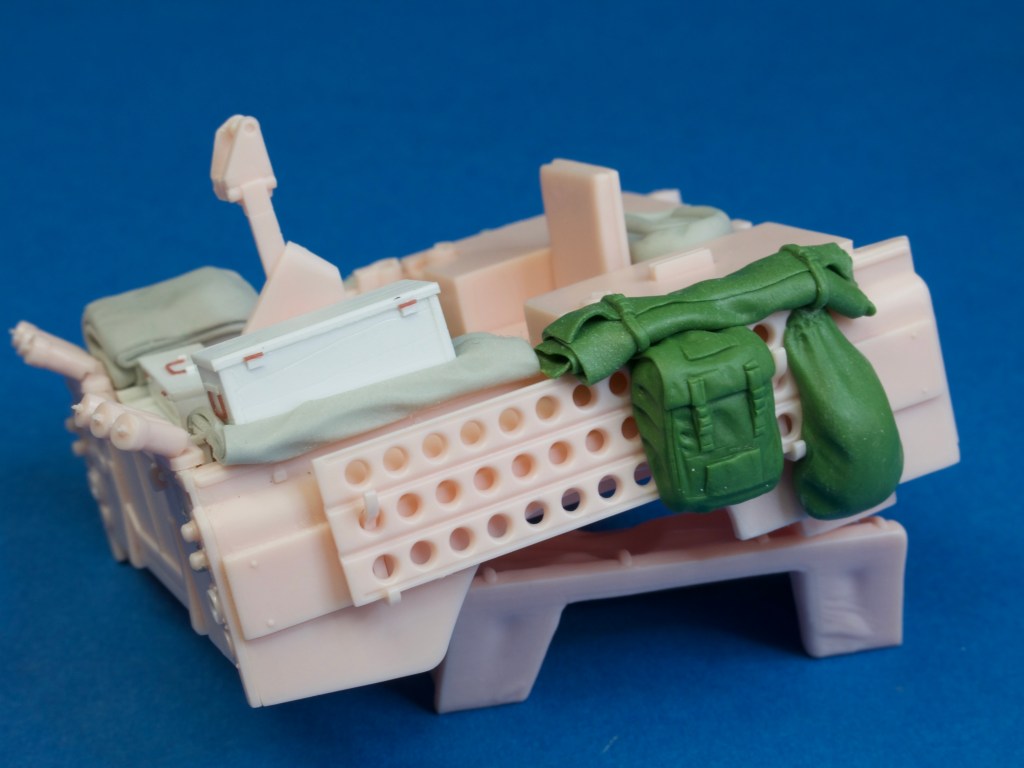

Though the additional details seems like a lot of work, in the end it wasn’t, needing little more than a day to complete everything. This though was my ‘challenge within a challenge’ offering something a little more complex to help on the way to finishing something different from the basic kit. I knew that the paintwork would be relatively straightforward, so needed something to offset that and as a diorama was out of the question (at least prior to the deadline), I had to try something different. Hopefully, the images see here will give you a good idea of how this was achieved and inspire you to try it for yourself!
The box top suggests that the kit contains ‘plentiful’ accessories, but I cannot help think that that short description is doing a lot of heavy lifting!
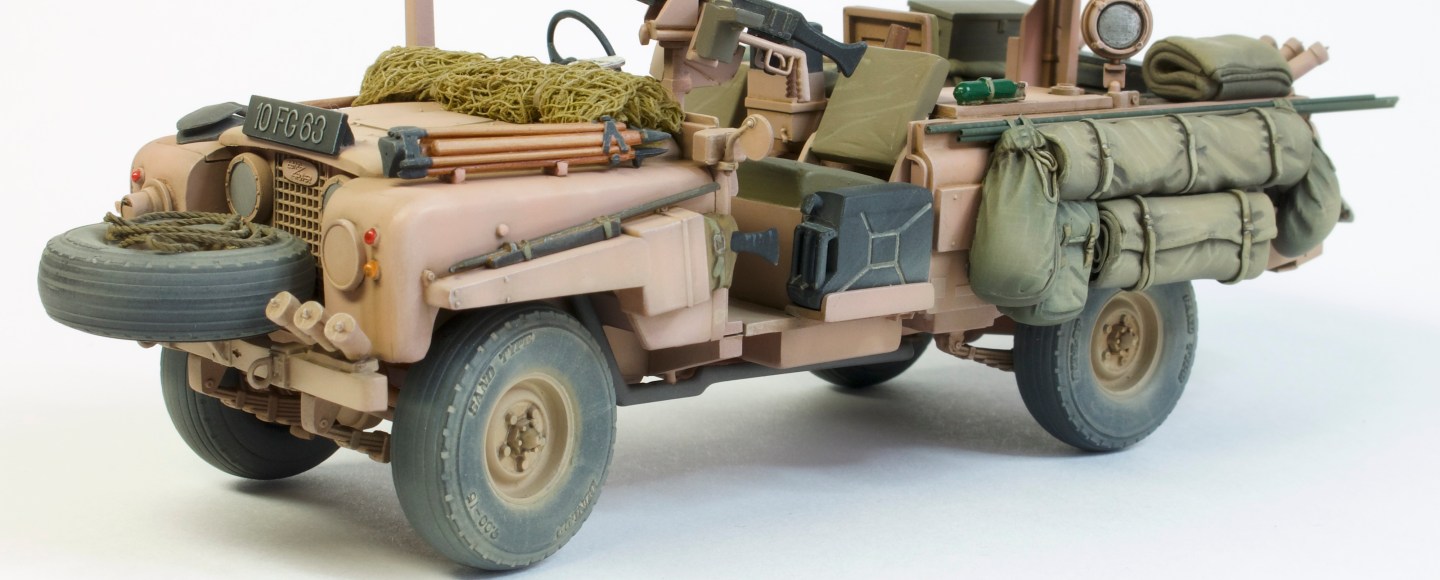
Painting this model was a really straightforward process. First things first: that pink colour. Contrary to popular belief, the pink used on these Land Rovers was not a standard colour, but rather a shade mixed in the field. Opinions vary, but it would appear that the colour was mixed using Red Oxide Primer and then either British Light Stone, or white, different shades being the result. In this case I mixed mine using Tamiya Hull Red, Desert Yellow and White, the resulting paint being a lovely warm pink that wasn’t too bright. I then mixed a slightly darker shade using Flat Earth and Hull Red to using as a base coat. This would then allow me to carry out the same painting processes as I have on all of the Verlindenesque ‘Legacy Builds’ through this summer: base coat, cloudy overspray, washes and then drybrushing. Detail painting could then follow, before turn attention to those items of stowage…
The softer pieces of stowage, bedrolls, tarpaulins and bags, were all airbrushed with Tamiya acrylics and then painted in much the same way that I would paint a figure: washes, drybrushing and then oversprays with lighter shades to blend everything together.
It was at this point that the model appeared to be more of a hybrid than a true continuation of my ongoing series. The reason for this is that although much of what I carried out on the model was indeed from the ‘Verlinden Way’ books, I also added layers of work that were more in keeping with my own developed techniques so that the finish was slightly deeper, especially when it came to the addition of dust layers. Here, I used washes of Tamiya Buff to impart a used appearance, this being especially useful around the wheels and tyres and then over the darker items of stowage where lighter washes would standout more than those mixed from darker shades, such as Raw Umber and matt black.
Were I to build another of these kits, I would also add chipping which is noticeable by its absence, my desire to let the pink speak for itself rather than overwhelming it with other layers of wear being uppermost in my mind. As I say, maybe next time…
With everything painted and assembled, the model could be brought together and then finished off with a few additional items such as that little tow rope, some Albion Alloys netting poles and a roll of nondescript cable hanging from the driver’s-side PSP. And that was that – I finally, after all these years, had a Tamiya Pink Panther!

FINAL THOUGHTS
This was a really fun build that resulted in a model that I really like. But more than that, it was a great project to not only build my model, but also see what Jonathan had come up with using Italeri’s kit as a base. In fact, we enjoyed the model so much, we are considering swapping kits and building two more, this time in European, green colours. If we do do that, you can be sure to see the results on here!
Thanks to The Hobby Company for the kits used and their continuing support throughout this ongoing series.
For further information!
If you would like to see a little more about this challenge, including Jonathan’s model, please take a look at the following pages…
Video reveal of models upon completion of challenge:
Jonathan Mock’s Italeri Pink Panther
The Interesting Modelling Company

This is a central hub for both the challenges and other news that we collect together. It is also the pace where you will be able to catch up on all of the videos that Jonathan Mock and I create, both for our Ten Day Challenges and our weekly news round-ups that go live at the weekend.

Impressive work as always Spencer.
LikeLike