“If you spend time studying a sheet of instructions and you can see that parts suggested to be added early on, look likely to break off as the build progresses, you are already well on your way to finding those simple to navigate paths that well all crave”
I think it is fairly safe to say that in the main, kit instructions are there merely to guide a modeller through the process of building a kit, some lateral thinking and deviation being part of the process along the way. They are not gospel, nor are they always drawn by modellers with experience of kit building, modellers who would instinctively know how best to construct the parts and paint the results. Sometimes they are just what a designer sees as the best way to build the model and though there are companies that offer well thought out instructions (Airfix, Wingnut Wings, Tamiya), there are plenty that leave much to be desired!
When you first begin to build models, or tackle something that is fundamentally a challenge (such as a Wingnut Wings biplane) I would always suggest studying and then following the instructions until you get a feel for the job in hand. Once comfortable with the process, you can then formulate your own plan of attack, happily using the sheets as nothing more than a guide to completion of your chosen model.
Over the years I’ve seen some superb instructions sheets, but also some that are truly awful, offering guidance that is more hindrance, than help. This being so, as experience grew and the same type of model was passing across my desk, similar steps would crop up and thus the same route could be repeated during each project. For instance, with aircraft I would always glue everything together that came in two halves: wheels, bombs, drop-tanks, wings, etc. I would assemble the cockpit to a point where it could be easily painted, construct wheels bays and if possible, even fix wings in place before the fuselage halves were joined – anything to get the building out of the way! With vehicles — especially tanks — I would always deal with the clean-up of the wheels, construct the suspension and then move on from areas that were boring to those that were more exciting, such as the hull and turret. It mattered not one jot that that was not the prescribed procedure, that’s what I did. It’s what I still do.

I remember many years ago that most eloquent of scribes, Joe Saki, hauling Monogram over the coals for suggesting that you built the fuselage of their then newly-released Mirage 2000, followed by the wings, onto which you fixed all of the undercarriage parts and weapons before joining the wings to the fuselage to complete the model. His description of this instruction as “absurd” certainly resonated even to a young teenager who could see clearly that you should complete the airframe before adding the finer details. It just made as much sense then as it does now, so I’ve followed that doctrine to this day. It’s not a forced idea, just one that’s obvious; you create the largest possible sections and then add all of the smaller details: how can anyone argue with that?
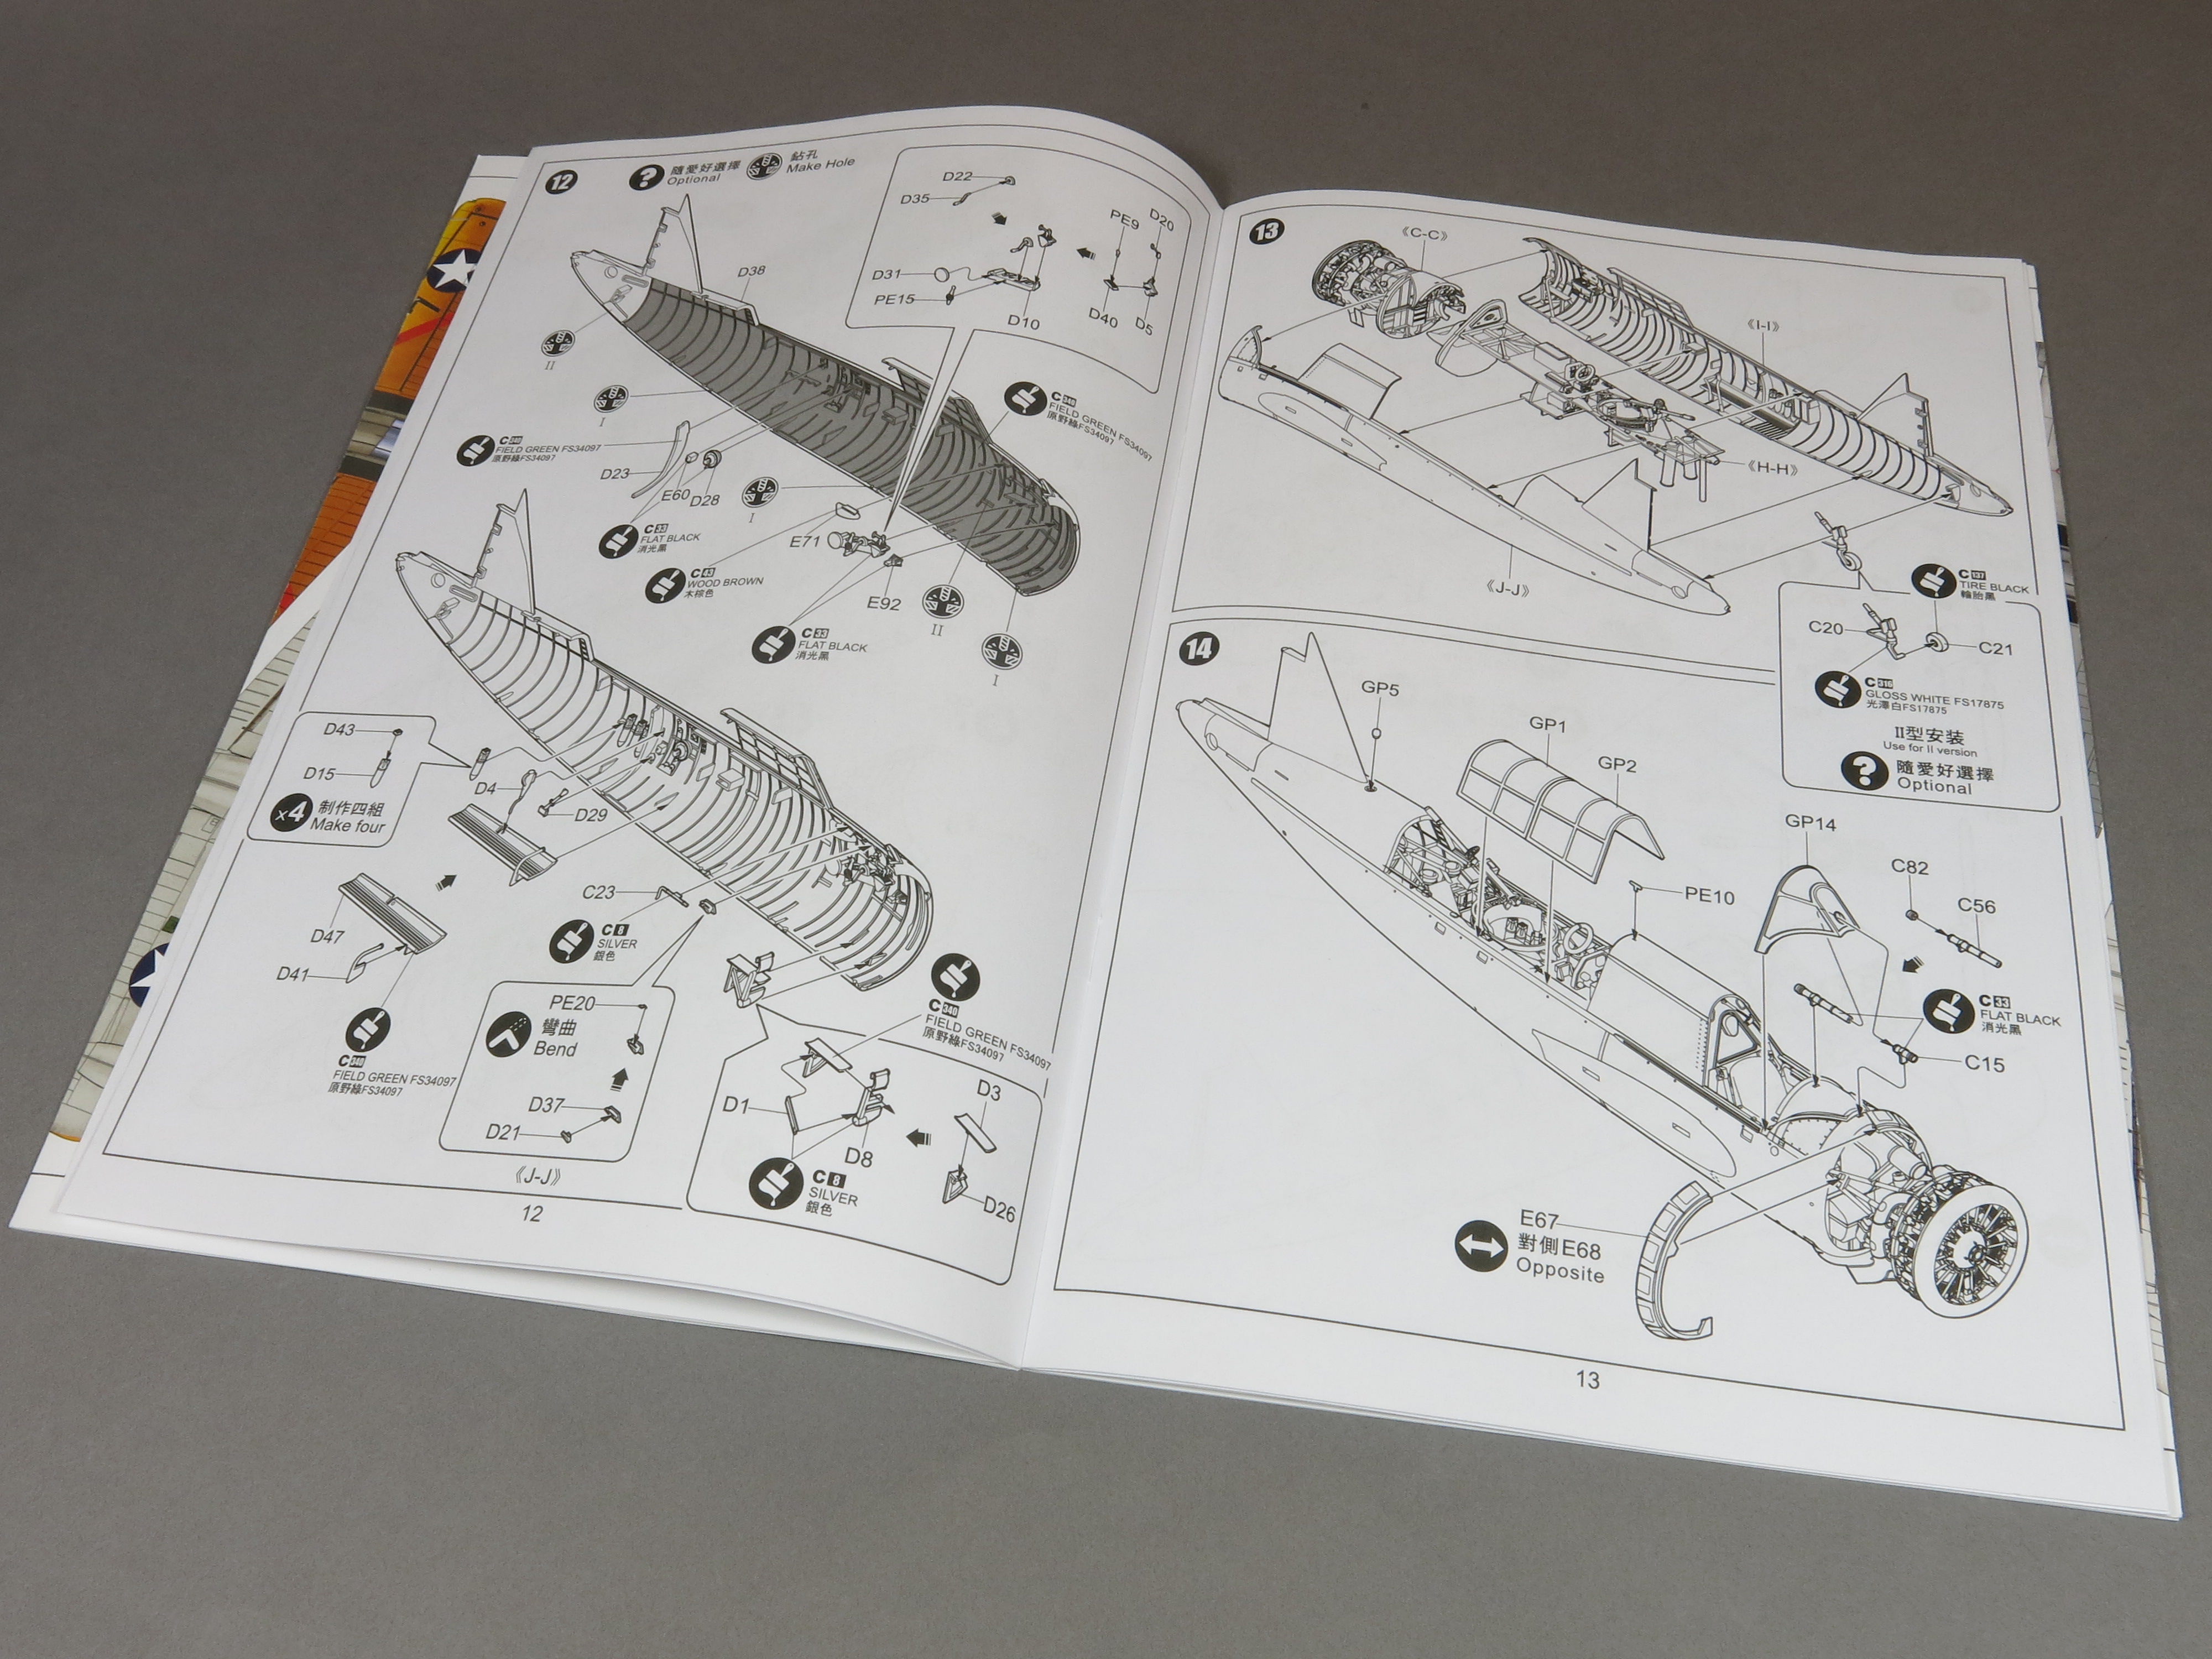
With such well trodden paths on which to walk through a project, it is not hard to see why I have approached the initial construction of Kittyhawk’s Su-17 in the way that I have. In the kit the fuselage is broken down into around a dozen parts, individual components that allow the construction of two different sub-types from this first release, but also other variants including a two-seat trainer, from later packages. The instructions as you might imagine, suggest that you build a fuselage that is split into three, initially, in three tubular sections: the first complete with cockpit and nosegear, an empty centre section and then the rear portion that wraps around the Lyulka engine, before bringing everything together to complete the picture.

Now, if this was a Tamiya kit I might — and I stress, might — have considered this route a sensible one to take; the fact that it’s a Kitty Hawk kit and that in the past the fit has been somewhat loose in their offerings, meant that at no point did I think it was a good idea! Instead, using some simple experience, I decided to combine the parts to produce two, long and rather traditional pieces, that I could join once the cockpit had been painted. That way, any adjustment that might be needed (such as the difference in circumference between the different fuselage thirds) could be dealt with easily and filling should it be needed (it was), carried out before any painting had taken place.
For more information on that approach on the Fitter, please click the following link:
Finding simple routes through the construction of a model is something that I always suggest to modellers keen to learn not only the basics, but also more complex builds. Not only does it speed up the process by allowing items needed later on to dry whilst working on other areas, it also cuts down on the chance that you will be caught out by routes that are often suggested by designers rather than modellers. But of course this takes confidence; it is easy to sit here typing guidance when I know that it works for me, but less easy if you are at a point where you are still unsure of your own skill set and whether or not what you can do, will work outside of personal experience.

Instructions are obviously an integral part of any kit, but they are by no means set in stone. If you spend time studying a sheet of instructions and you can see that parts suggested to be added early on, look likely to break off as the build progresses, you are already well on your way to finding those simple to navigate paths that well all crave. If a kit can be built outside of a prescribed sequence and that allows for adjustments to made easily to improve the fit of the parts, deviate from the guide! If sub-assemblies can be completed and fixed in place during final assembly, build and paint them separately. If it’s just as easy to build a model almost to completion and paint it in one go, build and paint it in one go, that way you are only painting what you can see and not wasting time on irrelevant time-wasting that you can’t. Simplicity is the key: don’t make life needlessly difficult!

So true! Especially when building WW 1 aircraft..
LikeLike
Nowadays mainstream kits are most often CAD designed and the CAD model is used to design the build and markings instructions. I believe that the instructions are often made while the moulds is being tooled in order shorten development time by parallelizing the product design process. This leads to a problem: the customer is to build a plastic model, not a CAD model. Plastic parts aren’t accurate representations of the CAD objects because CNC machines have finite precision, edges/corners often cannot always be made razor-blade sharp and parts can suffer some warpage. This implies that the kit producer needs to revise purely logical assembly flow to integrate some real-world inputs from test-shot builds. They may not always have the time to do so (distributors and shops expect ETAs to order new product and restock existing products). That’s an explanation why instructions often need to be digested.
LikeLike
Well said.
Speaking as someone involved in writing some instructions right now, i think its safe to say that instructions are often, if not always written in the “End Game”, where there is just an overwhelming desire to get the project wrapped up, pushed out the door… or to use GM’s term, “Thrown over the Wall”.
As a consequence, there’s probably not as much attention paid to them as there should be. To the people who design the parts and make sure they fit together, i think that’s where their concerns end. Looking at most instruction sheets you can see that they were not laid out by an experienced model builder; for exactly the reasons you cited.
-d-
LikeLike
Instructions are just a part placement guide for me, rather like a serving suggestion on a tin of mushy peas!
LikeLike