
I know that many modellers see the extreme nature of weathering as the fun part of their projects and that’s absolutely fine. I often see it as an ugly addition to paintwork that I want to look attractive and eye catching.
9th December 2025

Yesterday I revealed my latest build, a simple stick and paint project that took the superb Tamiya 1/48 ‘109G-6 from box opening, through to completed model. The genesis of this project was a question that asked if a model built in the clean style of those from the early eighties, could be as interesting as those built using modern tools techniques and ideas that are used to create weathered replicas, de rigueur in 2025.
Now that the models are finished, I have two builds that I can directly compare and perhaps use to drive my work and its style going forward. Here are those two builds…
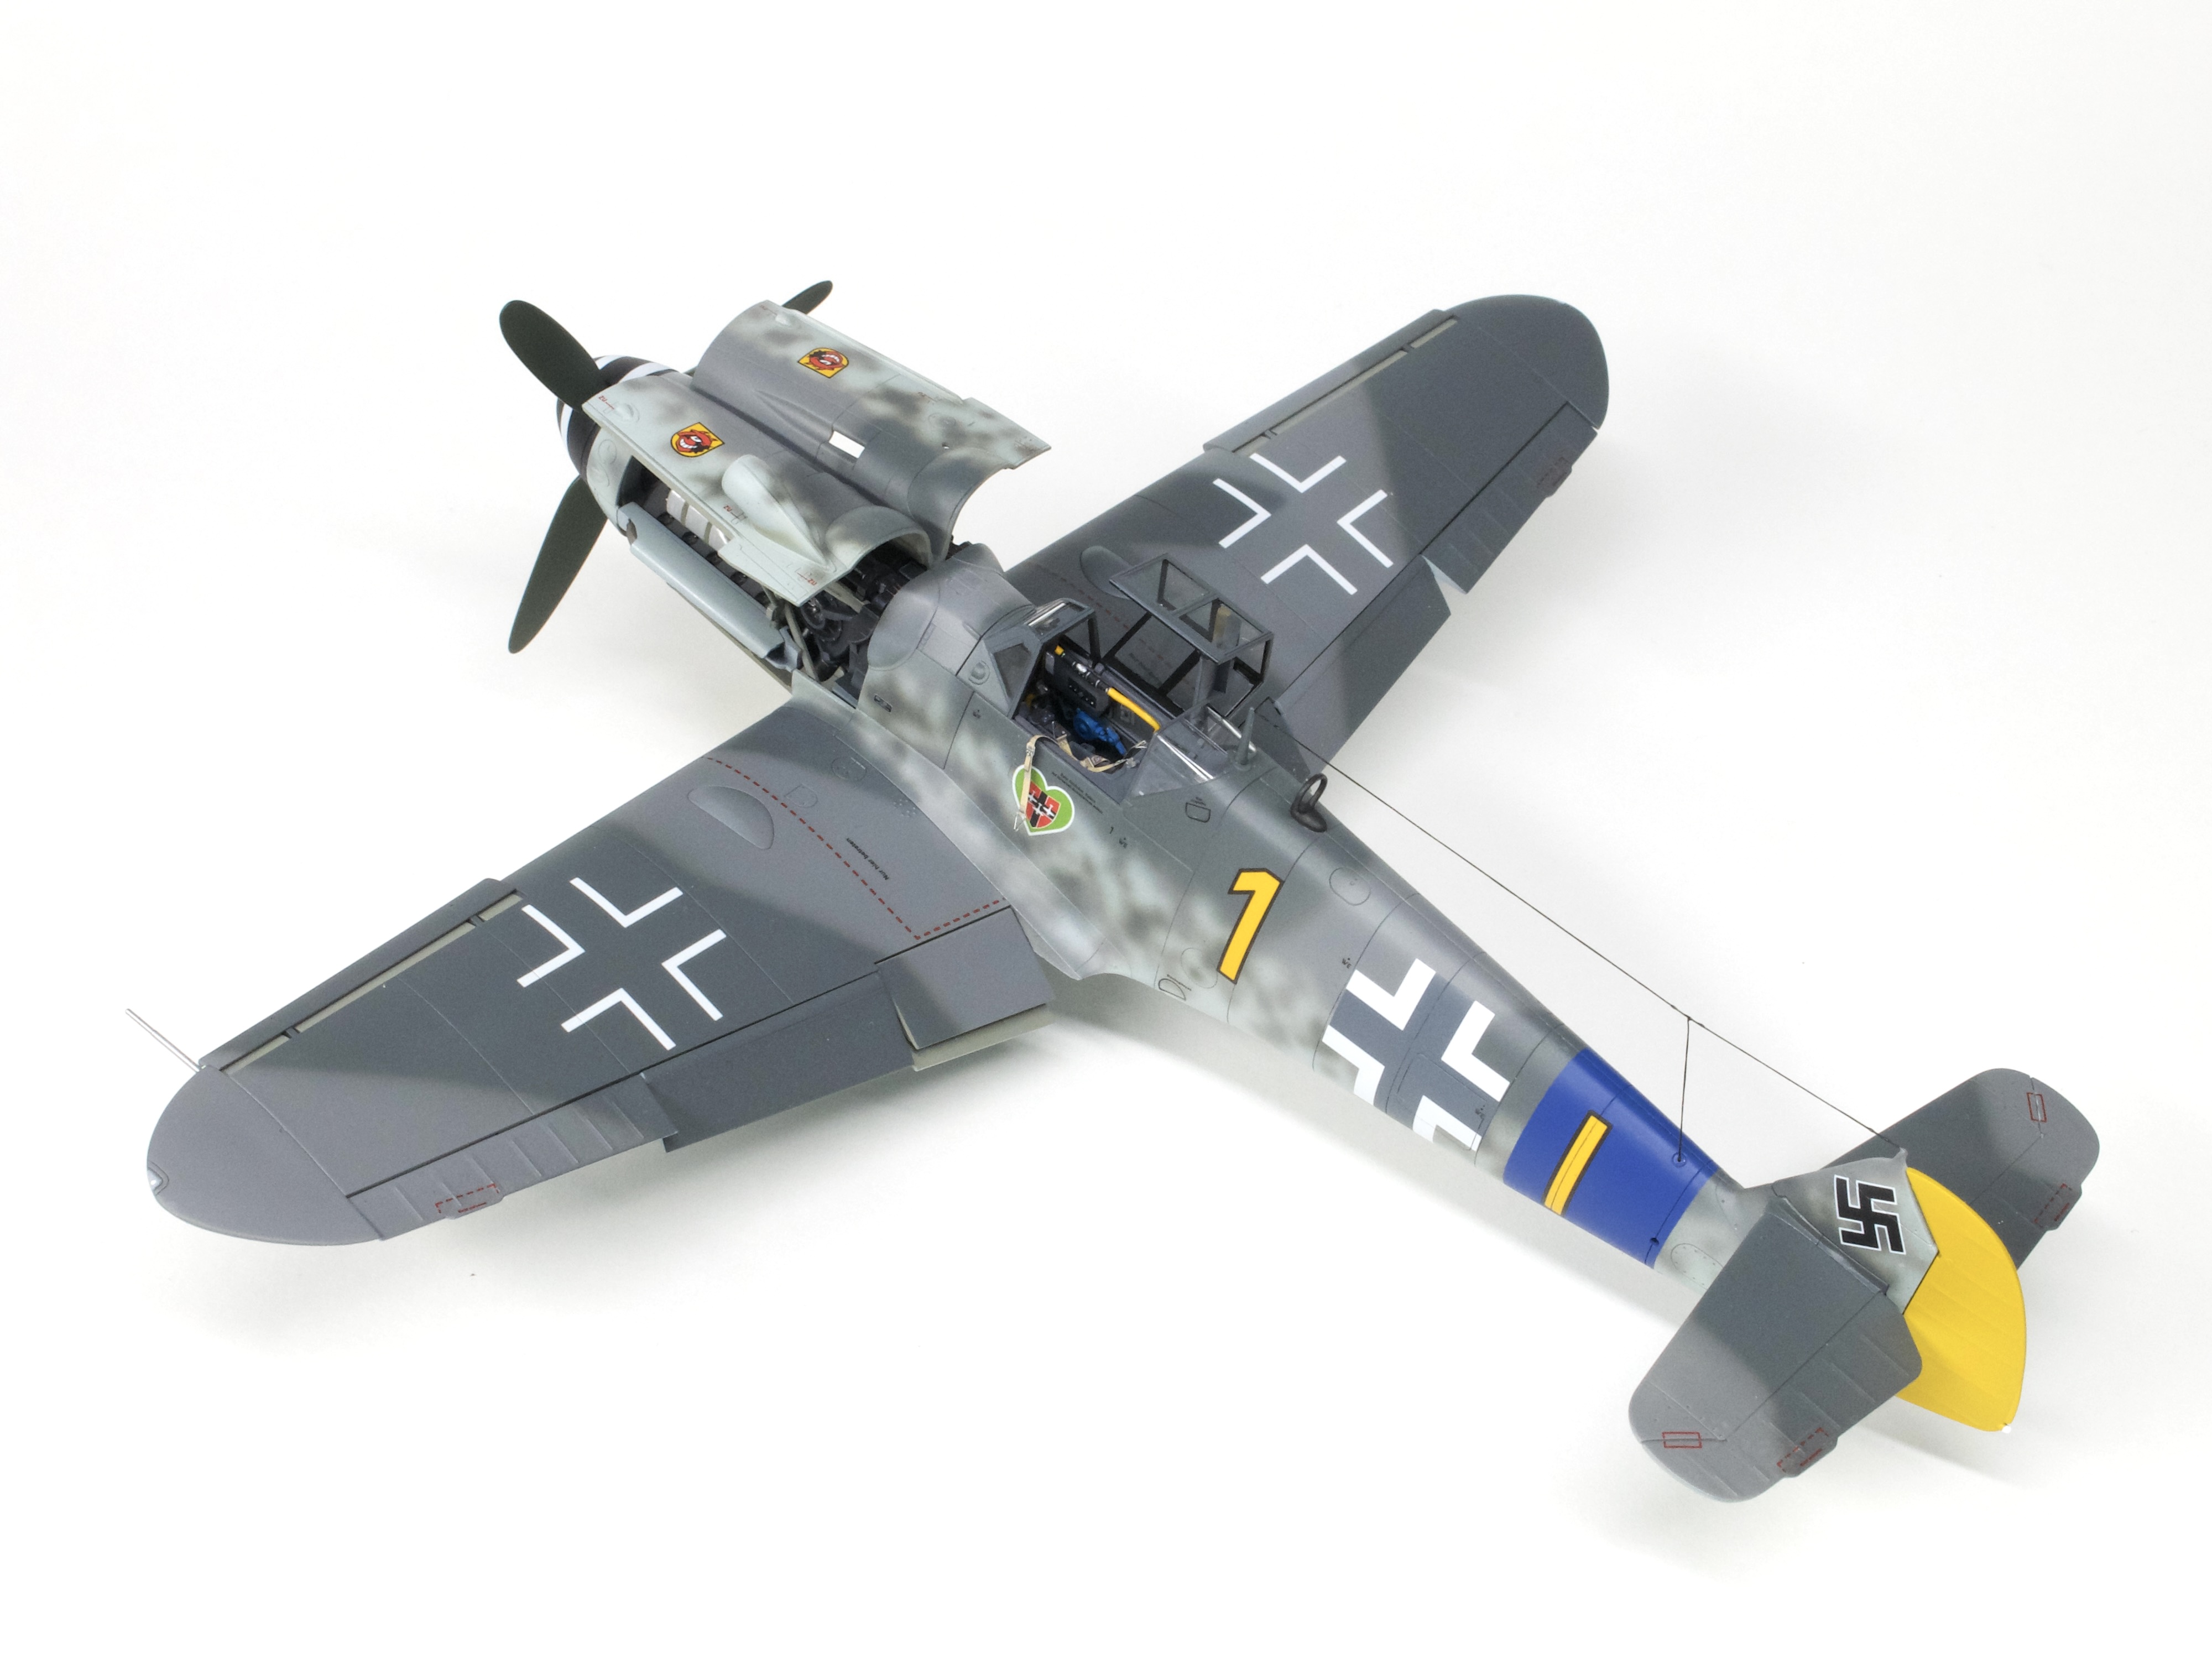

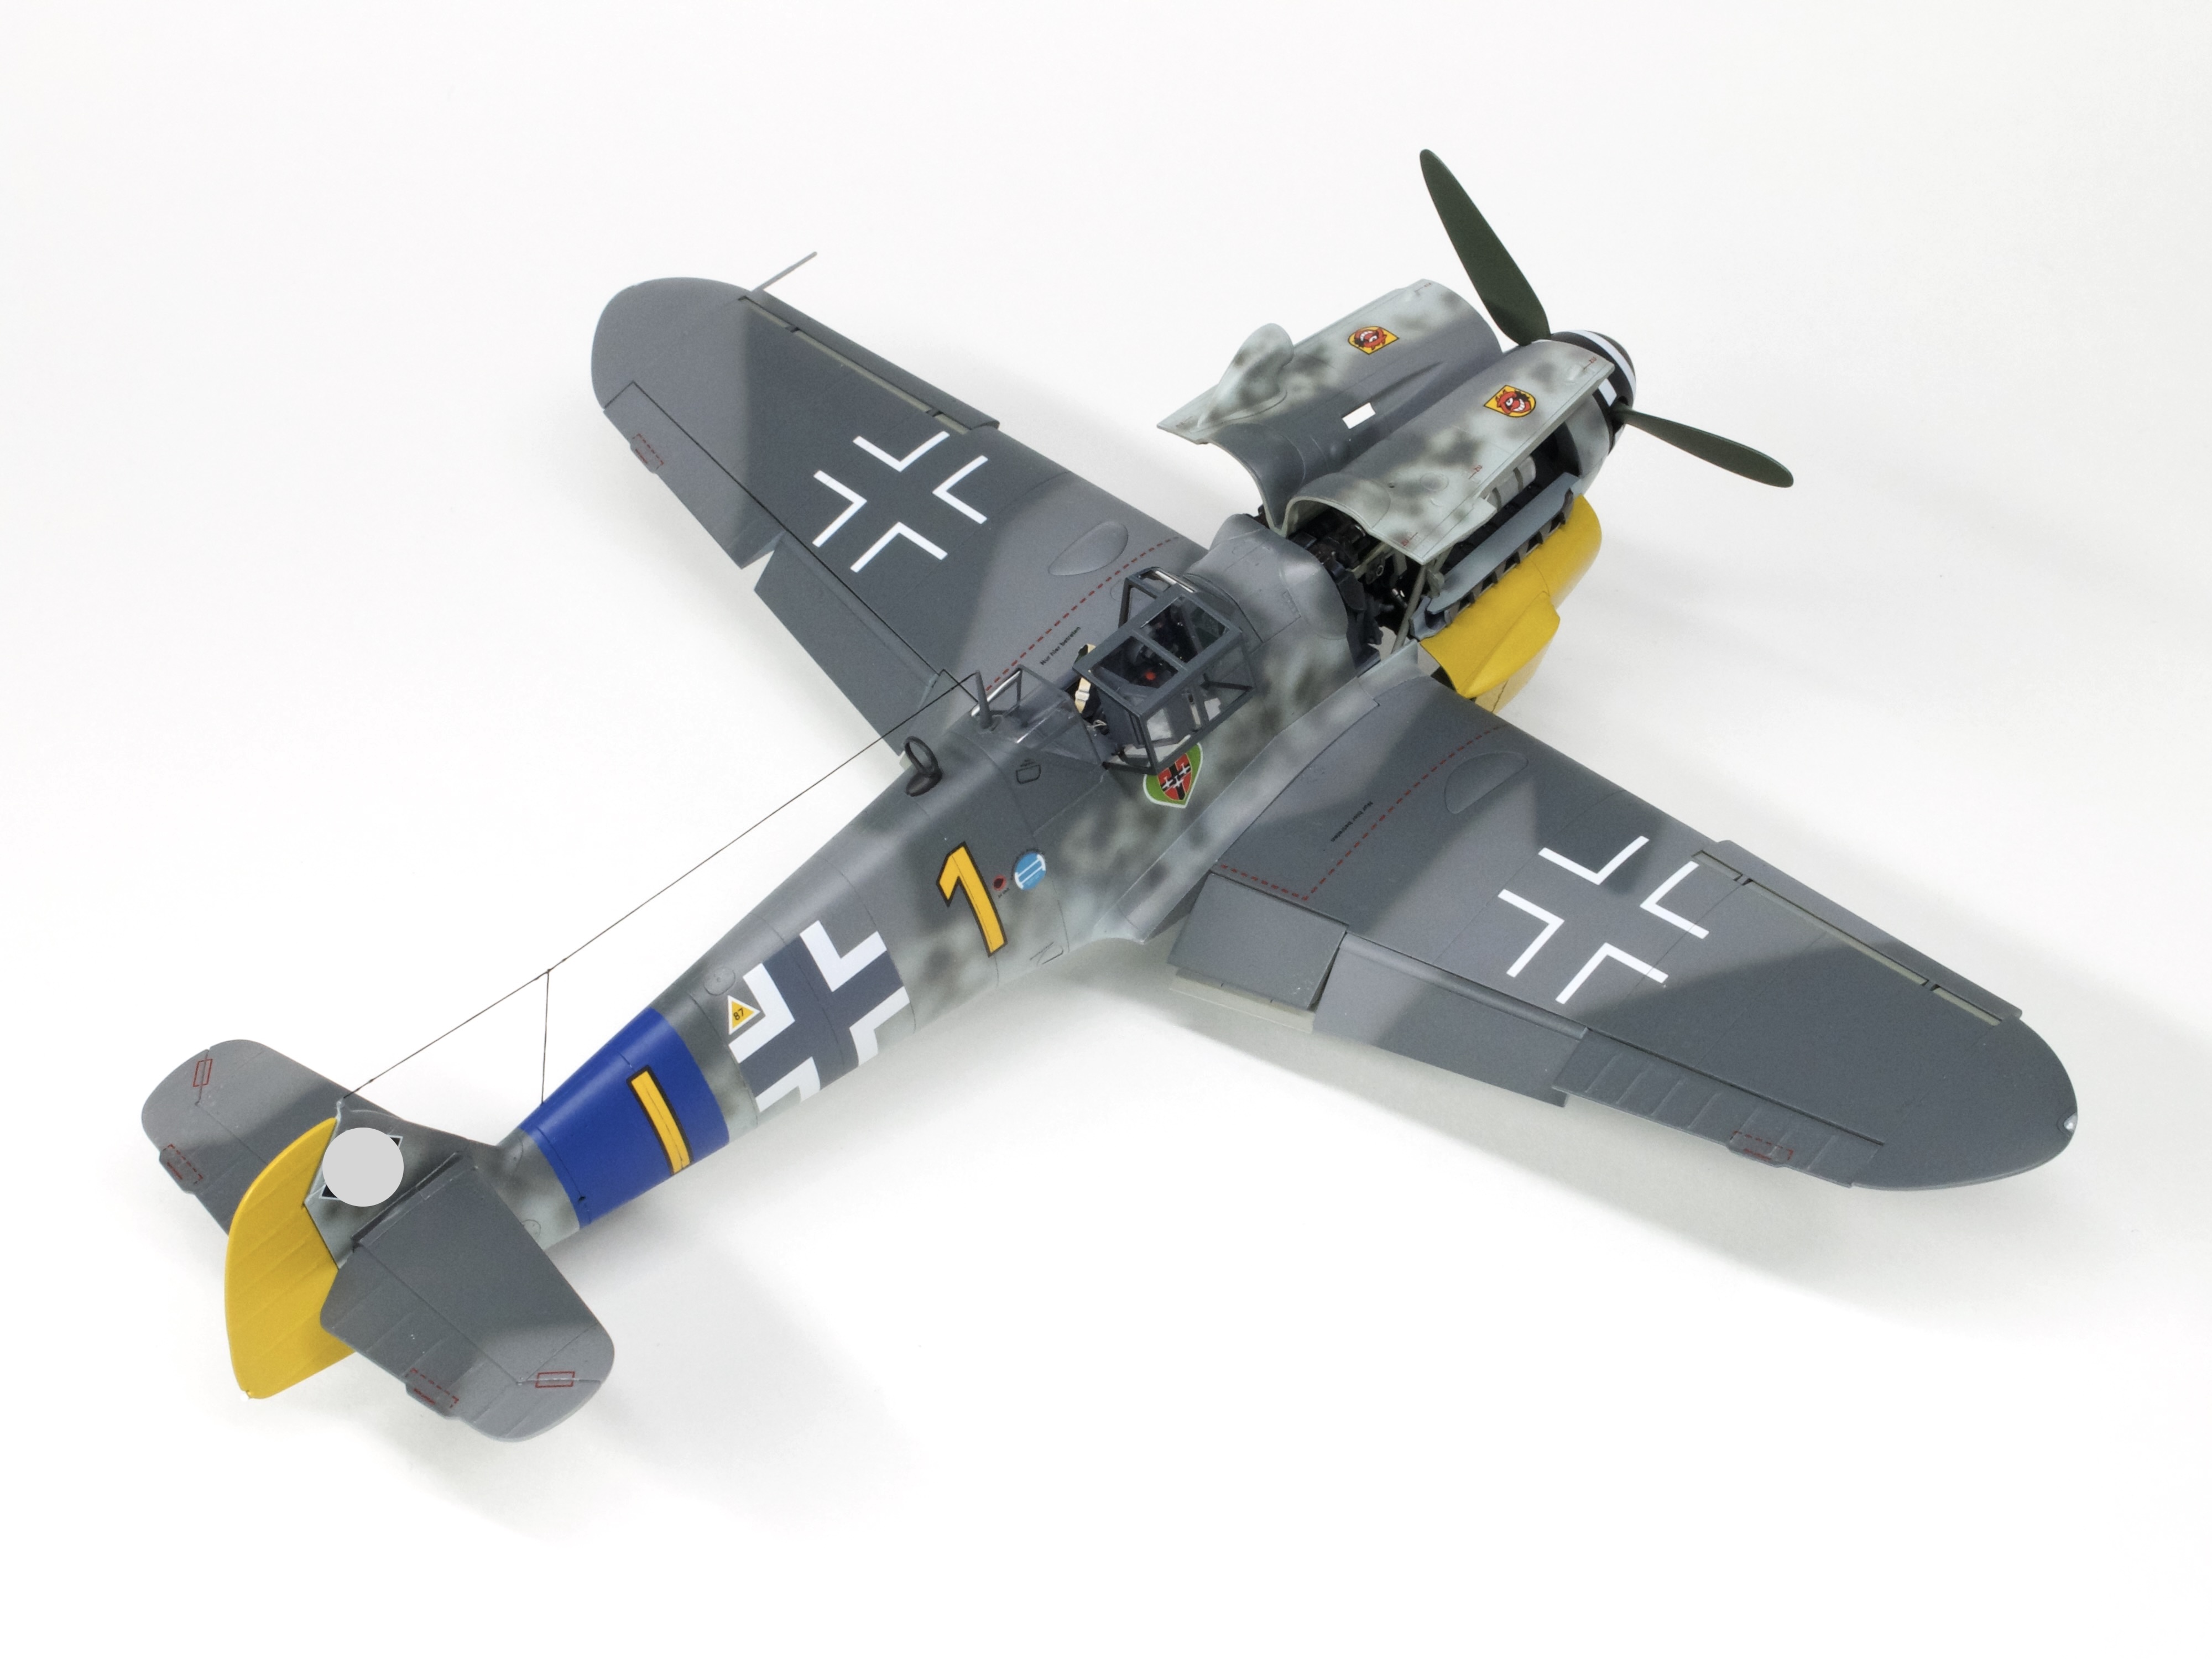
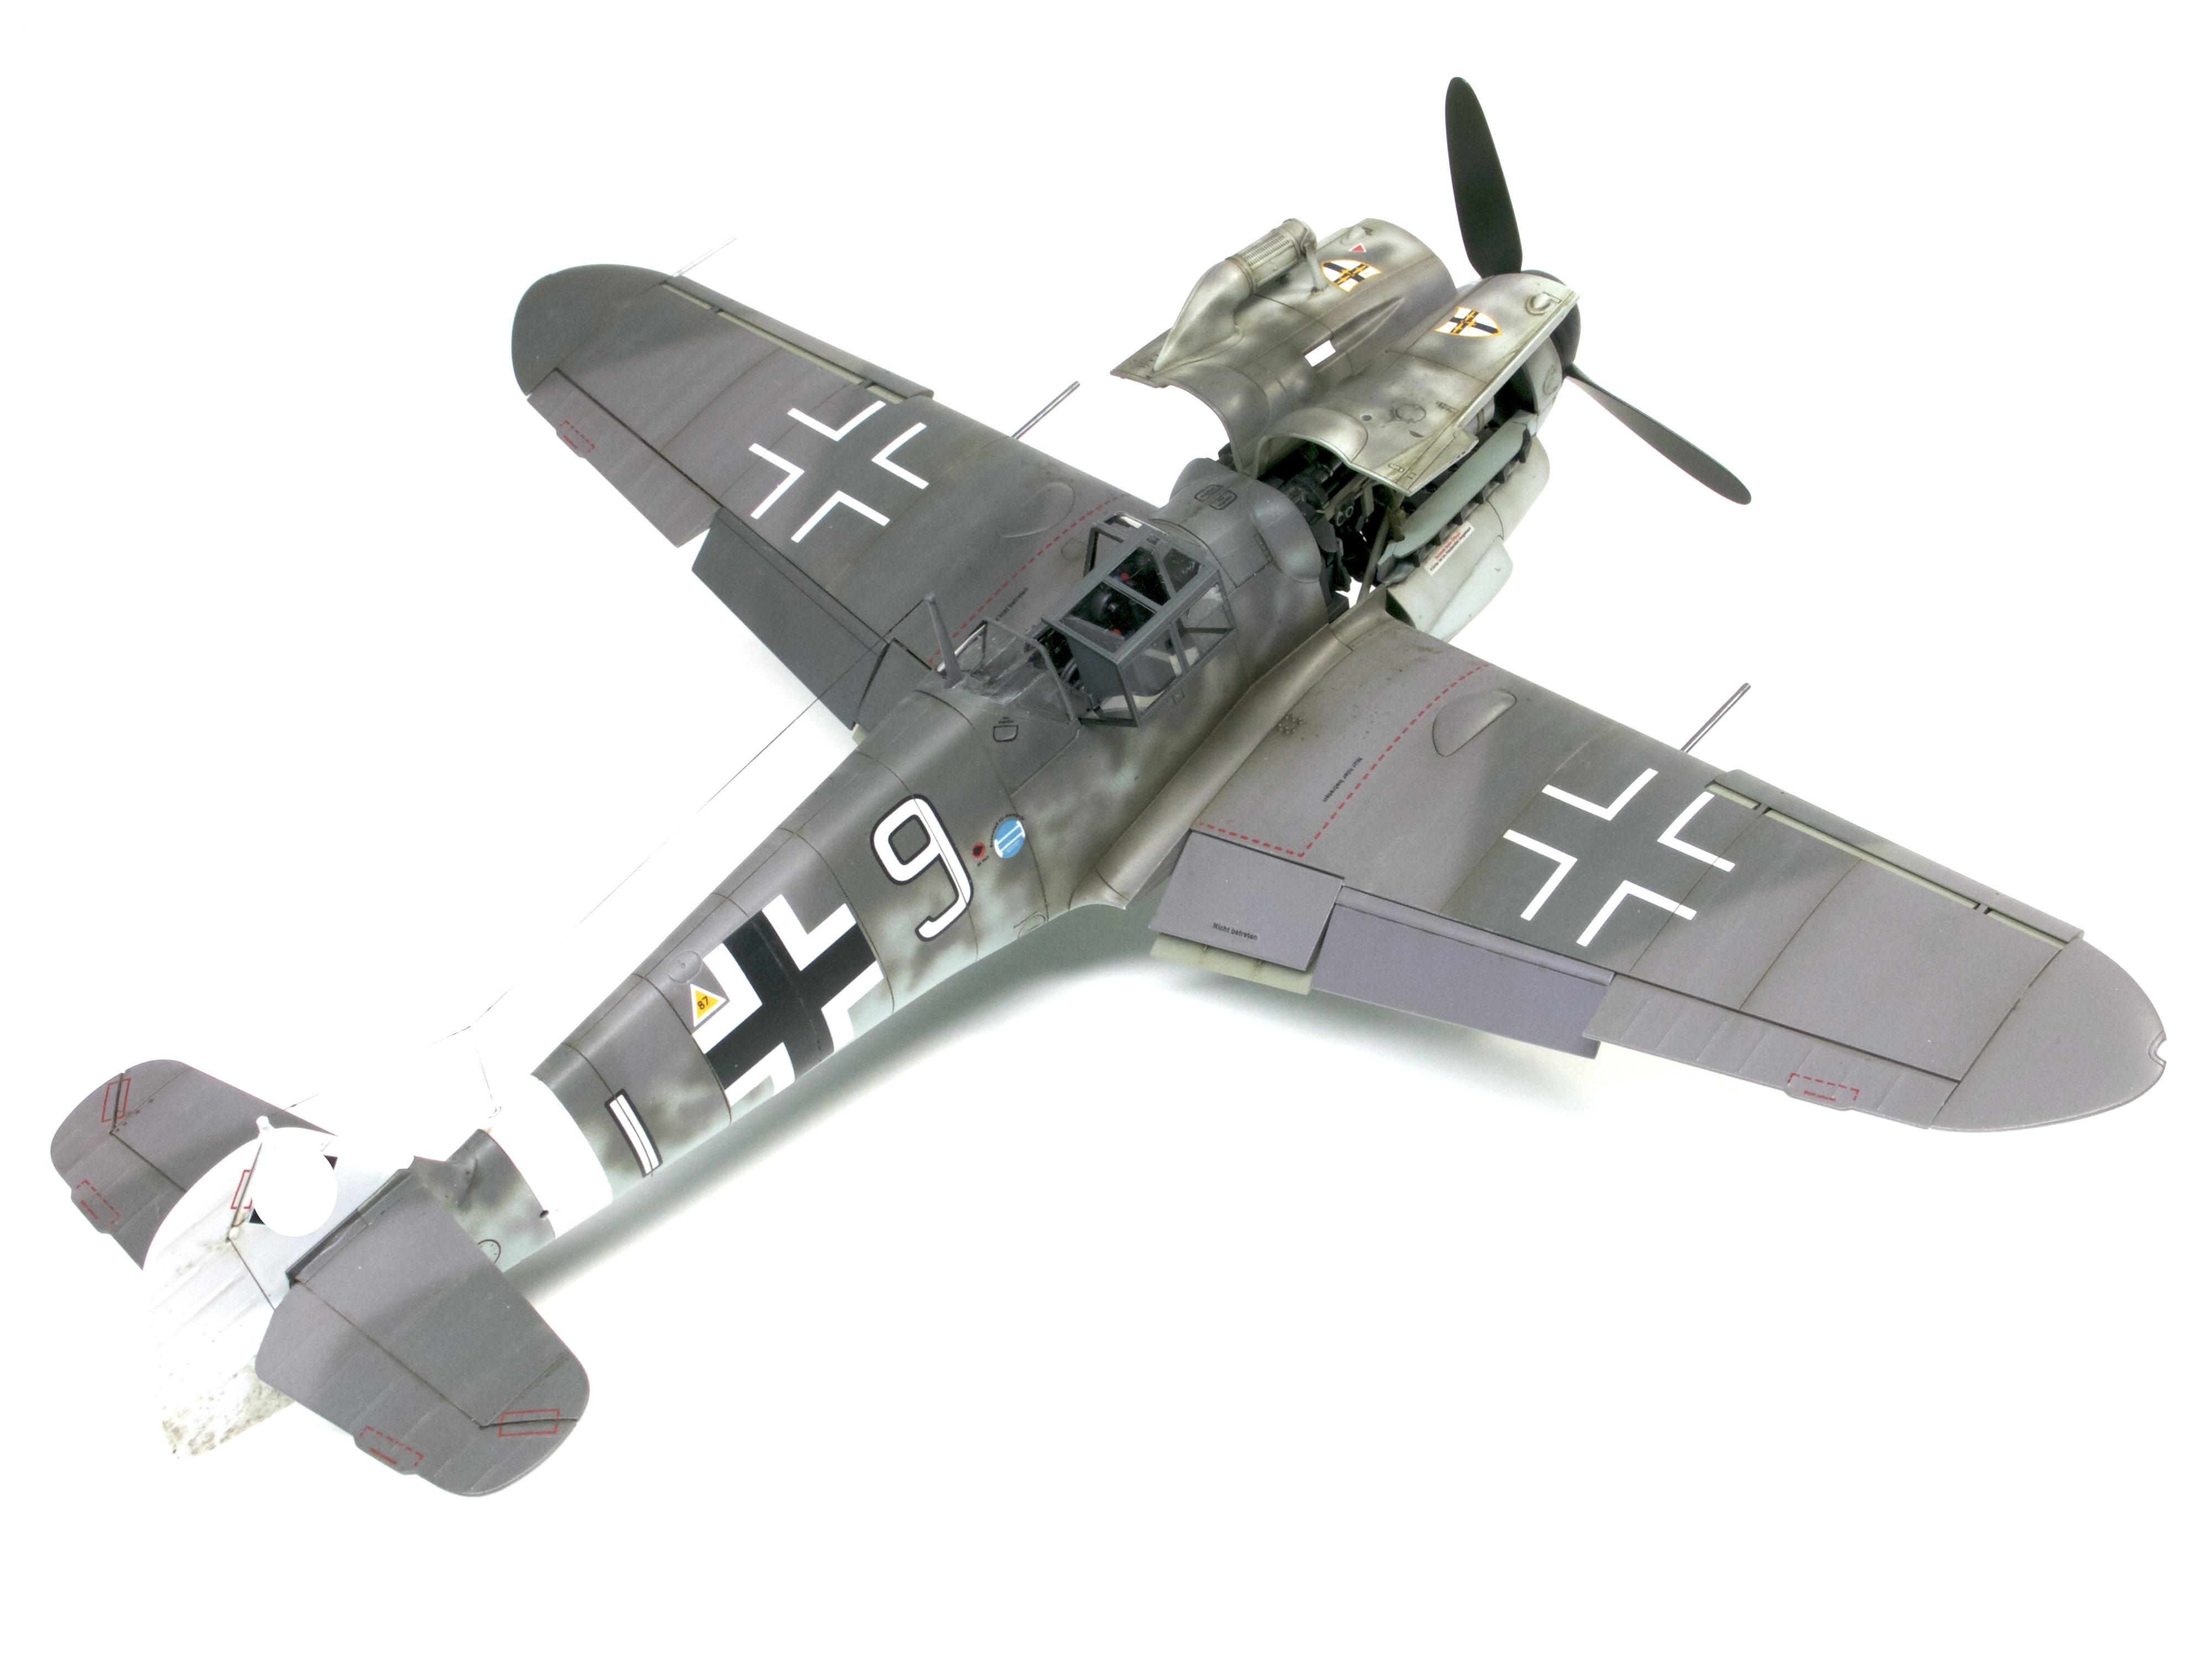
The first of the models was completed in 2017 when the G-6 was first released. As part of my brief, it was completed as a step-by-step build with all of the finishing whistles and bells that you might expect from my hands. The model is of course fully weathered inside and out, the resulting paintwork being muted, worn and degraded as perhaps befits this type of machine. The newer build was built using an entirely different approach. All of the paintwork was completed using flat colours, with concentration being placed on creating a perfect, almost flawless finish, that lets the model’s shape detail colours and markings, shine. They are as you can see above, very different in look despite being from the exact same kit.
Having now completed the newer model, I’m rather in two minds as to which I prefer. Though the first build is more realistic, the second one with its brighter plumage looks more pleasing to my eye and if anything, fits in with my other models where colours and markings are of paramount importance. I still really like the first one, it just doesn’t look quite as attractive, if that makes sense.
Here’s the thing: weathering per se is not really of interest to me unless it fits in with my perception of how the real machine would have looked. My drive has always been the subject and then the colours and markings that it carries, not the wear and tear that often forms part of the picture. I know that many modellers see the extreme nature of weathering as the fun part of their projects and that’s absolutely fine. I often see it as an ugly addition to paintwork that I want to look attractive and eye catching. As for fun, well, that’s another discussion for another day…
Over the years this approach has certainly generated a fair number of negative comments. Most of these tend to be along the lines that my models are a little too ‘clean’ which often rankles somewhat, even if there may be more than a grain of truth in the accusation. I can’t help though feel that the comments often suggest that my models are not pleasing to their eyes, completely ignoring what might be pleasing to mine. It’s as if the only thing that matters is the weathering and to hell with the construction, painting and decalling that comes before it. But here’s the rub: those comments have often driven the way I build and paint my models. After all, being in the public eye, if my models aren’t pleasing to those seeing them what’s the point of completing each one? I’ve spent a long time building for others and not for myself.
The new build has certainly garnered much interest with many liking the results. Equally, modellers have seen the model as perhaps lacking in personality because the finish is so clean, a feeling that I have a degree of sympathy with. Though I really love the model and the way that I approached it, there is definitely something missing though I’m convinced that that is not necessarily ‘weathering’ as such.
Perhaps the solution would be to built and paint a model that was half-way between the two. A model that was flawlessly finished, but with just enough additional wear to reflect use and help to further define the details.
What I really like about it are the colours. On this build they are pure with none of the degradation that overpainting with washes and other surface effects can cause. Washes, by their very nature will mute finishes so that everything ends up looking tonally similar, details becoming less pronounced as a result – at least, that’s my impression on my models. The new ‘109 suffers from none of those things because the colours, RLM02, 74, 75 & 76 are all as they should be in tone and hue. To my eye, the model looks far more attractive as a result. I’ve replicated the aircraft’s paintwork, not its surroundings and their effect on its surfaces. And yet it still needs a little something extra…
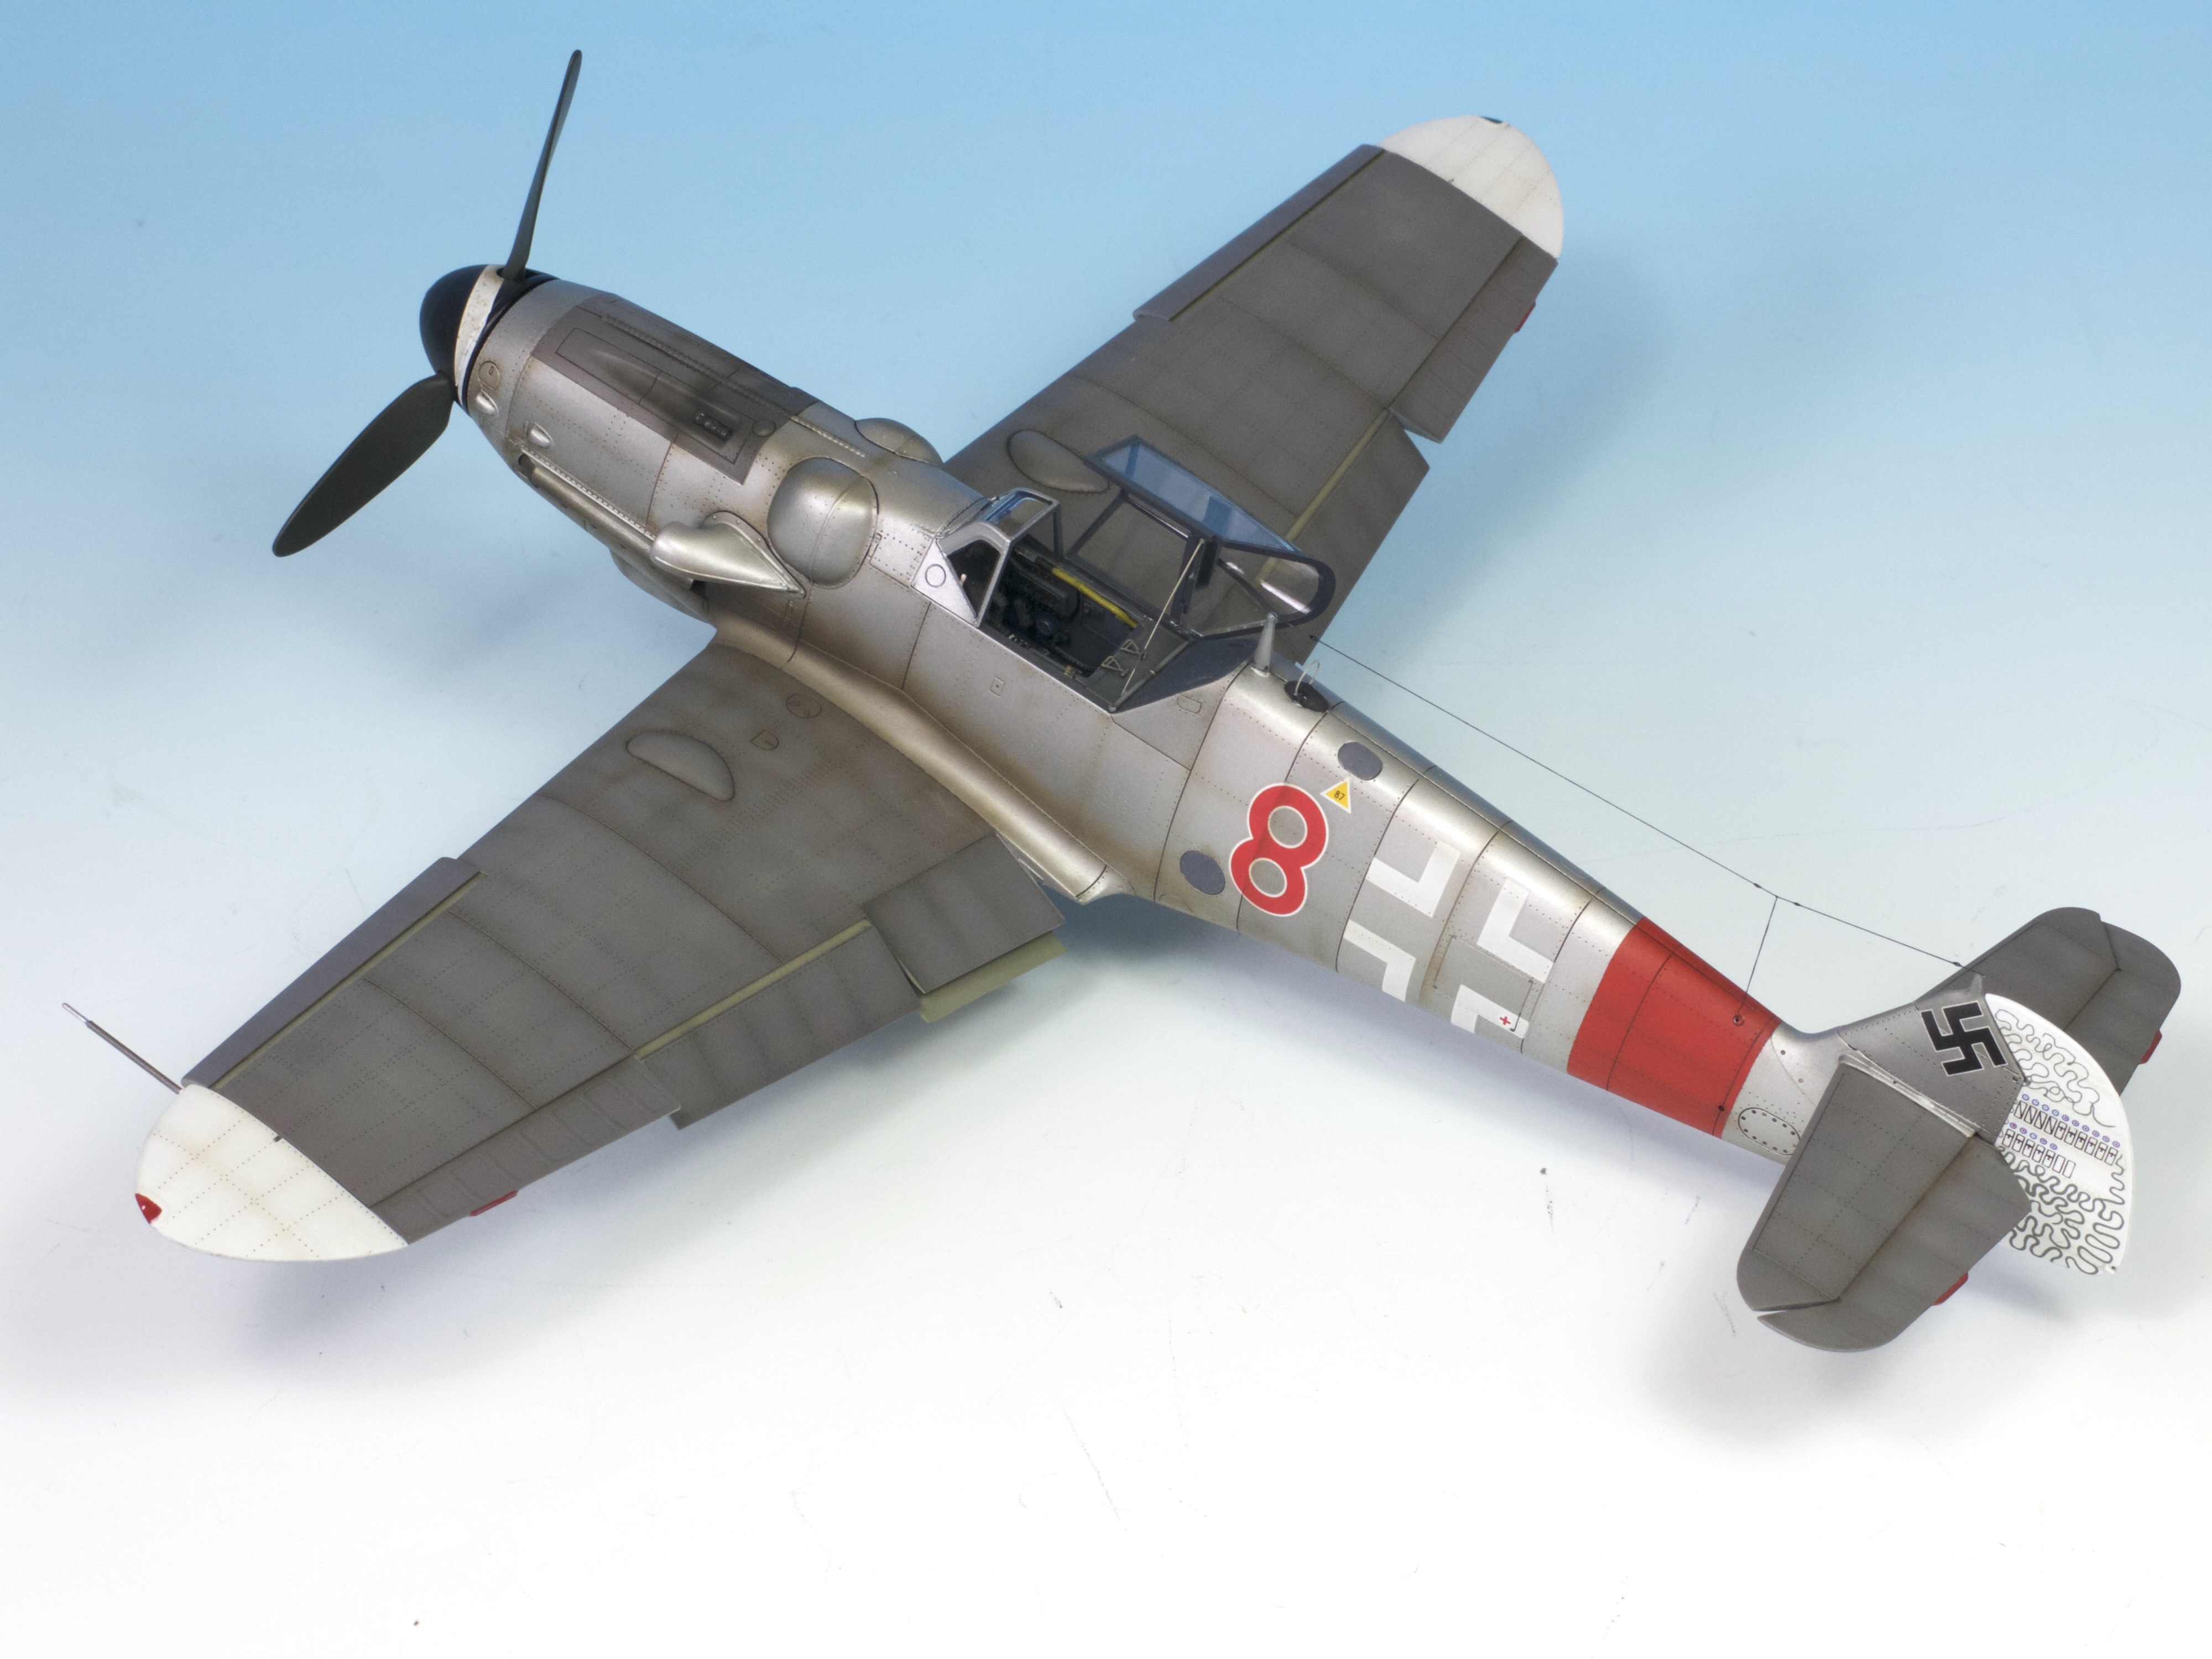
Perhaps the solution would be to build and paint a model that is half-way between the two. A model that was flawlessly finished, but with just enough additional wear to reflect use and help to further define the details. Washes around panel lines, a few chips here and there and some exhaust staining might just be enough to satisfy both my needs and those onlookers that are desirous of further investigation. The model would then be finished in a way that maintains the vibrancy of the base colours, but still has the accentuation needed to bring out detail without altering the tone and hue of those paints, more than I’m happy with (as seen over the surface of my Eduard Me109G-6 seen above).

This has been a very enjoyable and rewarding project that has given me much to ponder going forward. Not only has it sharpened up my painting, it allowed me the chance to road-test my new Gaahleri Mobius airbrush over an entire build, as well as using SMS paints for the majority of the camouflage. More than that though, I have a basis for further investigation of how to tread a line between miniatures that reflect the perfection that I so desire, and the degradation that is still a very important part of all of my projects day to day. How all of that pans out, only time will tell.

I really like your models, especially because you don’t over-weather them. It makes your meticulous work so much more apparent. However, the Bf-109 without any weathering reminds me a bit too much of the photos on the boxes of certain kits. The eduard model is indeed a nice solution. Best regards from Switzerland
LikeLike
You’re models look great! Build them the way you like but I understand the need to appeal to your readers. Most weathering is usually overdone and doesn’t look that realistic.
LikeLike
Hi
A new-to-service plane / model is always going to look quite ‘mint’ anyway, freshly delivered, minimum wear. So either goes. As long as the end result doesn’t look too ‘flat’ and boring!
LikeLike
A very interesting take on the art of modeling….. I am in the center, where you perhaps ended – aircraft weathered to a limited extent but cared for and not allowed to go to seed as some models seem to be. Many of us have seen photos of 109s on the eastern front (JG 54), even in the creative camouflage schemes, but showing reflections in the paint because those planes were wiped down and polished for more speed and better performance. Thus the finishing choices are legion….. Armor of course is entirely another ball game, where lack of weathering really does detract from the appearance of the finished product. I am appreciative of the great artistic effort and talent of those who creatively weather armor in the “Spanish style”, but as a practical matter, many of those models look like the Aberdeen Proving Ground collection after being outdoors in the weather for 40 years….. If you model derelict vehicles in Europe in the early 50s, waiting to be dragged off for scrap, OK, but for serviceable machines I prefer a more measured approach. That is what makes our hobby art, and there are many avenues one can take to the finish line…..
LikeLike
A worthy experiment, Mr Pollard. You have shown me that one should build for oneself, not the audience. Been trying to copy others’ styles too long, whereas I actually have my own thing that I’m happy with…
LikeLike