
Having not painted my model this way, I had no choice but to rework it to better represent the look of the real aircraft as seen here…
5th June 2025
Though it can be something of a double-edged sword, one of the great pleasures when it comes to building models is the discovery of new details that you might have assumed were correct, or that you’d simply missed first time around.

As you all know, I’m building an Op Granby Jaguar GR.1A from the Airfix kit, specifically, XZ118. Superficially, that’s a fairly straightforward task (if you remove the need to get the colours correct and the weathering spot on, you know, that sort of thing…) with most of what you need being offered in the kit. From the off I figured that it would involve some simple construction and then an overall coat of desert sand. Bingo! Job done. But as the project has developed and my enthusiasm lifted with each passing day, that simple approach has taken some unexpected twists and turns…
This afternoon as I carried out a little more research into this jet using both my stash of books and the old Interwebz, I noticed a few details that were not apparent during my initial rounds of painting and subsequent weathering. If you follow the link below you will find an image of XZ118 which reveals some of those details and though this is a post-war image (the nose art has been removed) it’s fairly representative of the way the machine looked in the Gulf.
Though I don’t want to go into too much detail in this update (I’m saving that for my book, a post on which you will find here:
I was taken by the painting around the flaps and slats, the former revealing some original paintwork over half of their upper surfaces, no doubt the result of them being painted with the flaps, retracted. Checking my images revealed that this was not an uncommon occurrence. Indeed, my images showed that the slat’s also protected original paintwork in some cases so that was another area worthy of correction. Having not painted my model this way, I felt I had no choice but to rework it to better represent the look of the real aircraft as seen here, which made it both correct and in my opinion, a lot more interesting!
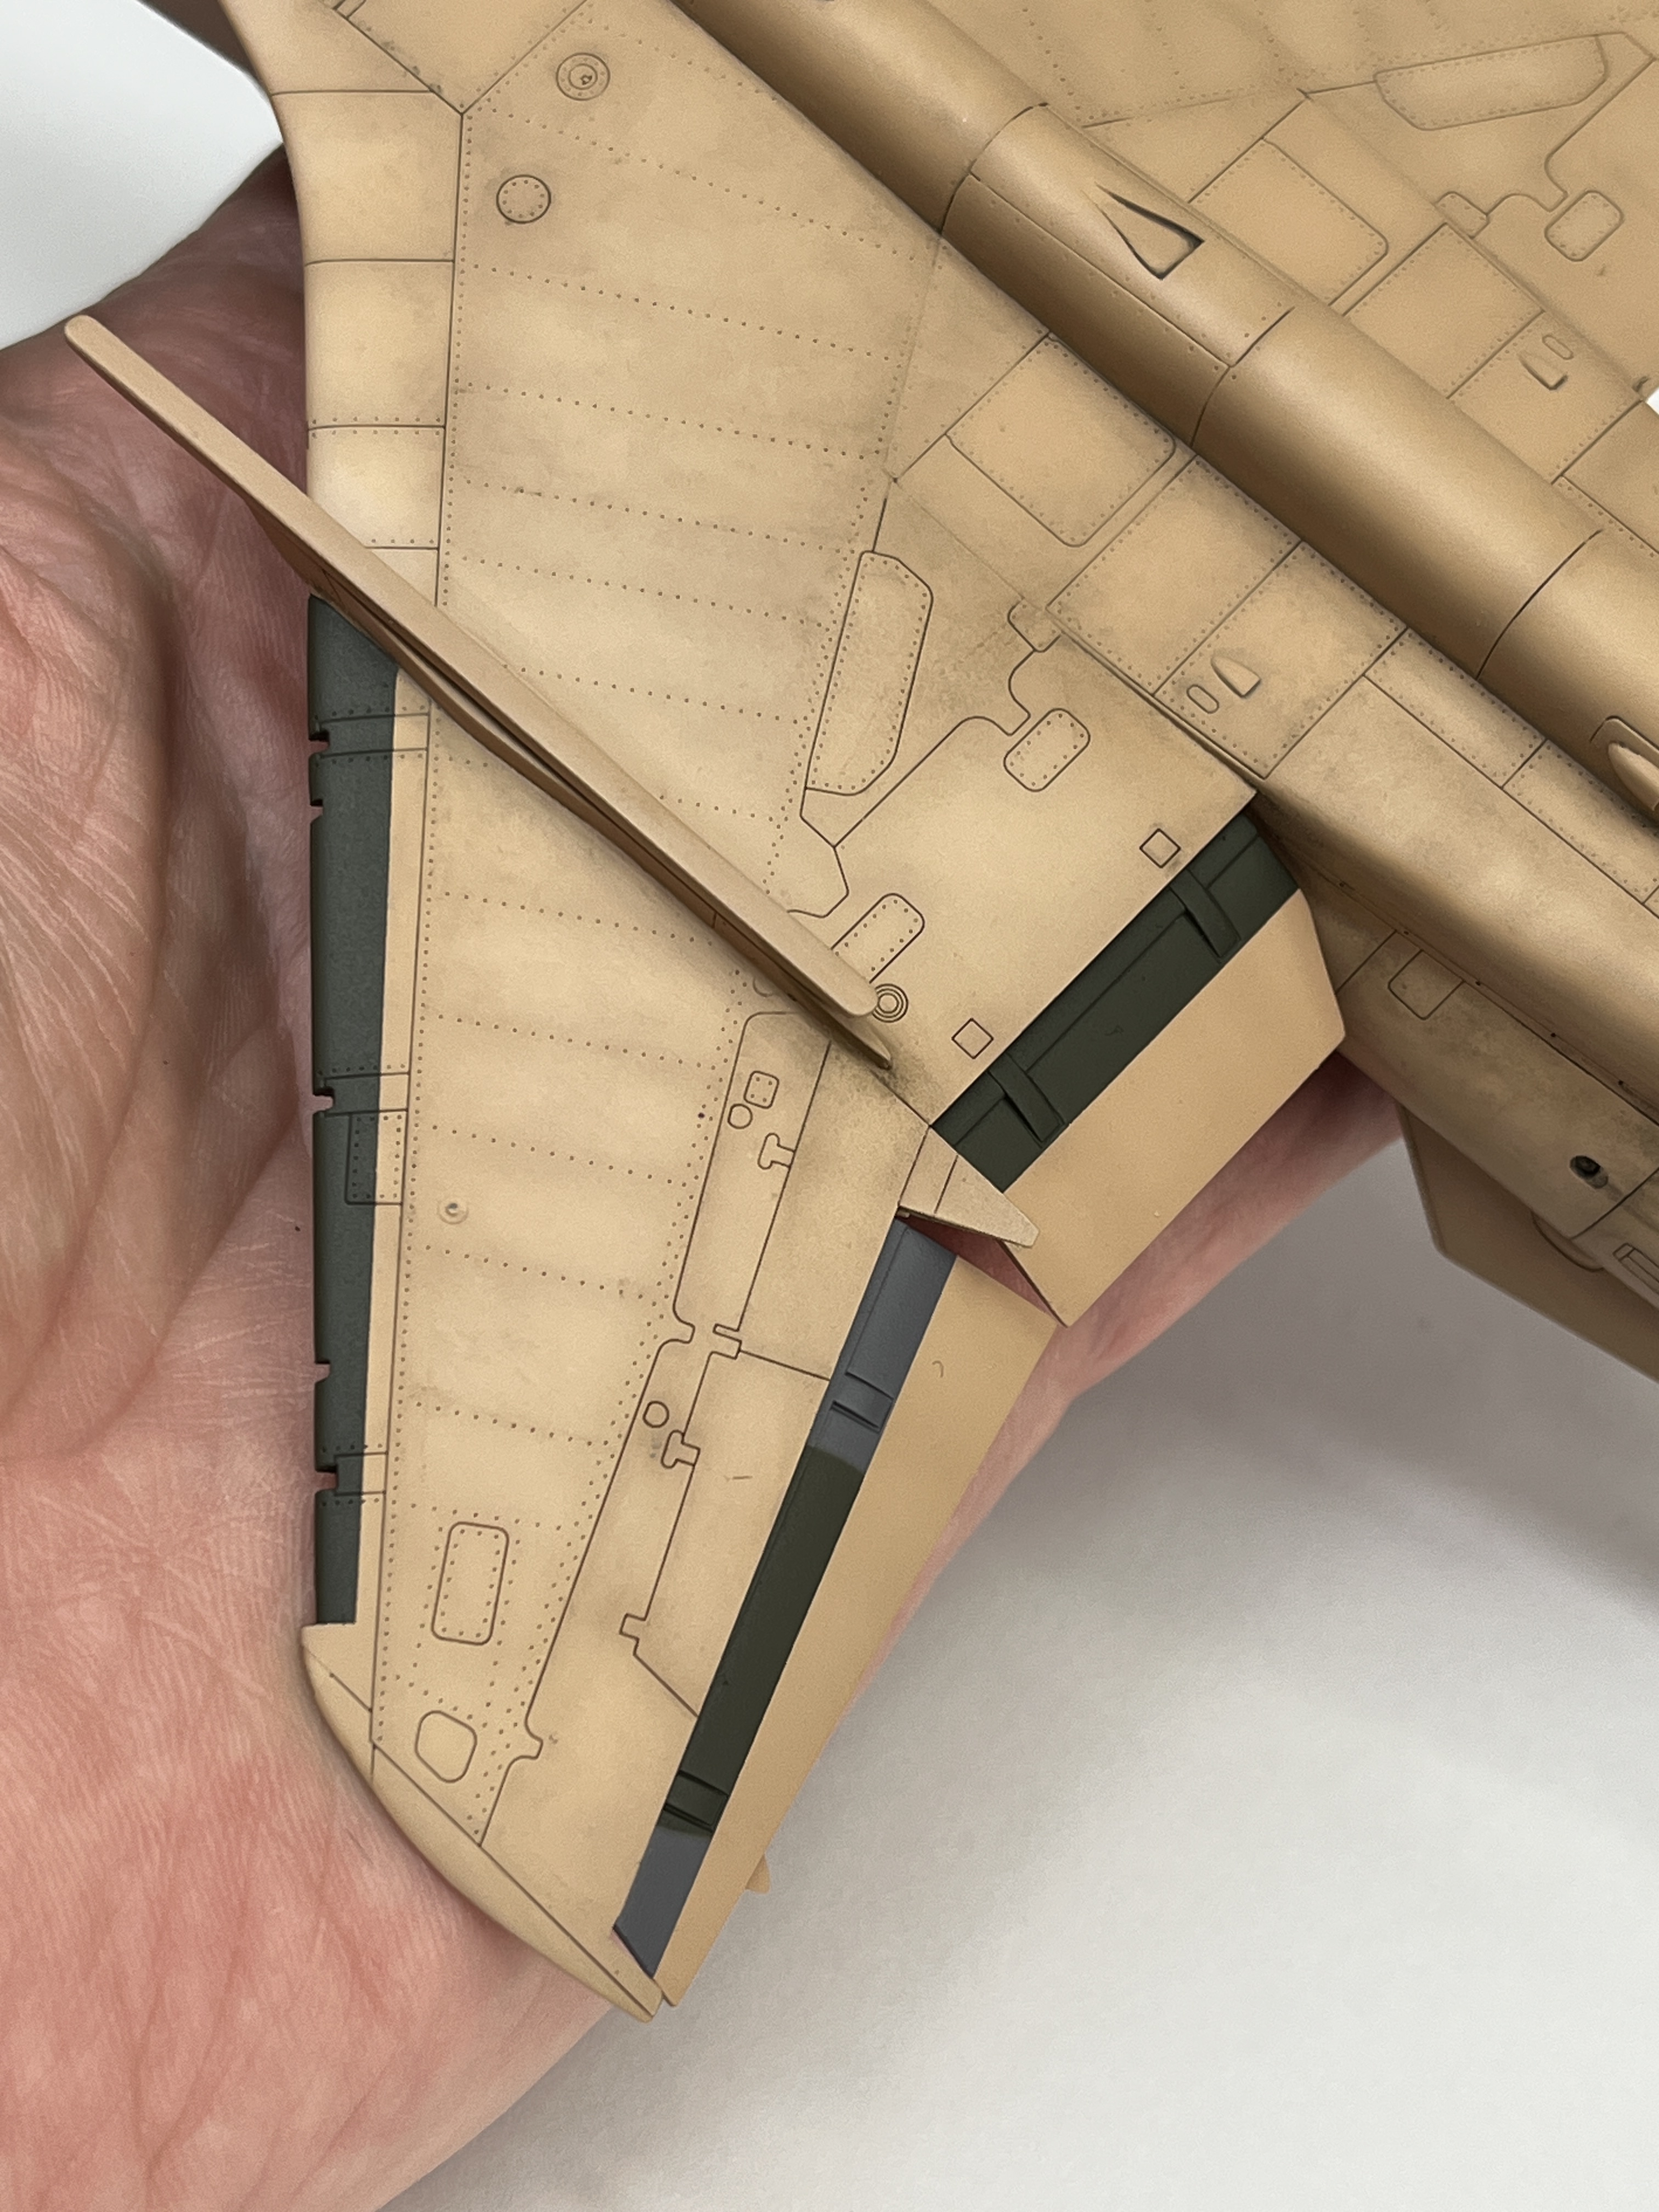
The second detail that I was suddenly aware of was what appeared to be a later tail cone, more associated with the GR.3. The kit suggests using the rounded cone to complete the tail, so that’s what I did. Fortunately, the spare part is still on my desk, so tomorrow I will remove the offending part and replace it, again, correcting my model and making it a closer representation of reality.
This model has been an engaging project, these little discoveries making it perhaps more so. I was initially taken by the story of these jets and their pilots in combat, so trying to get things as correct as possible is part of the journey. Hopefully, by the end of the process I will have a model that pays due deference to their service during that conflict and their wider part in the history of the Royal Air Force.
See you tomorrow.

Kudos for the attention to detail, as a fellow misser till after completion, you got lucky. I now get the kit, and do a deep dive before starting. Once at a competition it was pointed out to me I had break lines reversed because the photo in a reference book was reversed for printing. Needless to say I had two other refer that showed them correctly and I just didn’t check
LikeLike
Wow, I would have missed that!~W
LikeLike